How to trim the beginning and end of a Zoom cloud recording
How to locate Zoom Cloud recordings?
Zoom cloud recordings that you initiate or schedule from your SCU Zoom account can be managed in the Zoom web portal.
To view and manage cloud recordings:
1. Visit Southern Cross University - Zoom portal - Recordings and sign in with your Southern Cross University account user name and password:
Link to getting started with Zoom
2. On the Zoom portal, click the Recordings on the left panel and from the resulting list, click on the Cloud Recordings section:
3. Select the appropriate meeting from the list and click on the meeting you wish to trim.

4. The page will change to show a thumbnail of the recording - click on the thumbnail
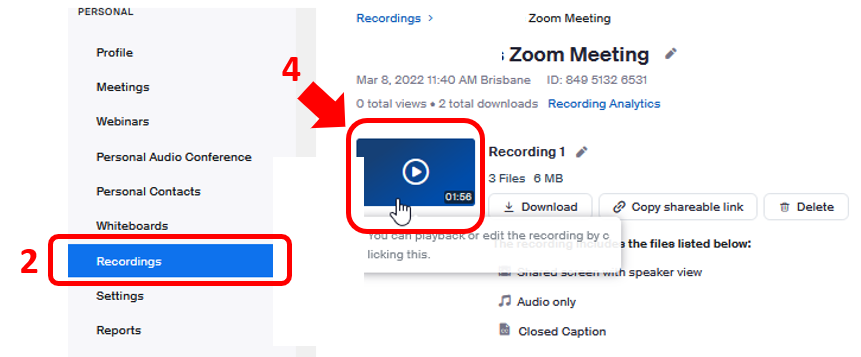
5. Click ![]() Trim.
Trim.

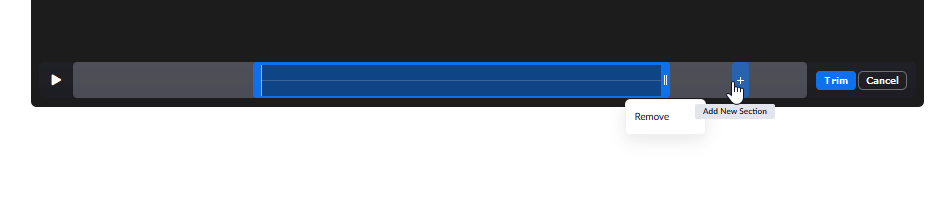
6. Use the blue sliders to specify the start time and the end time for the trimmed recording. This means that the blue highlighted area will be the trimmed recording.
- Note: To trim by the second, drag one of the sliders, then click the back arrow icon
 or forward arrow icon
  .
. - (Optional) Use these options to add or delete sections to the trimmed recording:
- To add more sections to the trim, hover over the playback bar, then click the plus icon
 . Use the blue sliders to specify the start time and the end time for the new section. Repeat this section as needed to add more sections.
 - To delete a section of the trim, hover over a trim (blue section of the recording playback bar), then click Remove.
- To add more sections to the trim, hover over the playback bar, then click the plus icon
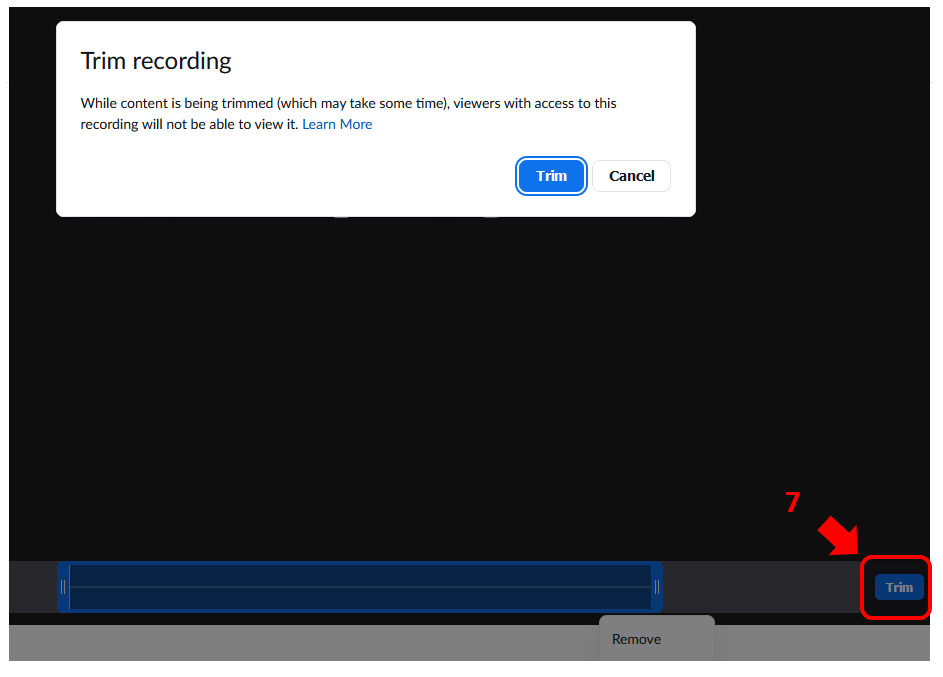
7. Click Trim, then click Trim to confirm.
You will see a notification below the video stating that your recording is currently being trimmed. All associated files (audio and transcripts) will be trimmed and the trimmed version will overwrite the original recording file. The original recording can be restored at any time after trimming.
Notes:
- While content is being trimmed, viewers with access to the recording will not be able to view it. Typically, it takes about 2 hours to trim a recording.
- When the recording is done trimming, you will receive an email notification if enabled. Also, you must reload the page to view the trimmed recording.
- In the Zoom web portal, where the individual recording is located, click
 Copy shareable link to share the trimmed recording with others.
Learn more about managing and sharing cloud recordings.
Notes:
If you trim a recording and provide the share link to others with the option to download. Viewers can view or download the trimmed version of the recording, not the full recording.
- You can only trim each recording 5 times every 12 hours.
How to restore a trimmed cloud recording
You can restore original recording can be restored at any time after trimming. This will permanently remove the trimmed version of the recording.
- Sign in to the Zoom web portal.
- In the navigation menu, click Recordings.
- Click the meeting topic for the trimmed cloud recording you want to restore, then click the thumbnail of the video.
- Below the video, click Restore, then click Restore to confirm.
The original recording will be restored and you'll be redirected to the original recording.