Zoom online class Preparation
The following article explains how to set up a Zoom for teaching purposes. Zoom is an online meeting tool used for class workshops and tutorials at Southern Cross University.
How to teach online?
For more information about teaching classes in an online environment please see the article on online teaching.
Preparing for a Zoom class
Before you start, ensure that you have Zoom software installed correctly on your computer.
Check your Zoom account
If you have used Zoom before at another institution, or have used a free Zoom account in the past - you will need to sign out and then sign in to Zoom using your Southern Cross University credentials.
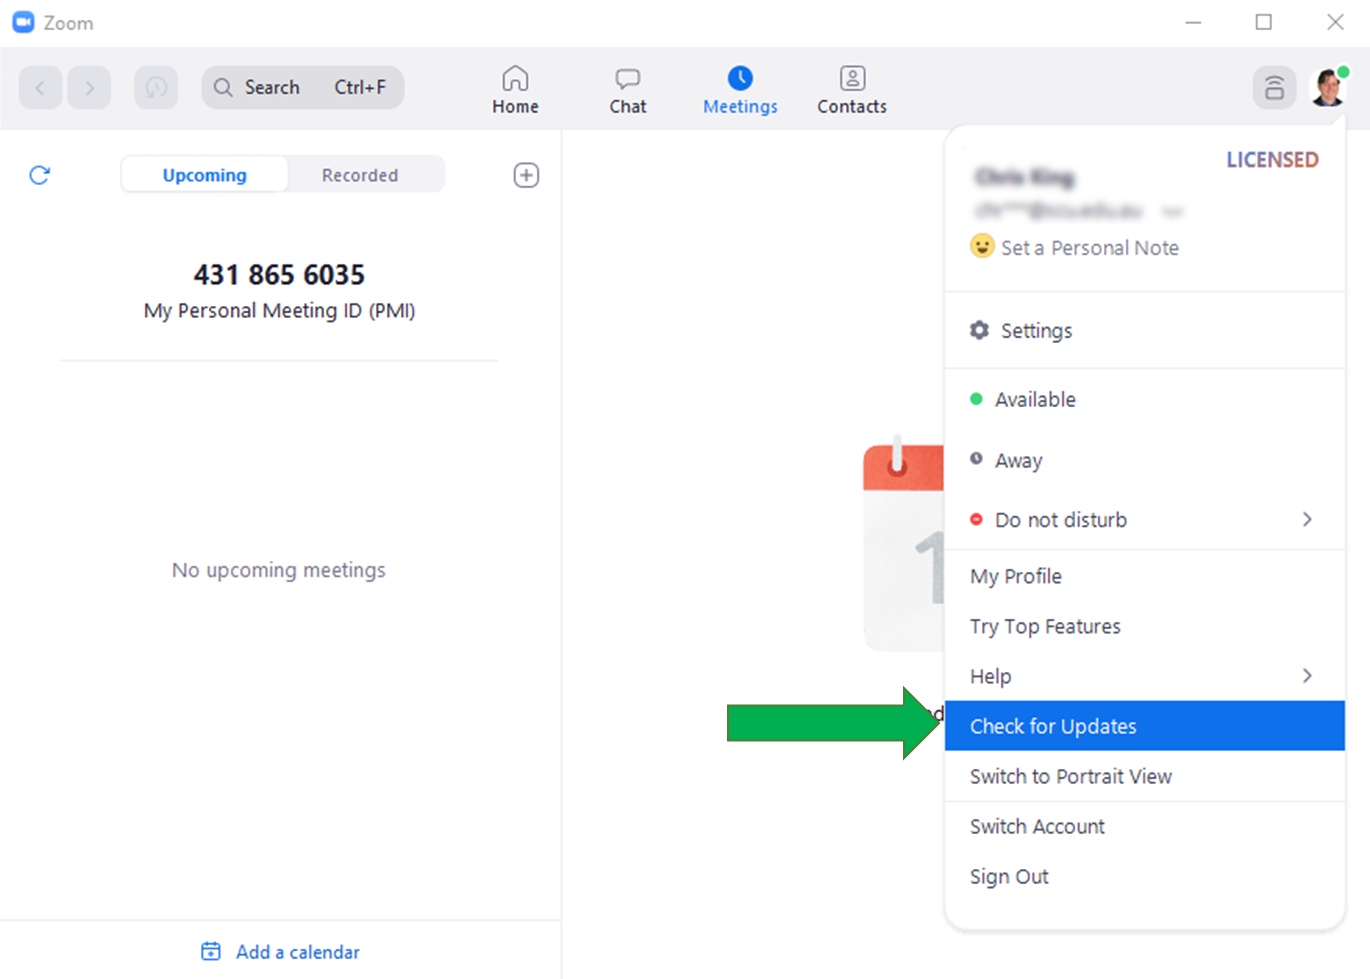
It is important to regularly check for updates to the software. To check for updates, open the Zoom App (type Zoom into the Windows search bar) and then click on the profile picture in the top right, and click on the Check for Updates option (see below).
Updating during meetings
You can even check for updates during a meeting, however, the update will only take place after you exit. Make sure you get into the habit of checking for Zoom updates to ensure you have access to all the latest features and security integrations for the software.
Setup your Zoom Profile
The Zoom profile settings control your personal identification information, language and timezone.
- You can adjust your Zoom Profile settings at: https://scuonline.zoom.us/profile. Use your Southern Cross University credentials to login.
- Click on the edit text to change the settings (circled below).

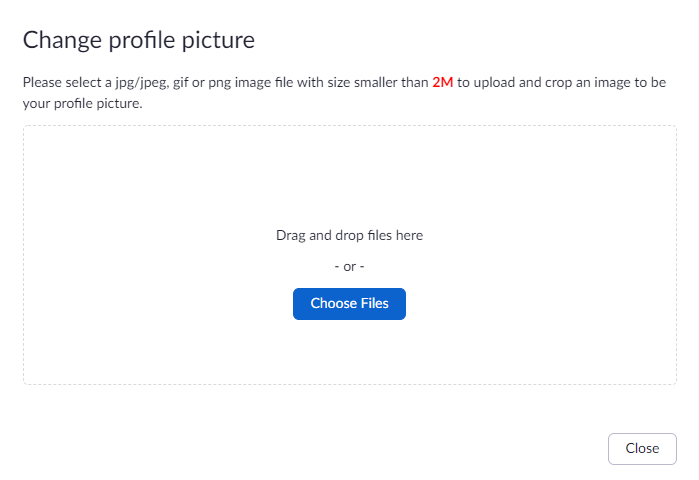
- To change your profile photo click on the thumbnail image and select a suitable photo to use. Click Save to apply the changes.
Adding Zoom Meeting Blackboard LTI integration
In a Blackboard unit learning site, you should ideally place links to Zoom Workshops or Tutorials under the CONNECTING menu of the standard template. You should hide the link to Collaborate Ultra as it is not recommended to use both platforms which can lead to student confusion. The following process outlines how to use the Zoom Blackboard LTI integration (Learning Tools Interoperability) which is the simplest method of creating Zoom classes.
Zoom Webinars
Zoom Webinars used for larger classes (500+), do not support the Blackboard LTI integration. You can either split the class into more than one meeting, or alternatively, create a Zoom webinar link and manually add each meeting link to Blackboard. Please see the Technology Services Knowledge Base - Zoom Webinars for more information.
Note on scheduling Zoom meetings
If you are already familiar with Zoom you may prefer to create and schedule Zoom links yourself using the Zoom Outlook calendar integration (or the Zoom app itself), rather than using the Zoom Blackboard LTI integration. If you decide to create your own Zoom meeting links you can manually add these to Blackboard using Build Content > Weblink to create links in the Zoom Class content area.
- In the top left corner of your Blackboard site menu, hover over the plus
 button and select Content Area. Name this area Zoom Class and ensure you tick the option to make this Available to Users.
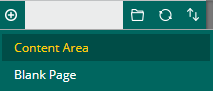
- This new content area appears as the last item in the left menu, just above Site Management. Click and drag to move the Zoom Class content area by hovering over the left of the text and dragging it up under the Connecting section.
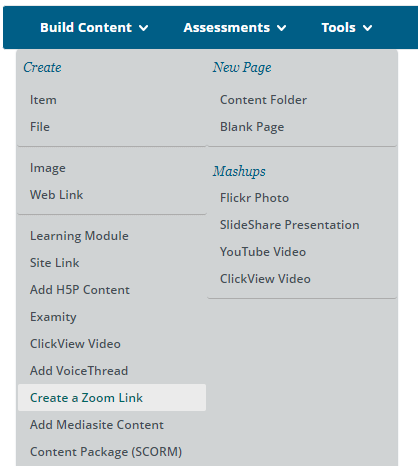
Open the Zoom Class content area you just created, and then click Build Content and choose Create a Zoom Link.
- Title the Zoom link and provide a description, for example, Tutorials and Workshops.
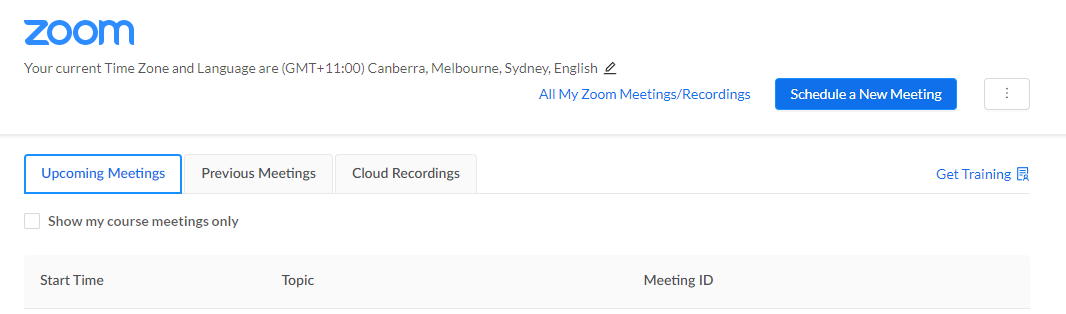
- Click submit to save the link, which will provide you with a Zoom icon and link to the LTI page. Click on this link to schedule and access Zoom meetings for your unit.

- Click on Schedule a New Meeting. You are encouraged to describe the Topic name using the unit code, the type of session (Workshop or Tutorial), the day of the week and the time of the session for disambiguation for students (e.g. EDUC5000 - Workshop - Monday - 3pm). Click on Save to create the meeting.
Once the class meetings have been set up, students can join the meetings directly through the Blackboard Zoom link, and Hosts can start these meetings from the same location. The video below explains the process of setting up the Zoom LTI in a Blackboard unit learning site from start to finish.
You can copy and paste the following text into the description box in Blackboard when setting up these links:
Title: Zoom Meeting Links for all Workshops & Tutorials
Description: To access a personalised view of your finalised timetables, go to: https://myschedule.scu.edu.au/
For more information regarding your timetables, go to https://www.scu.edu.au/current-students/enrolling/class-timetables/
Setting a virtual background
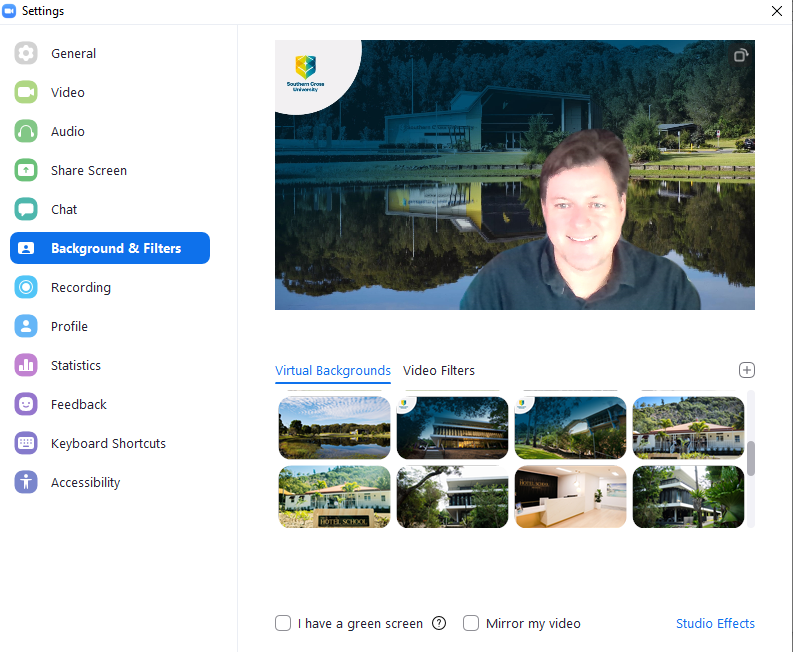
A Zoom virtual background allows you to swap the background behind your webcam video and replace this with an image of your choosing. Technology Services have added a suite of background images from Southern Cross University campuses that you can use, or choose your own appropriate image or video to use a background.
- Click the settings cog
 located on the main Zoom App screen.
 Select the Background & Filters menu, where you will be able to choose and preview different options. Click on the image you wish to use, or click on the plus button to add your own.
Dealing with Artifacting
You can use the I have a green screen option selected if you have a solid wall behind you, but this can introduce artifacts if the colour is not consistent enough. Where you are having issues with backgrounds elements randomly appearing you may wish to place a sheet behind you, or increase the lighting in the room.
The video below walks through the process of adding a virtual background in Zoom.
Sharing Pronouns
Knowing and using a person's correct pronouns fosters inclusion, makes people feel respected and valued, and affirms their gender identity.
Ultimately, you don't want to make incorrect or hurtful assumptions about someone's gender. Just because someone appears feminine or masculine doesn't mean they are a man or woman -- they could be agender, nonbinary, or uncomfortable identifying with "he" or "she".
Here is a list of gender-neutral pronouns:(Subject pronouns) He/She -- Zie, Sie, Ey, Ve, Tey, E
(Object pronouns) Him/Her -- Zim, Sie, Em, Ver, Ter, Em
Typically, you won't use one of these gender-neutral pronouns unless a colleague asks you to identify them as such.However, there are more traditional gender neutral pronouns you can introduce into your everyday conversation, regardless of the individual. These include "Them", "They", "Their", "Everyone", and "That Person". When in doubt, refer to someone by their name, rather than "him" or "her". (Forsey, 2018)
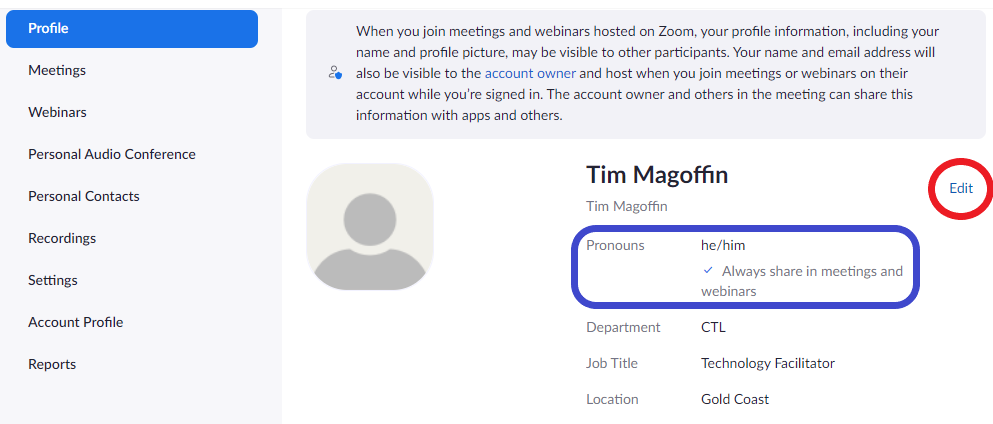
Zoom can assist you to normalise the practice of using pronouns by adding pronouns to your Zoom profile and video window. Encouraging students to do the same supports a more inclusive classroom environment. Generally, you should only share your subject and object pronouns separated by a forward slash "/". For example "he/him", "she/her", "they/them", "zie/zim", sie/sie", etc. You can change your pronouns by adjusting the settings at: https://scuonline.zoom.us/profile
The following video explains the process of adding pronouns to your Zoom profile and turning them on and off.
References
Forsey, C. (2018, September). Gender neutral pronouns: What they are & how to use them. Retrieved from Hubspot: https://blog.hubspot.com/marketing/gender-neutral-pronouns