Zoom Whiteboard
The Zoom Whiteboard
The Zoom platform includes a Whiteboard tool that was updated in 2022 with new collaboration features. Students can access a Whiteboard from a Zoom meeting (synchronously), or directly through a web browser outside of a scheduled Zoom meeting (asynchronously). Whiteboards provide an excellent means of gathering student feedback or supporting online group work.
Zoom Whiteboards can be created before class using the Zoom desktop client (during or outside Zoom meetings) or by accessing the Zoom web portal.
Watch the Zoom Whiteboard in action
The following video uses paper plane design as an example to illustrate how collaborative brainstorming can work on a Zoom Whiteboard.
Preparing a Zoom Whiteboard
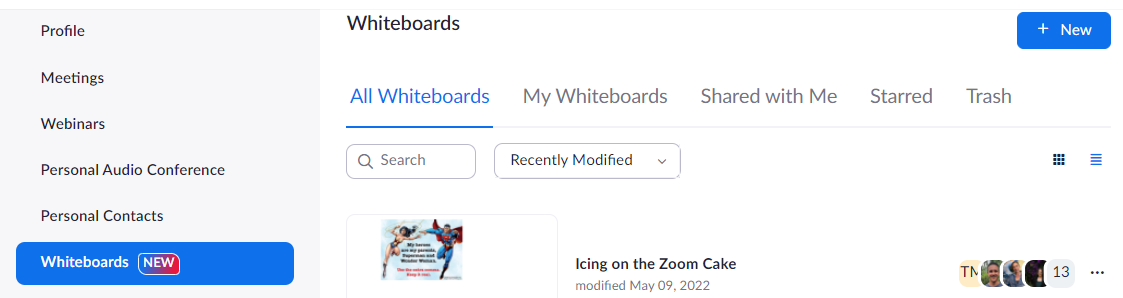
- Access Zoom Whiteboards from the online Zoom Web portal, or alternatively the Whiteboards button from the Zoom application.
- Click on All Whiteboards to view existing, or click +New whiteboard to create a Whiteboard.
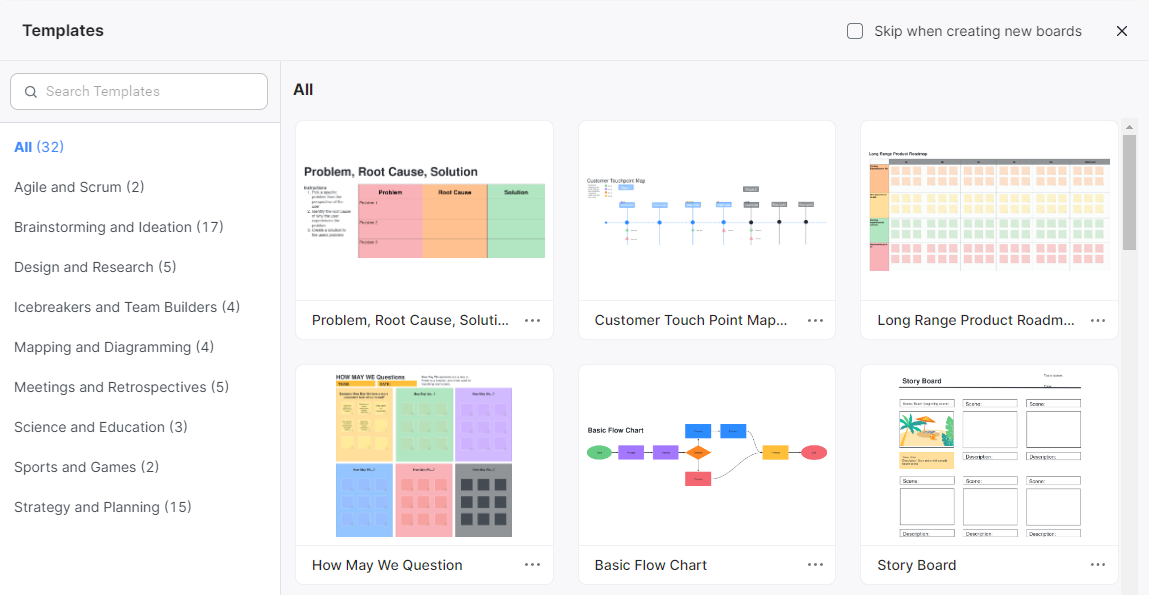
- Choose a template to start from and then click Use template, or alternatively close the template window with the X in the top right to start with a blank Whiteboard instead.
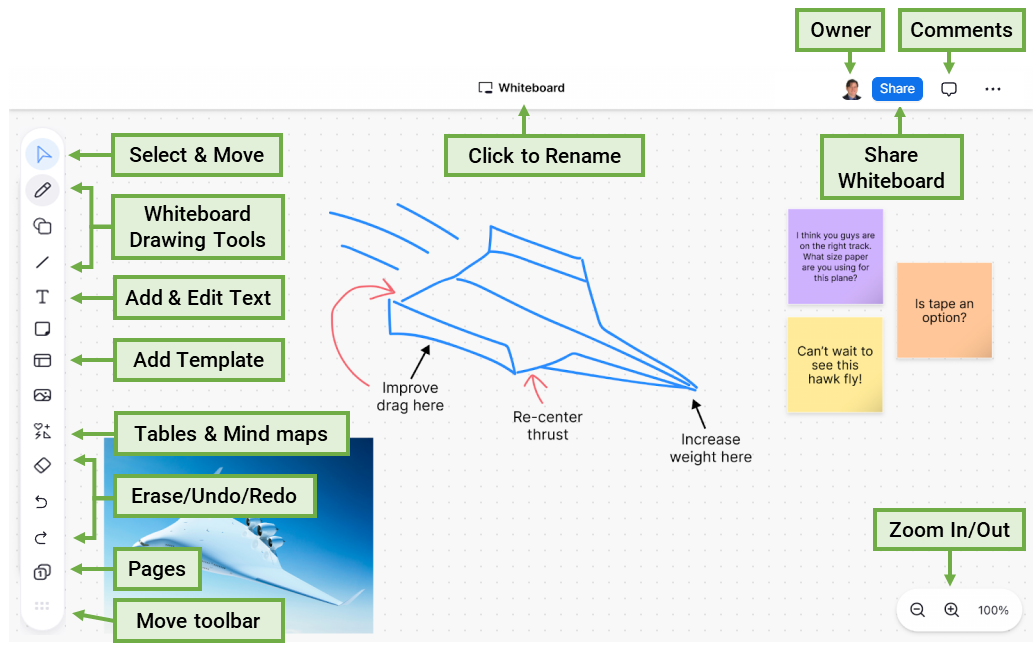
Use the Whiteboard Tools to prepare the Whiteboard. You can add more pages if required. Click on the Share button to email students or generate a web link.
Effective instructional design for whiteboards
- Don't assume that students will understand the Whiteboard activity; ensure that you provide adequate text instructions on the Whiteboard.
- Headings and large text draw attention, so use them wisely to grab students' attention.
- Students may need time to practise using the Whiteboard tools, so design an engaging, simple page to start with (e.g. the Two Truths and a Lie Zoom template is a fun ice-breaker activity).
- Include an example or prompt to get students started.
Zoom Whiteboards within a meeting
You can create a new Whiteboard or open an existing one within any Zoom meeting.
- Start the Zoom meeting.
- Click on the Whiteboard button
 located at the in-meeting controls (near the bottom of the Zoom screen).
 - Click New Whiteboard
 to create a new blank whiteboard. Alternatively, choose an existing Whiteboard to open.
Check the permissions and access settings and then click Open and Collaborate.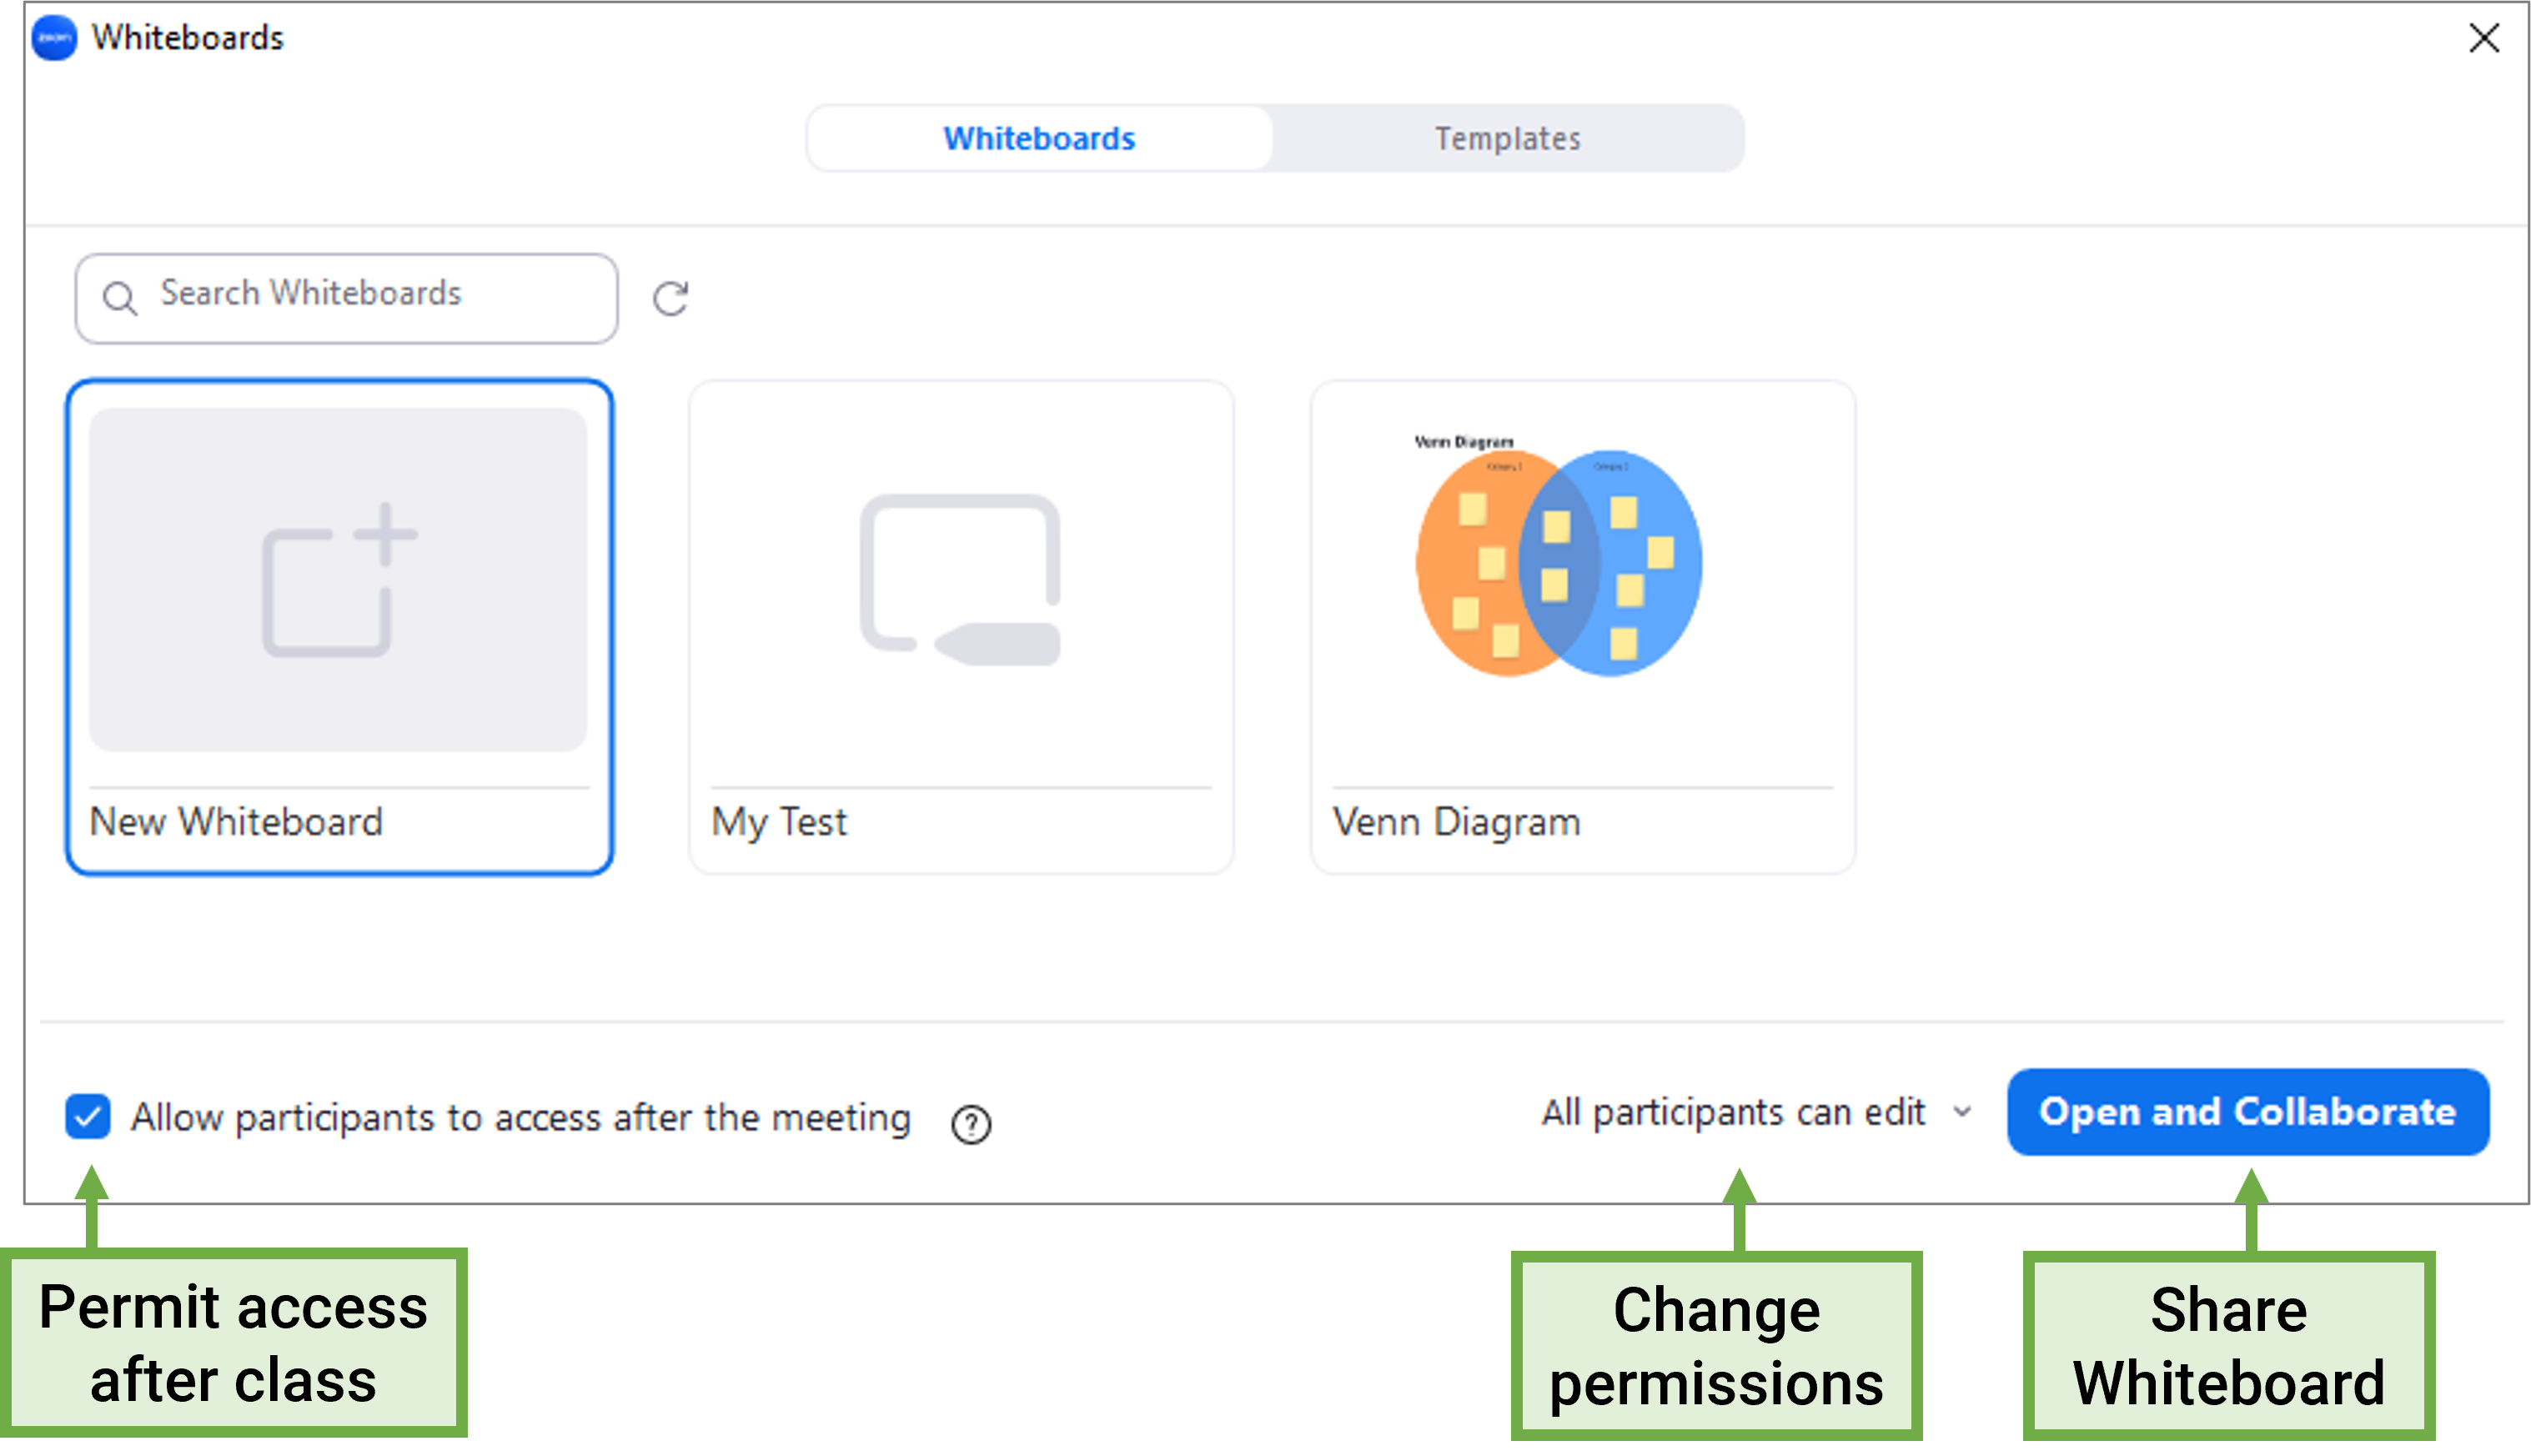
Allow participant access after the meeting
Allowing participants to access the Whiteboard after the meeting is essential when students will continue the activity outside class, or so that absent students can participate later. However, students who can edit a Whiteboard outside class time may also delete areas of the whiteboard when you may be unaware. It is a good idea to Export a Whiteboard to PDF at the end of the class, especially where archival is important.
Students are now ready to use the Whiteboard tools to interact and collaborate. If students are unable to access the tools, click the Whiteboard button and double-check that the All participants can edit option has been selected (you can use this to allow/disallow access on the fly).
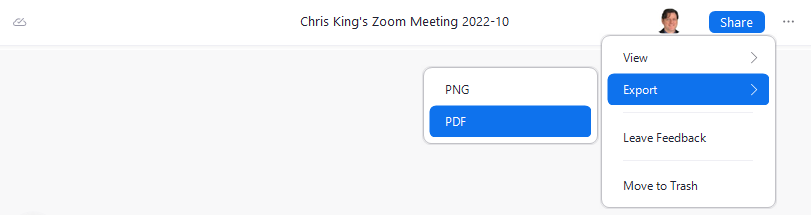
- You can export the Whiteboard at the end of the whiteboard activity by selecting Export > PDF from the top right dotted menu (next to Share).
To stop sharing the Whiteboard click on the Close Whiteboard button at the top of the Zoom Application window.

Saving Whiteboards
Because Zoom Whiteboards are cloud-based, every action is automatically saved, so there is no need to save manually.
Sharing a Zoom Whiteboard outside a meeting
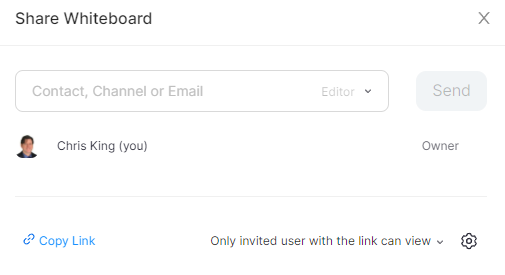
- Any opened Zoom Whiteboard can be shared with other collaborators using the Share Whiteboard button.

You can choose to Send an email or Copy Link to share a web link with students.
Zoom Chat Channels
If you are sharing many Whiteboards with students it may be worth setting up a Zoom Chat Channel which will allow you to send a Whiteboard to all students quickly.
Students open the link to view the Zoom Whiteboard and interact depending on the permissions set.
Watch learning with Zoom Whiteboards
Watch the following video as a guide to the new tool and for ideas on how you might use it to engage and facilitate active learning in your Zoom sessions.
Zoom Application Whiteboard updates
Note that the latest Zoom application updates now include the same Whiteboard features as the Zoom web portal. Please ignore the video comments below about the magnification and image tools not working in the Zoom Application as this is no longer correct.
Make sure to consider
- Where a Whiteboard activity draws upon a design process, model or theory, ensure this is adequately explained before students start the activity.
- Provide enough time for all students in the class to participate.
- Divide students into groups so that everyone has a role to play in the Whiteboard activity.
- Consider how students can use the comments tool (e.g. asking questions or identifying flaws).
- Wrap up the activity with a summary of what was developed, so that students understand the relevance of the whiteboard activity to the unit.
- Make the Whiteboard available to any students who could not attend the live class, preferably allowing them to participate when they are able to.
Locking Whiteboards
Lock the Whiteboard to remove all student access once an activity is complete (or at the end of term). From the Zoom Application or Zoom web Portal, open the Whiteboard, click on the dots at the top right and choose Lock Board.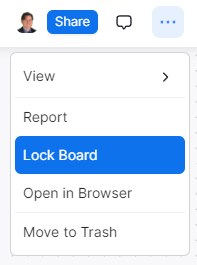
Further resources
Zoom has developed a comprehensive support guide: Getting started with Zoom Whiteboard.
Explore some great teaching ideas in the following Zoom article: Zoom Whiteboard Tips for Teaching and Collaborating in the Classroom.