Managing Turnitin QuickMarks
The following article dicusses the use of QuickMarks which are comments or suggestions for efficiently marking assessment using Turnitin Feedback Studio.
Why use QuickMarks?
Quickmarks provide targeted and individualised feedback to students about their progress towards learning outcomes, what they did well, and what can be improved upon. QuickMarks facilitate more efficient marking through the use of a Quickmark library, which markers can quickly adapt, edit and reuse previously created comments without having to write them from scratch. Sharing Quickmark sets developed for particular assessment types or assignments can also support moderation and standardisation of commenting and feedback across a marking team.
Make your own
Whenever you spend time writing a targeted comment to a student, make sure to save it as a QuickMark. You could develop a library that provides specific feedback about a particular unit or assessment item. The more QuickMarks you make, the more time you can save marking!
What is a Quickmark Set?
Quickmarks are organised into a library of QuickMarks Sets, and each set contains a list of Quickmarks that address a particular aspect of marking student work (e.g. academic integrity). The default Quickmark Sets will help you get started, but these can be hidden if they are irrelevant to your marking context. You can also develop your own Quickmark Set based on the comments you make, and these can be shared with others in a marking team.
Quickmark libraries are individual
It is important to understand that a Quickmark library is tied to your user account rather than a particular unit site or Turnitin assignment. This means that any edits you make to your Quickmark library will carry across to any sites you teach, and also that you will need to export a Quickmark set to be able to share it with a marking team.
CTL Quickmark set
The Center for Teaching and Learning has developed a Quickmarks set named Academic Writing Feedback (CTL) that can be accessed from the QuickMarks menu in Turnitin. While it's helpful to use generic Quickmark sets, the best feedback will be directly relevant to the unit learning outcomes so it is worth investing the time to create your own Quickmarks.
The remaining sections of this article will explain how Quickmarks can be accessed, created and shared.
Accessing the QuickMarks manager
- Open a Turnitin student assignment and access the Turnitin Feedback studio.
- Select the
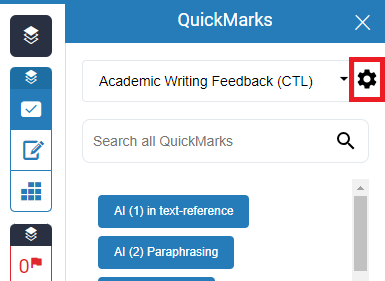
 QuickMarks tick icon located on the right-hand side of the screen.
 - The active QuickMarks set will be displayed at the top. Click the settings cog to open the Quickmarks library.
The Quickmarks library shows a lists of Quickmark sets on the left, the Quickmarks inside a selected set in the middle, and the currently selected Quickmark on the right.
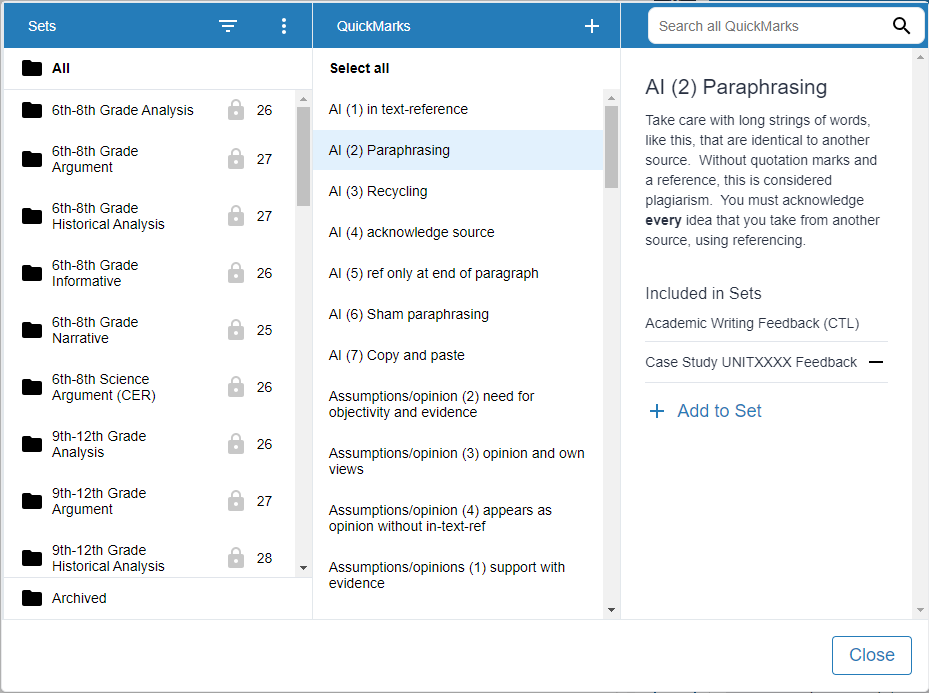
Note the default Quickmarks sets have a padlock beside them to indicate they can't be edited.
- To hide a Default Quickmarks Set select it, then click on the three vertical dots, and select Hide Set.
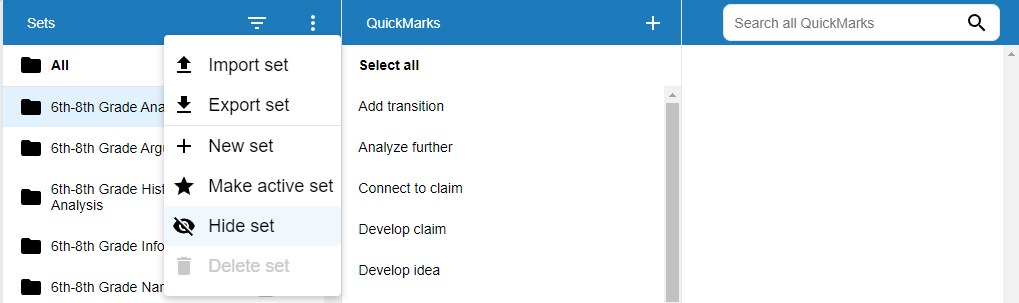
- You can use the same menu to create a New Set (e.g. Feedback for ASB1001).
- To change the set that Turnitin selects by default, select a set and then choose Make active set.
The video below covers the process of accessing and creating QuickMarks.
Importing and exporting QuickMarks
To share a QuickMarks library with graders, you will need to export the library, send it to your graders, and they will need to import it.
Faculty QuickMarks libraries
Talk with your faculty about the possibility of creating a common library that can be shared with other markers and colleagues to enhance, improve and standardise feedback to students. This will make everyone's life easier!
To export Quickmarks
- Open the Quickmarks library
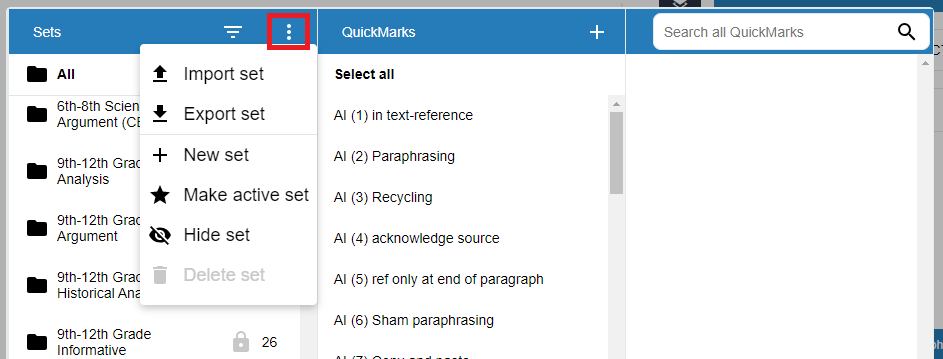
- Select the set you wish to export
- Click on the three vertical dots and choose Export set
- Save the QMS Quickmarks file. Share this file with your colleagues.
To import Quickmarks
- Open the Quickmarks library
- Select the three dots and choose import

- Locate the exported QMS file and select it
The video below illustrates the import/export process.
Further Resources
- Similarity reports and academic integrity
- Meaningful feedback using Feedback Studio
- Managing Turnitin QuickMarks
- Using Turnitin rubrics for grading