Produce a live event in Microsoft Teams
Step 1
Open your Microsoft Teams application
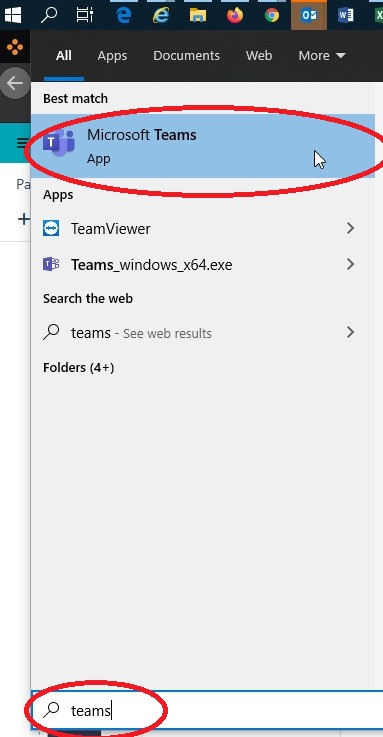
Search Teams
If you do not have the application in your task bar, simply search for it by:
Pressing the Windows Key and typing Teams in the search bar
Click on the resulting Microsoft Teams App
Step 2
Select Calendar from the left hand menu, then double-click on the event
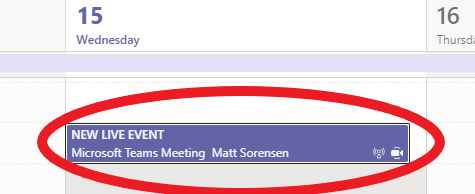
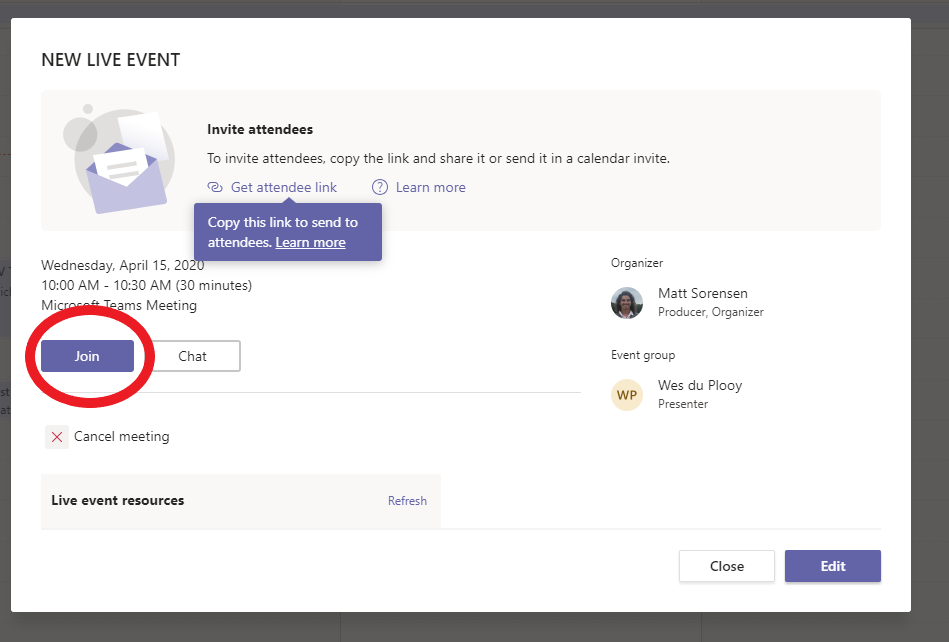
Step 3
A pop up window will appear, click on the Join button
Step 4
The Live event window will open - Ensure the camera and microphone are off unless you wish to present as well

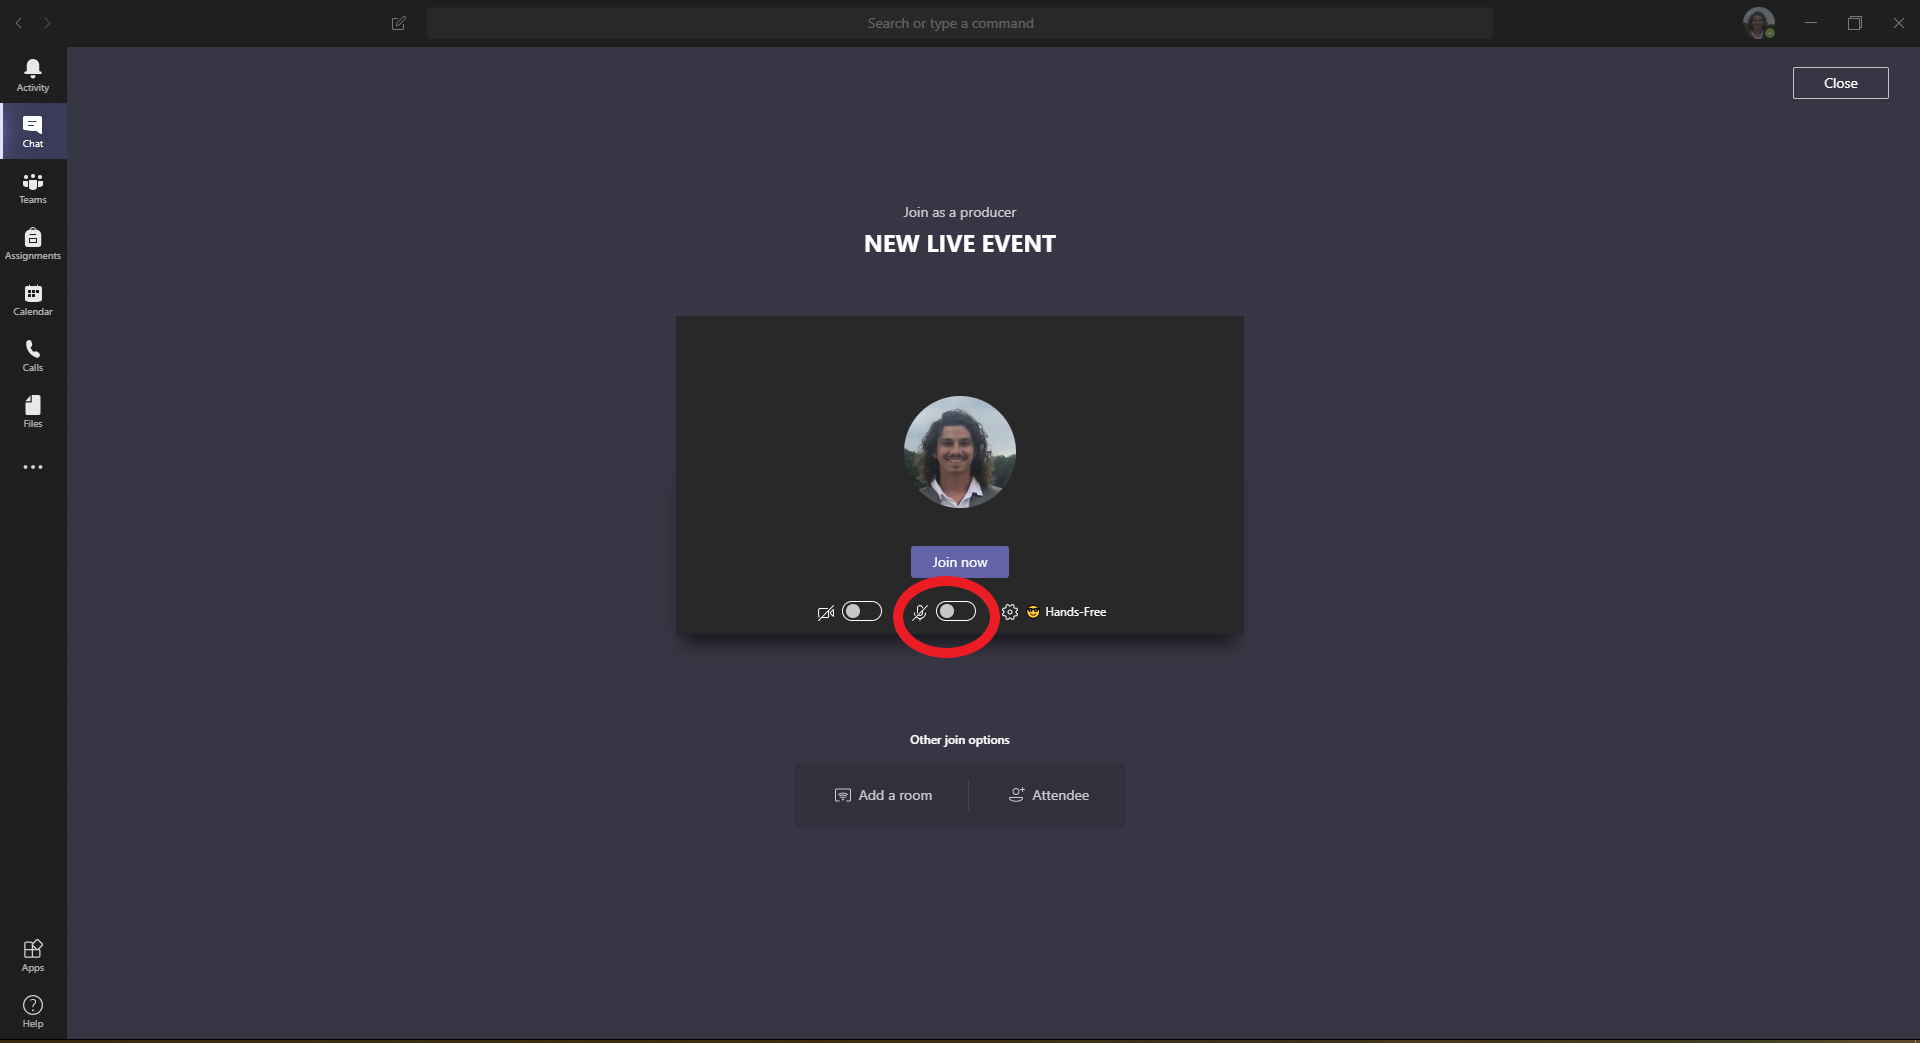
Step 5
Click on the Join now button

Step 6
The producer window will open
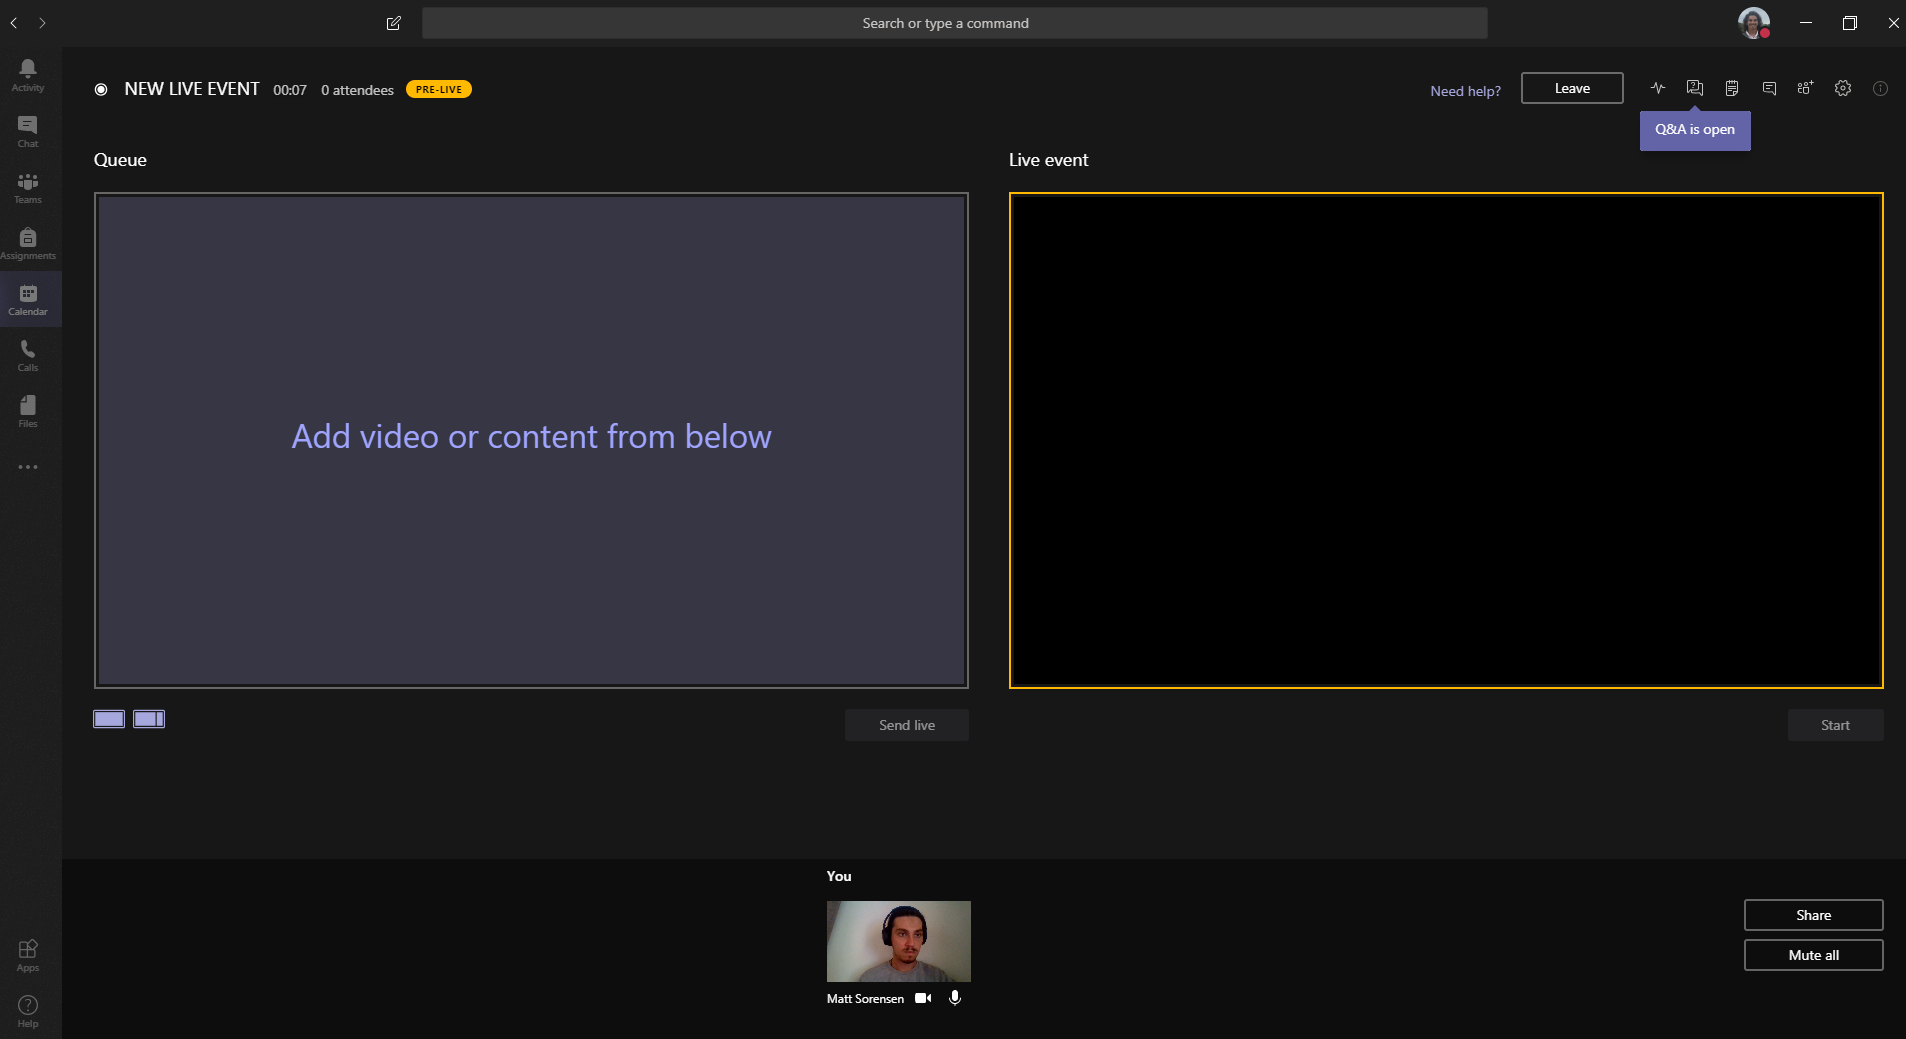
Step 7
The left window is the Queue window. This is where the the producer can set up the content they want to send to the Live event

There are two layouts to choose from:
Single source (Video or Content)
Content left (content on the left, small video window on the right)
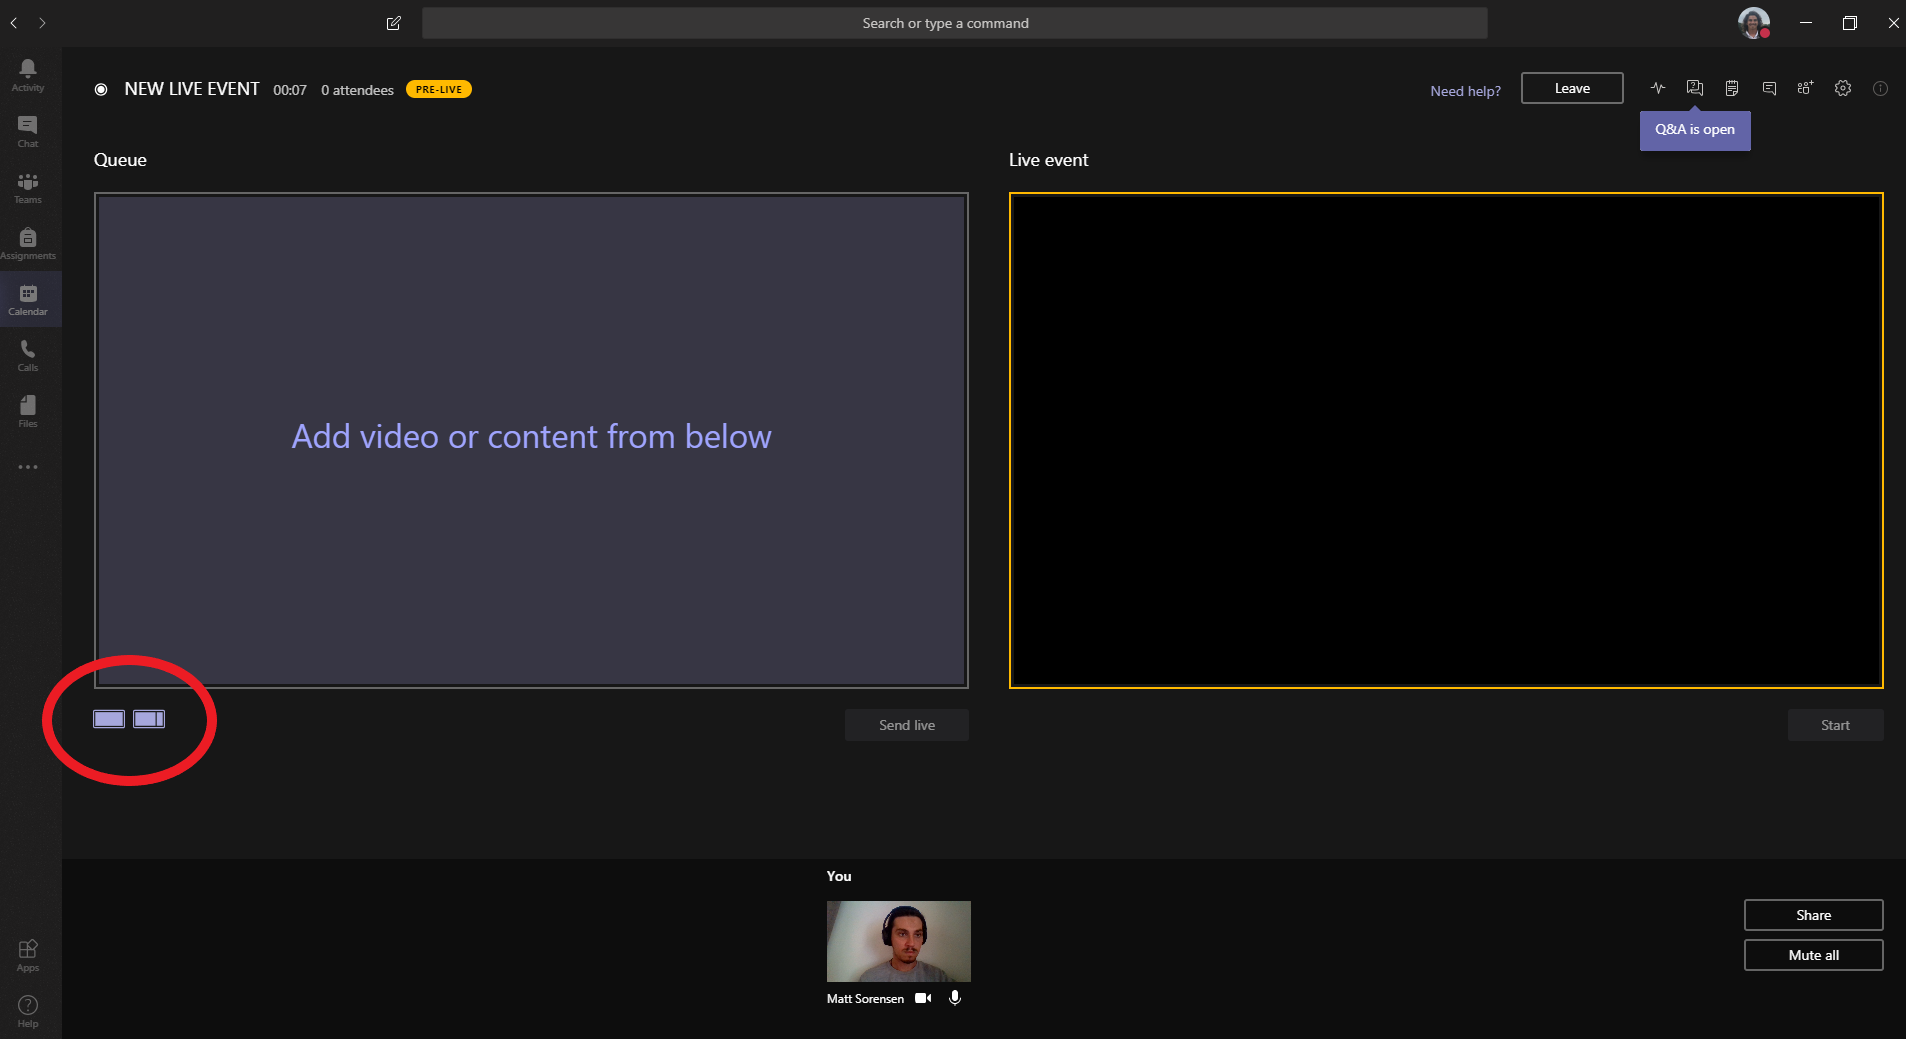
Simply click on the icon to change

Step 8
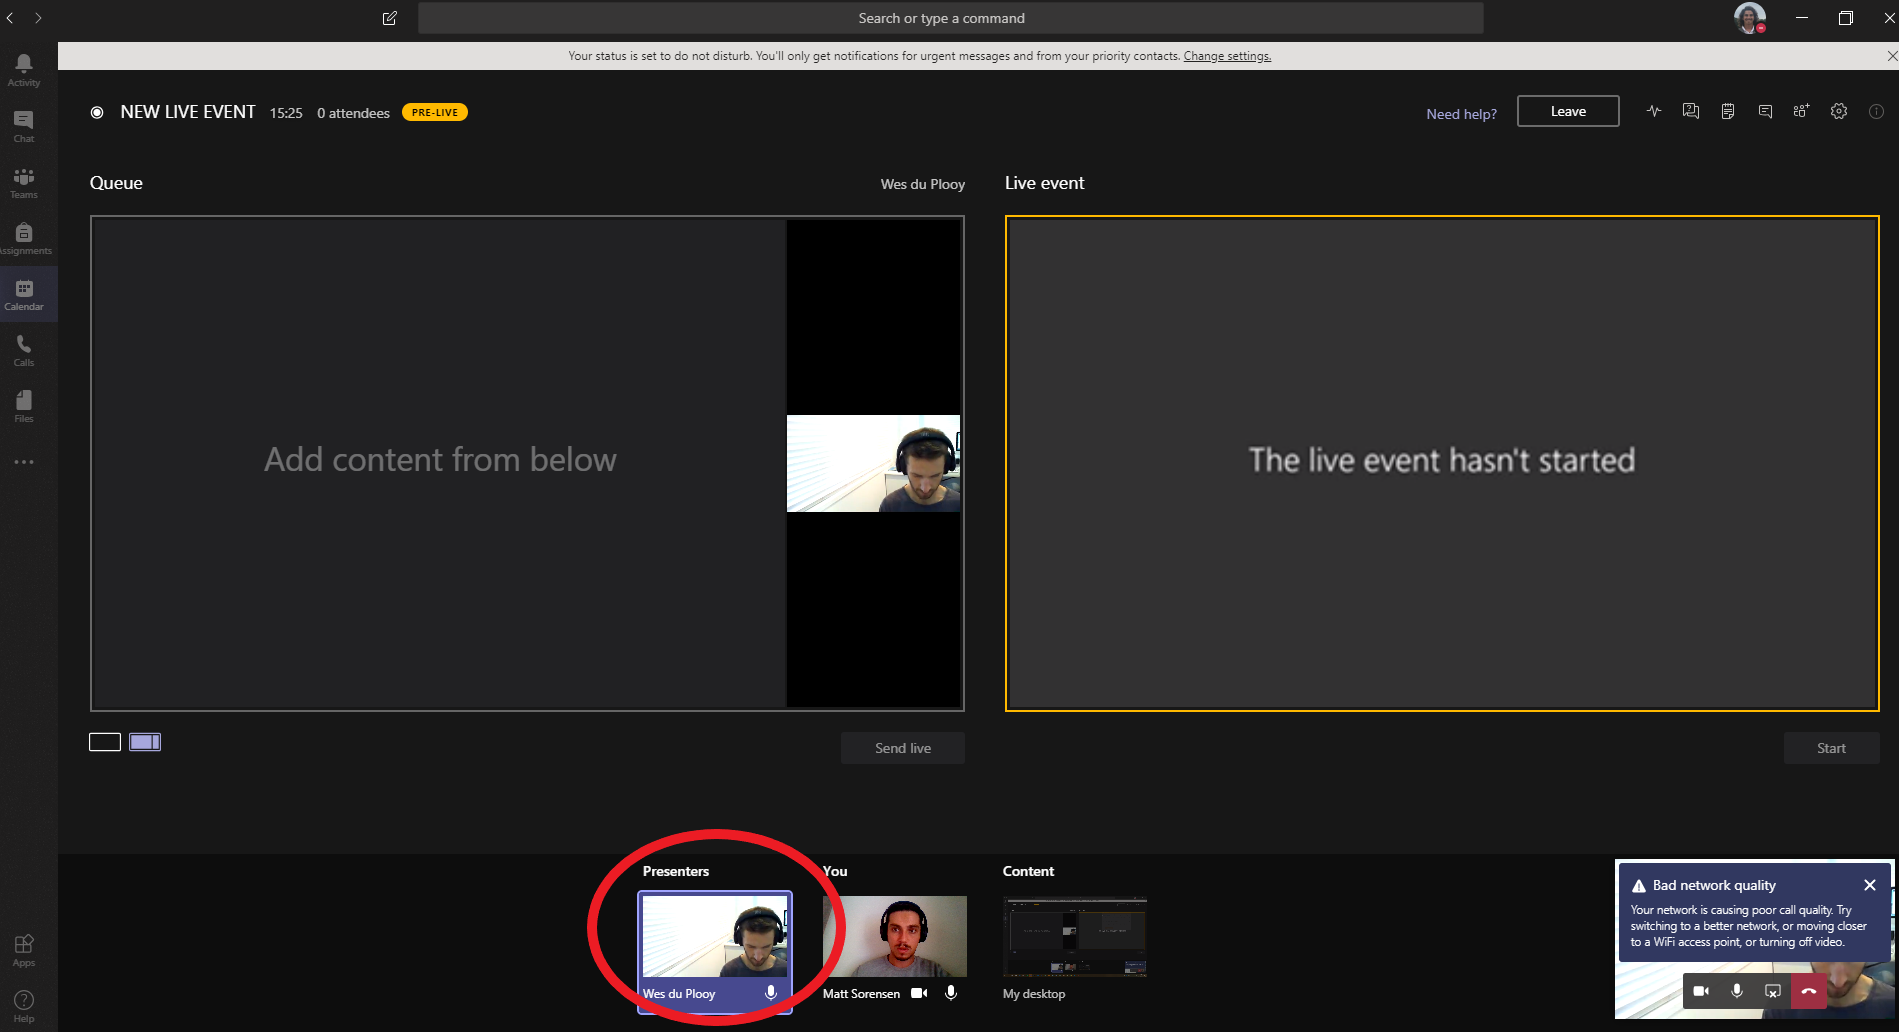
When your presenter joins they will appear along the bottom of the PRE-LIVE event window
Click on the Presenter whose video needs to be sent - highlighted in purple means it's the selected video
Step 9
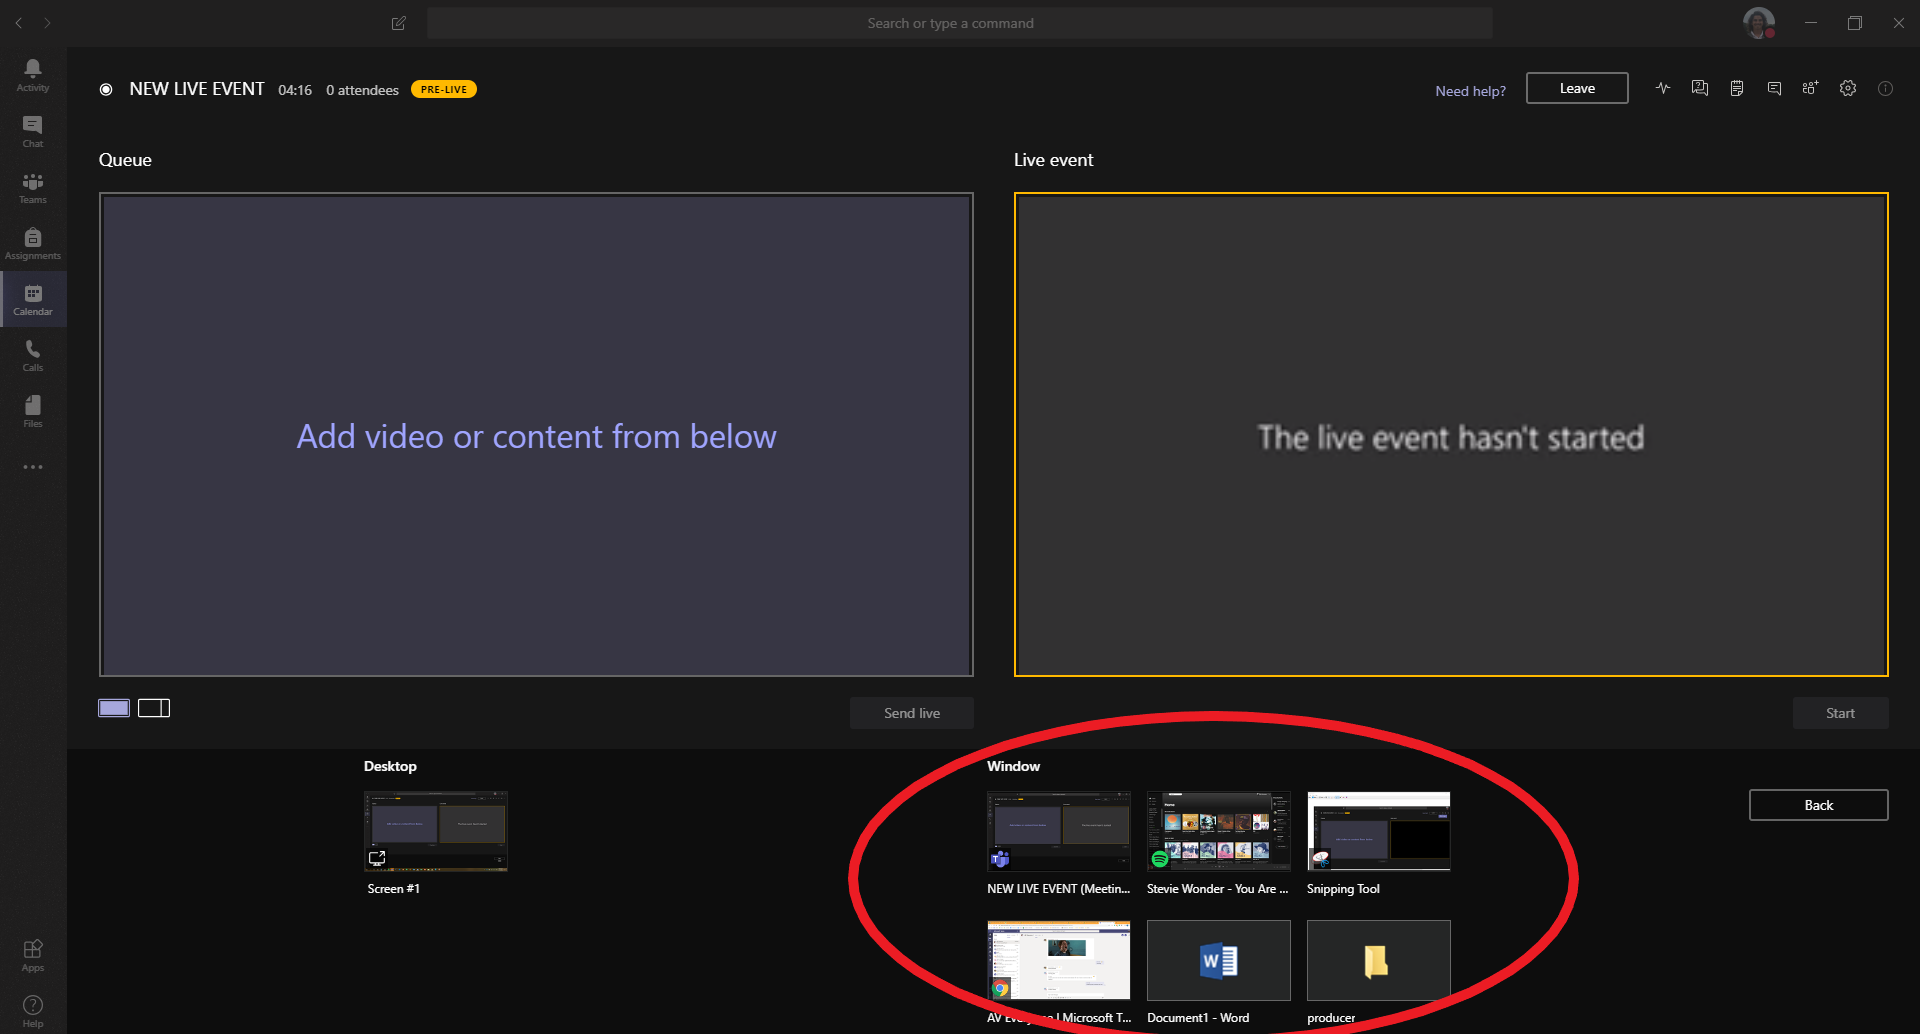
To be able to add and share content, you need to make the content available. Simply click on the Share content button located on top right of the event window
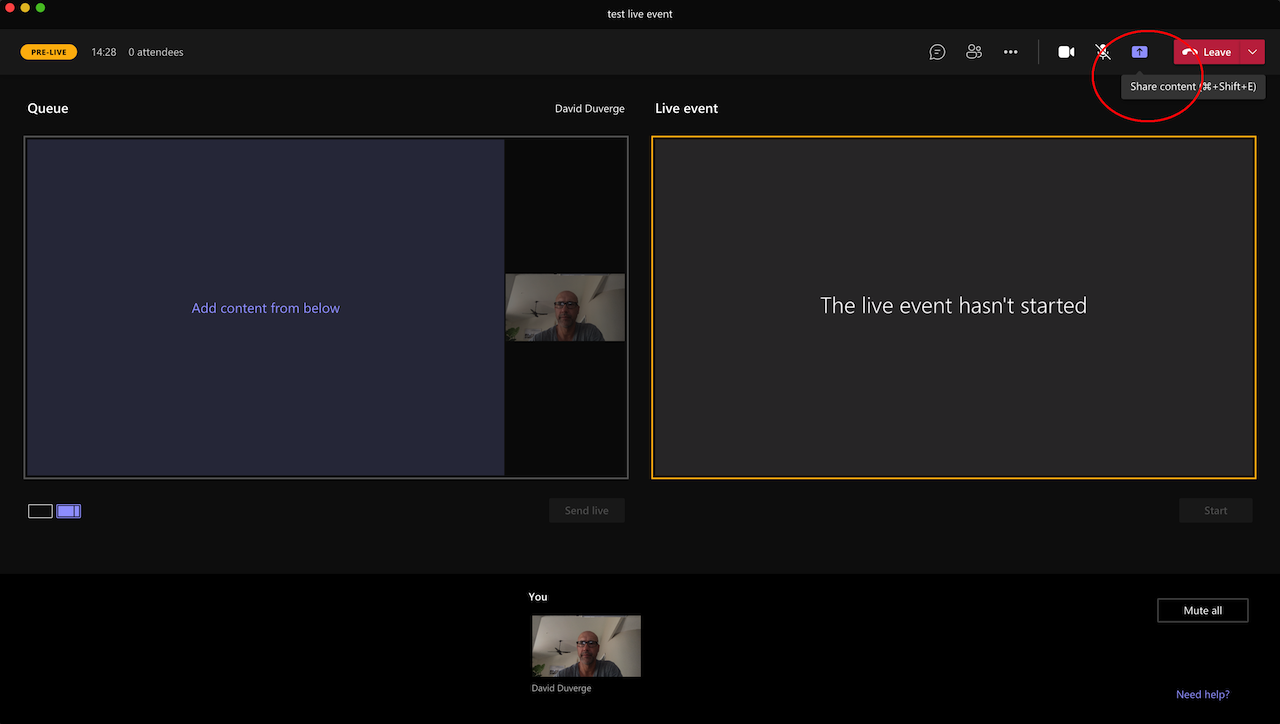
A selection of Desktop/s and Windows and will appear
Best practice tip
Do not share your Desktop (unless required), instead share the application you want to present by selecting it from the Window options (section circled in Red below)
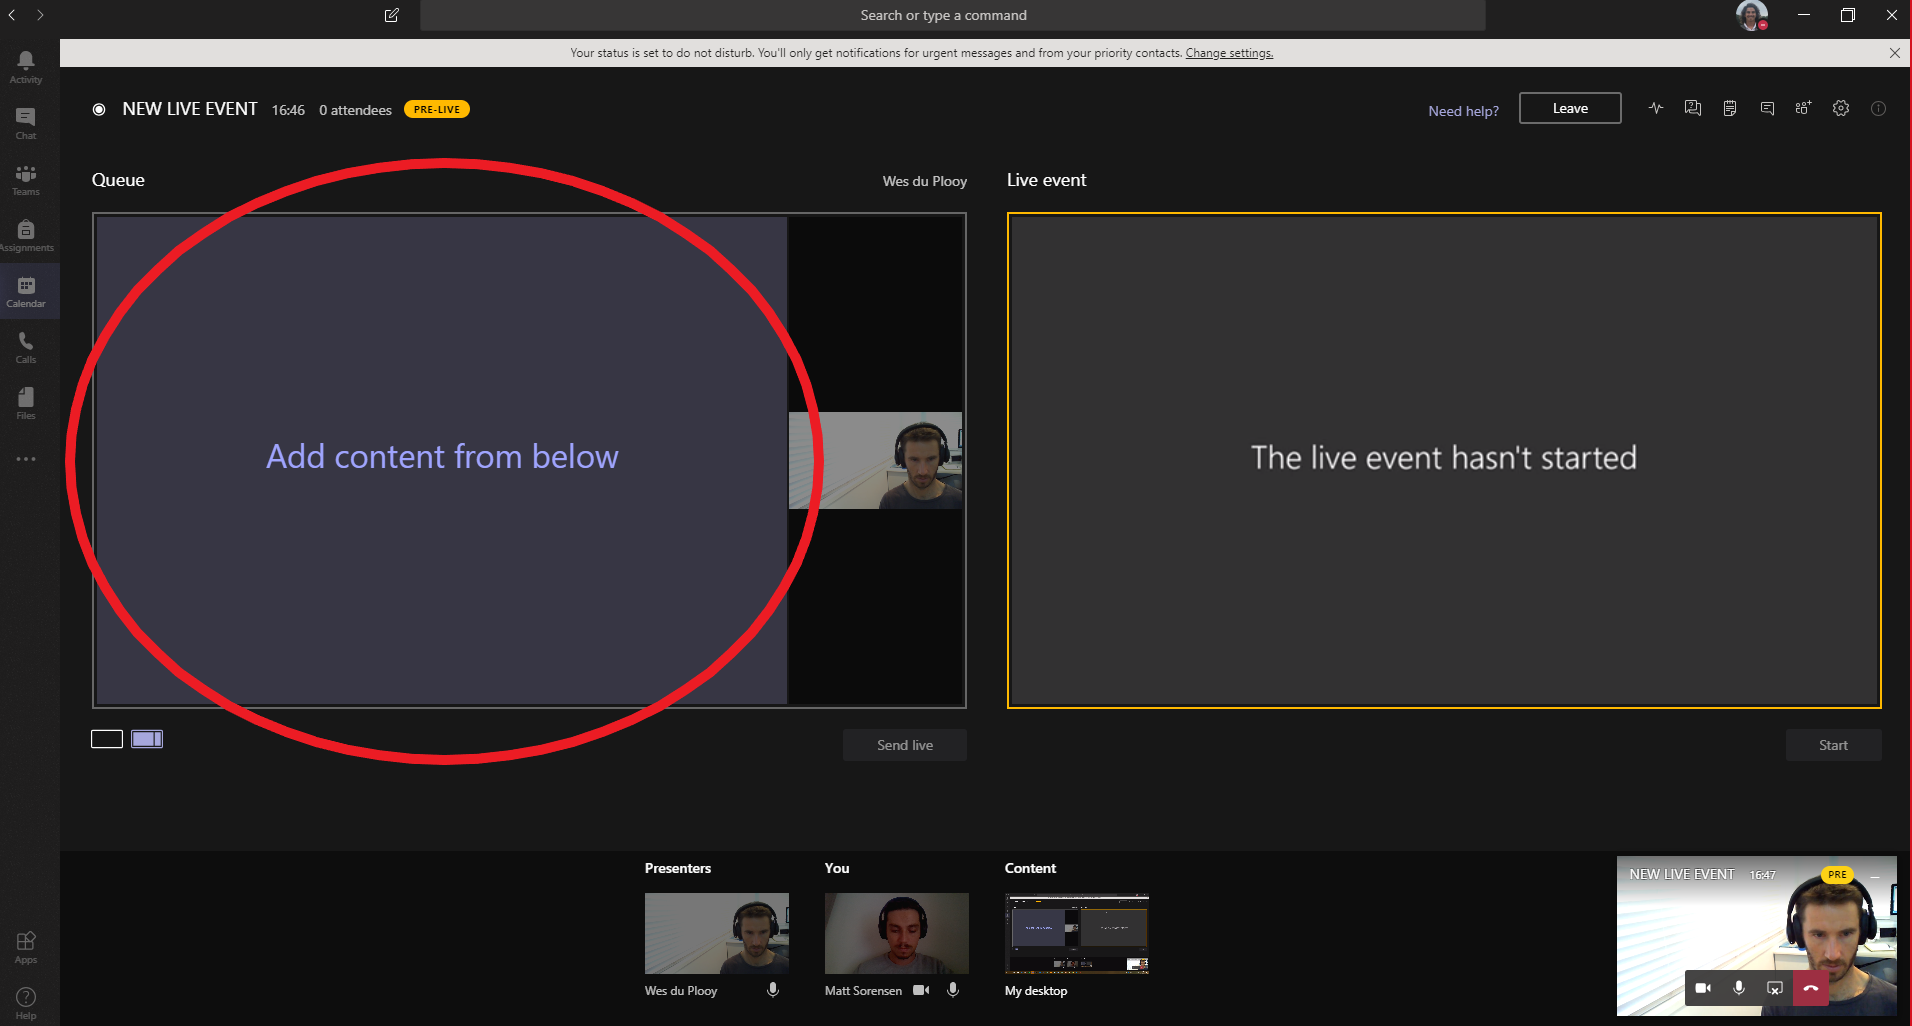
Step 10
To add content to the Queue window, click on Add content from below in the Queue window - if it's highlighted purple it means it's selected
Now click on the content you wish to present for the event (in this example we have shared "My desktop")
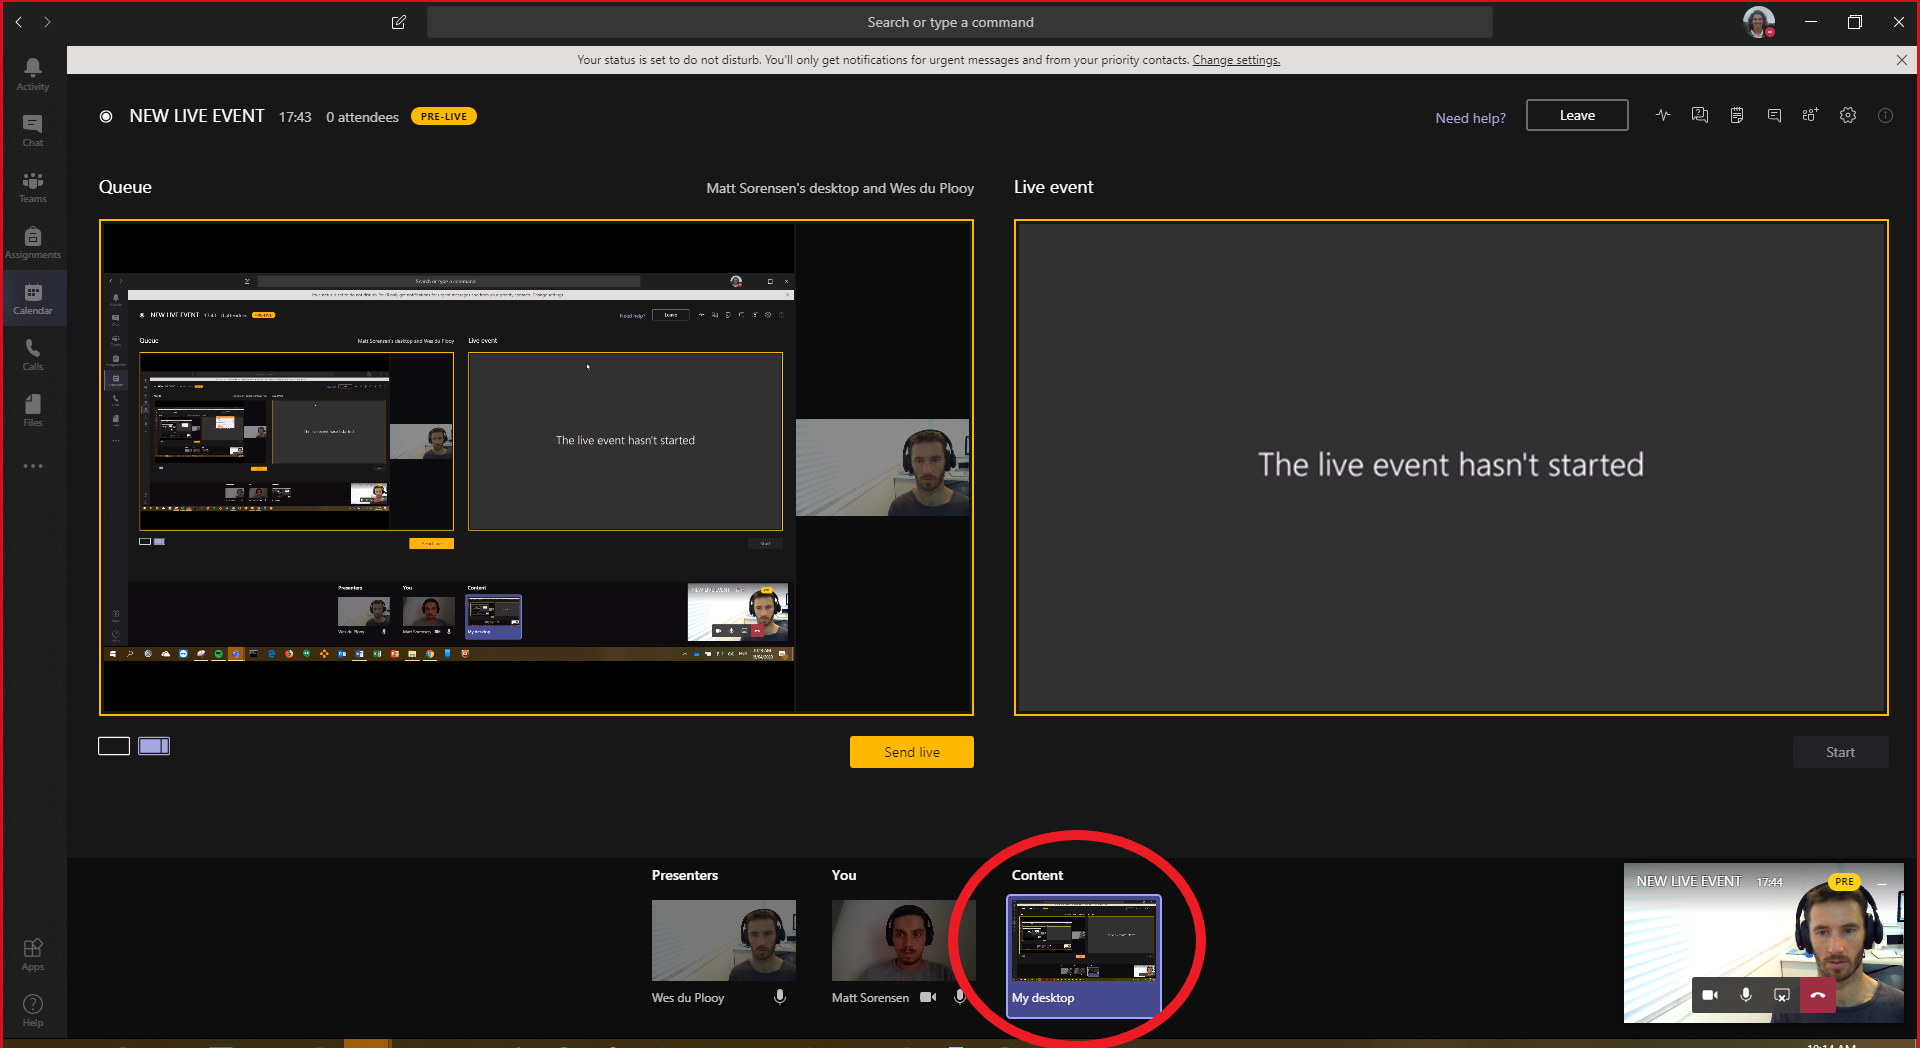
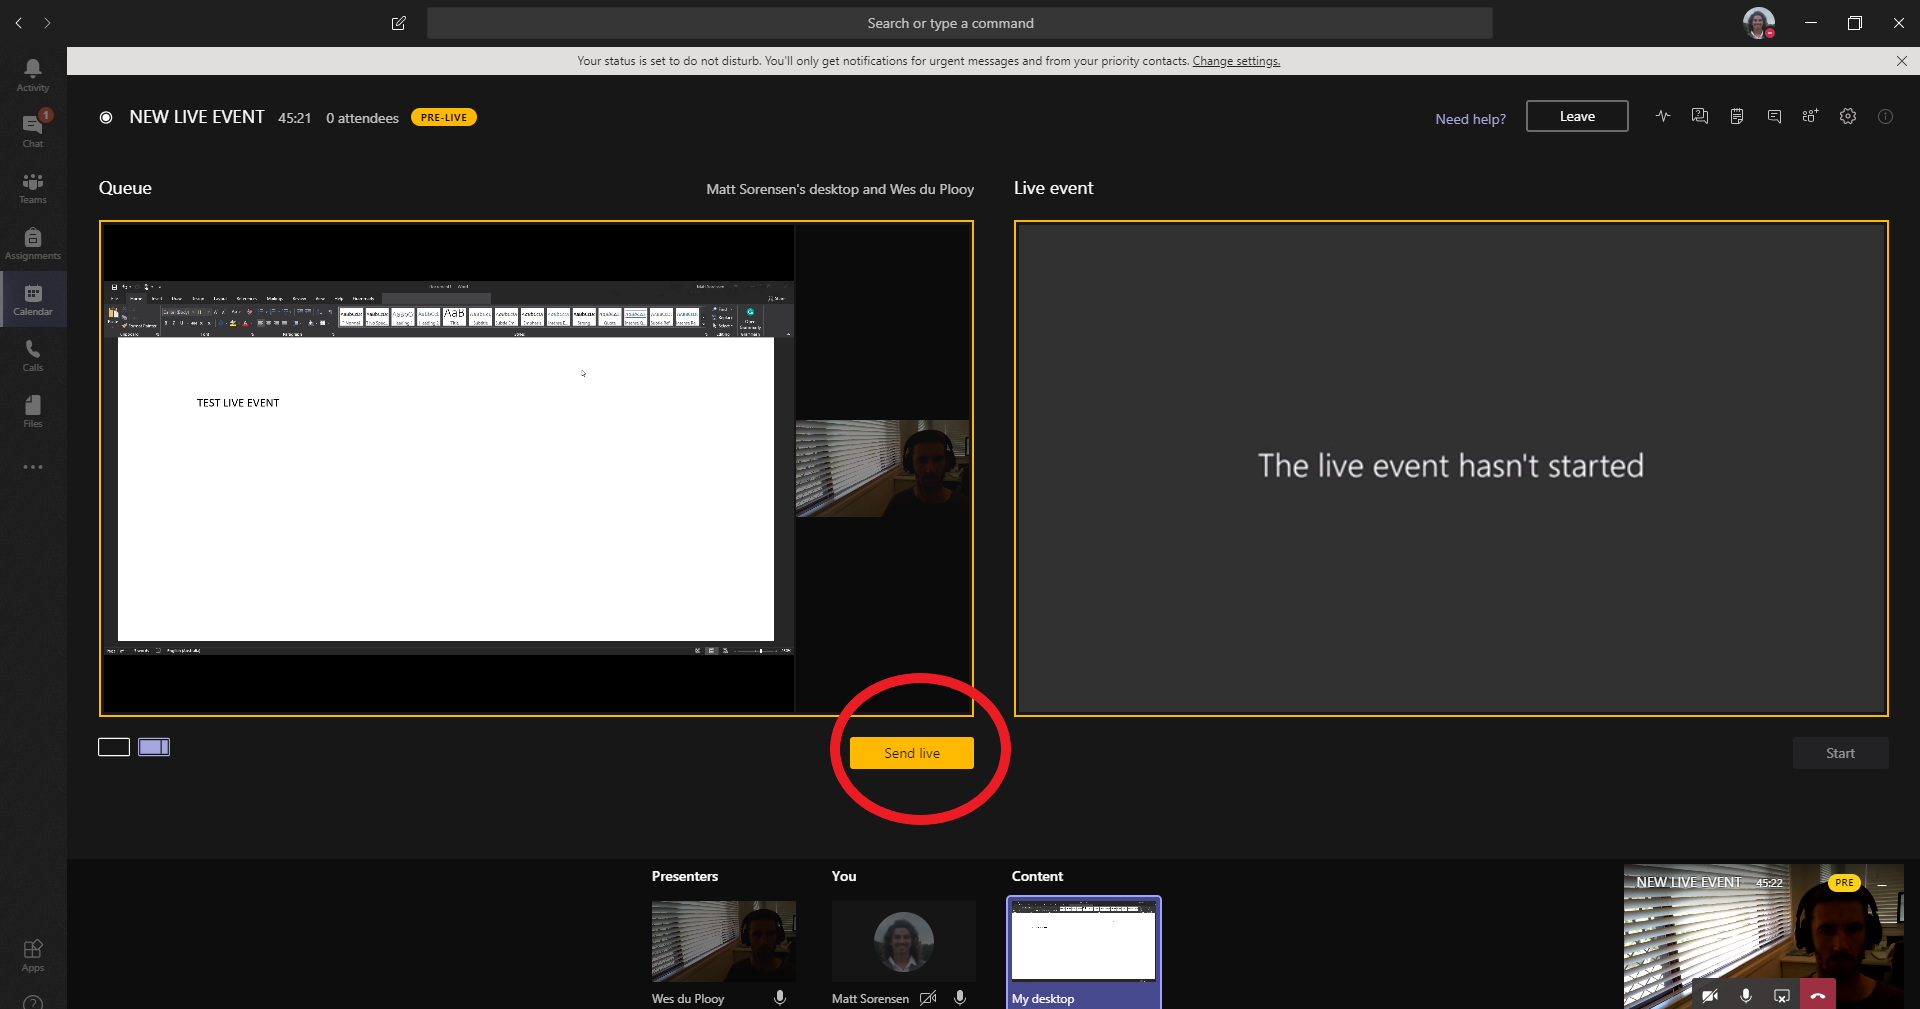
Step 11
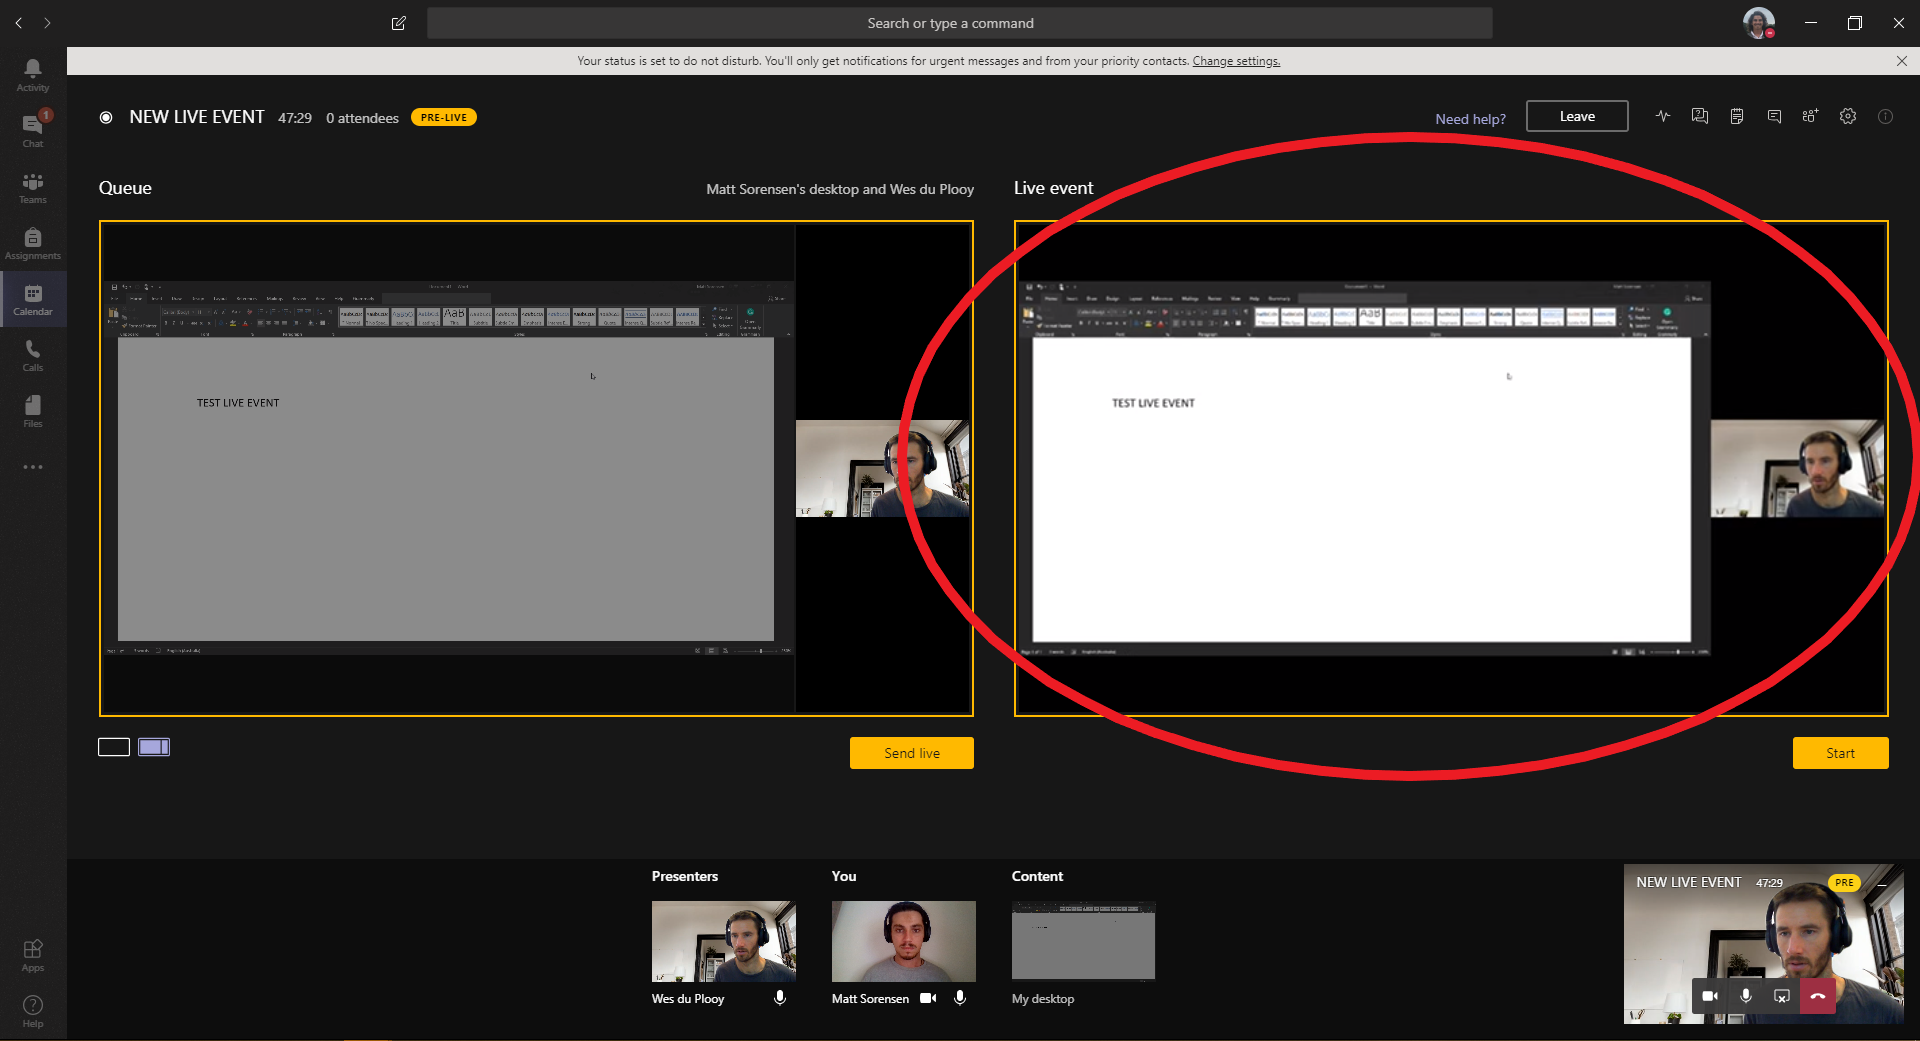
Once you have configured your Queue window correctly click on the Send live button, this will duplicate what you've configured in the Queue window to the Live event window
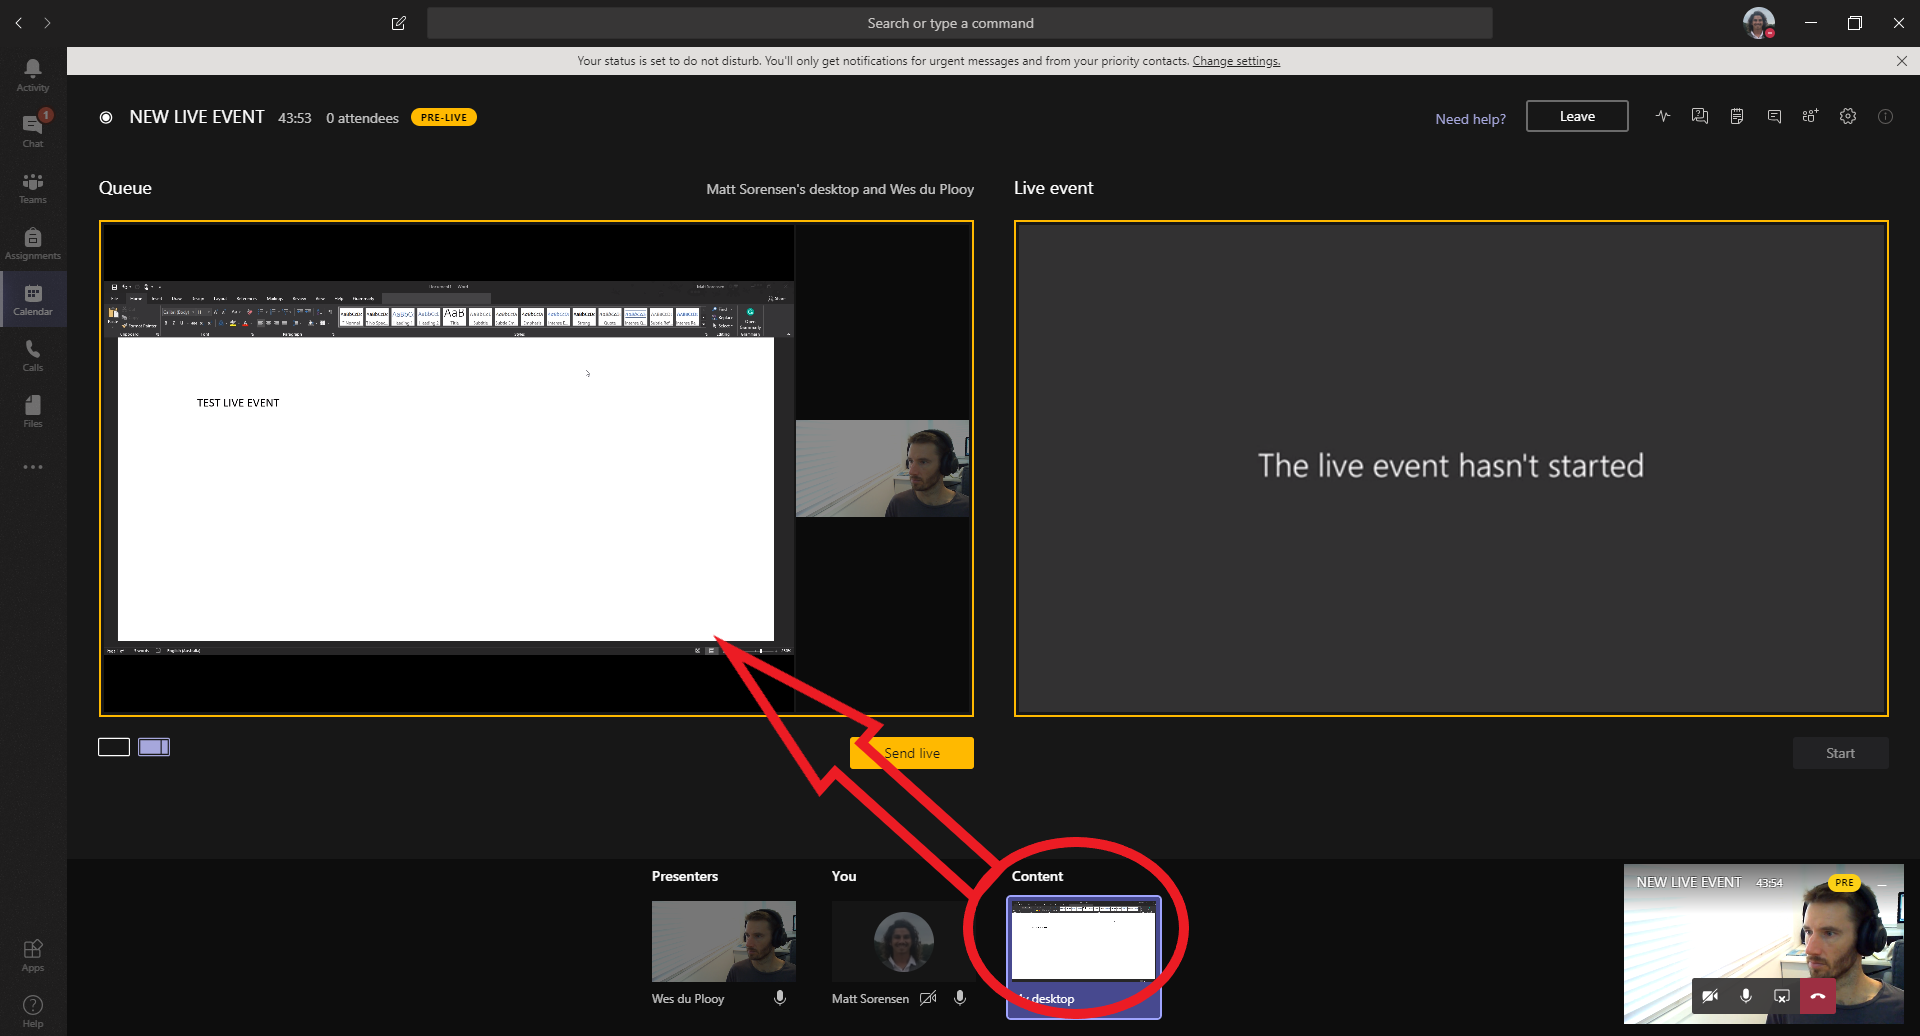
Step 12
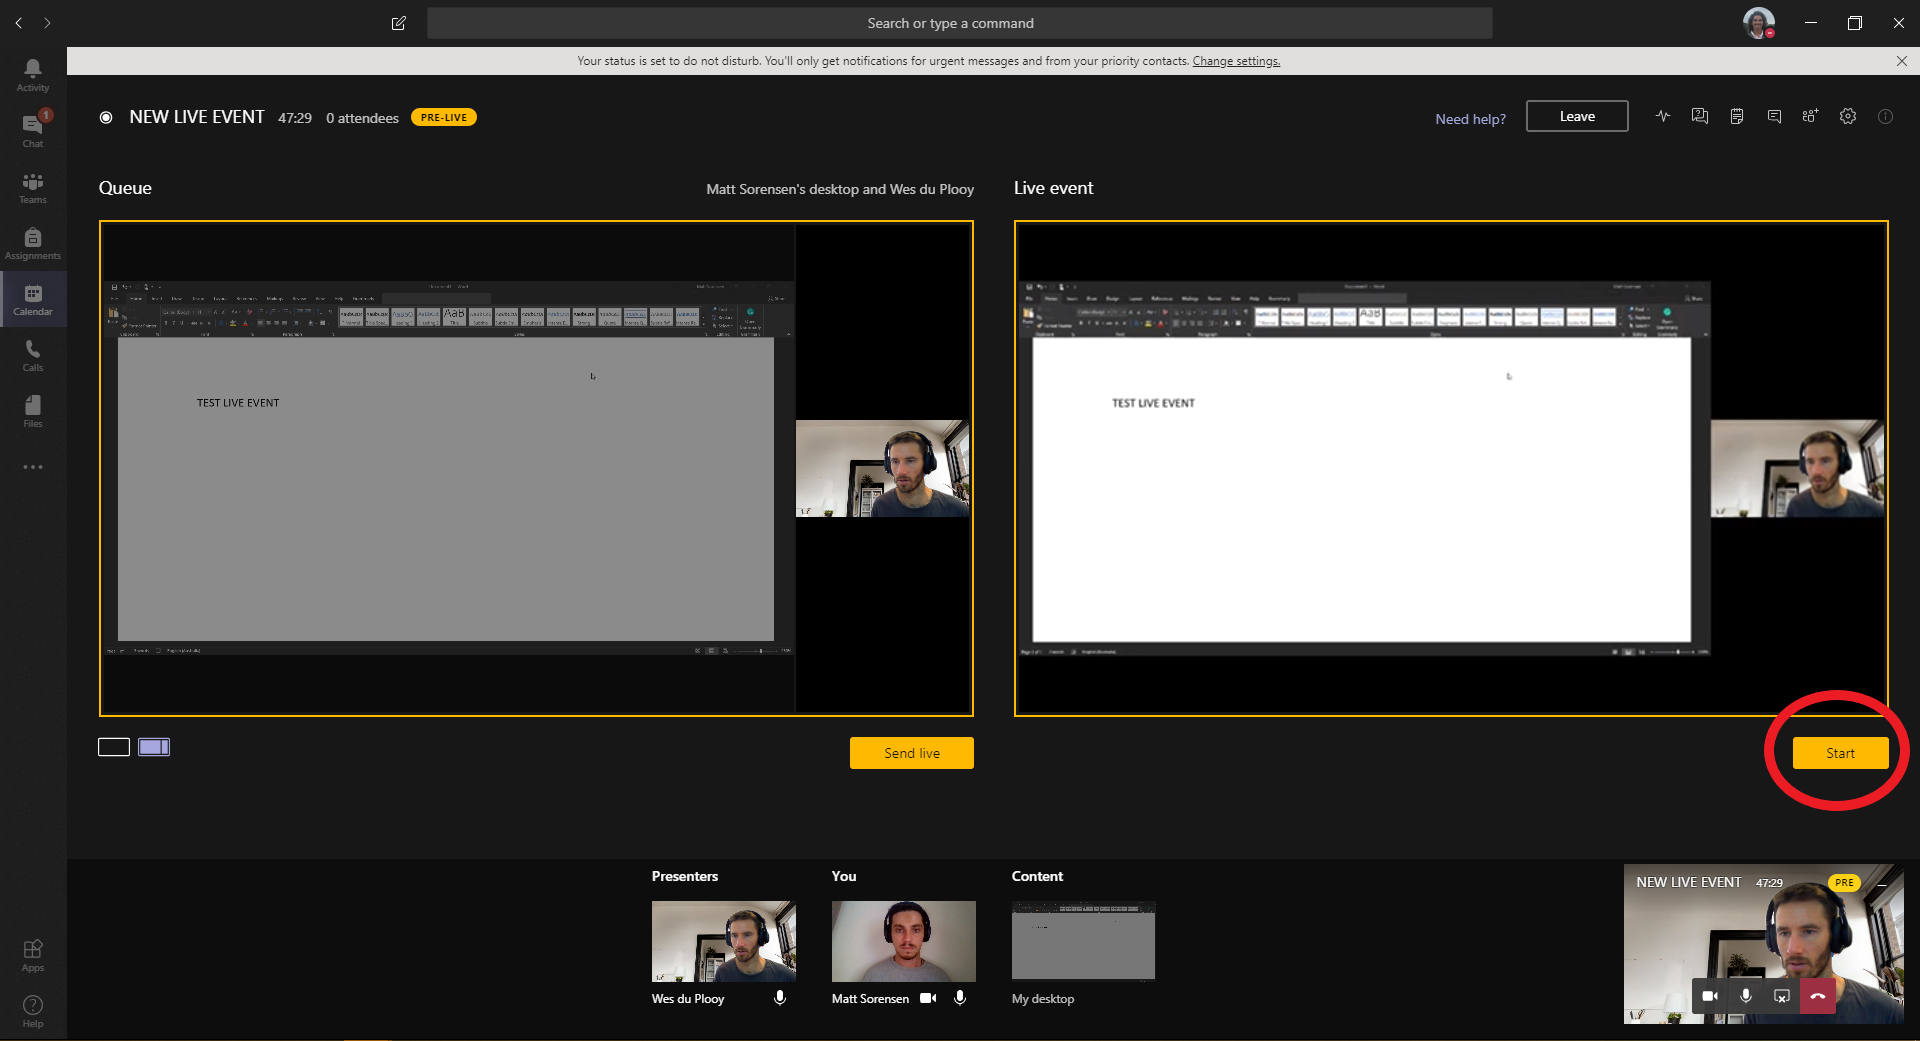
You are now ready to the start the live event, the Start button will now be yellow because you have populated the Live event window - click on the Start button
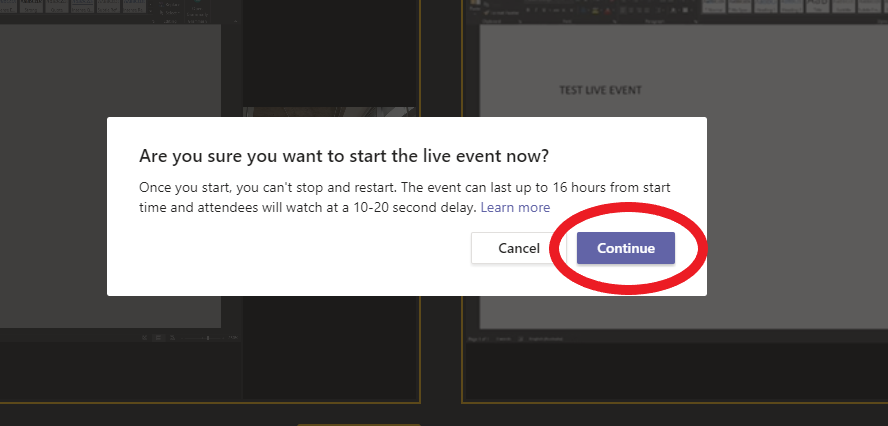
A pop up will appear asking Are sure you want to start the live event now? If you are ready, click on Continue
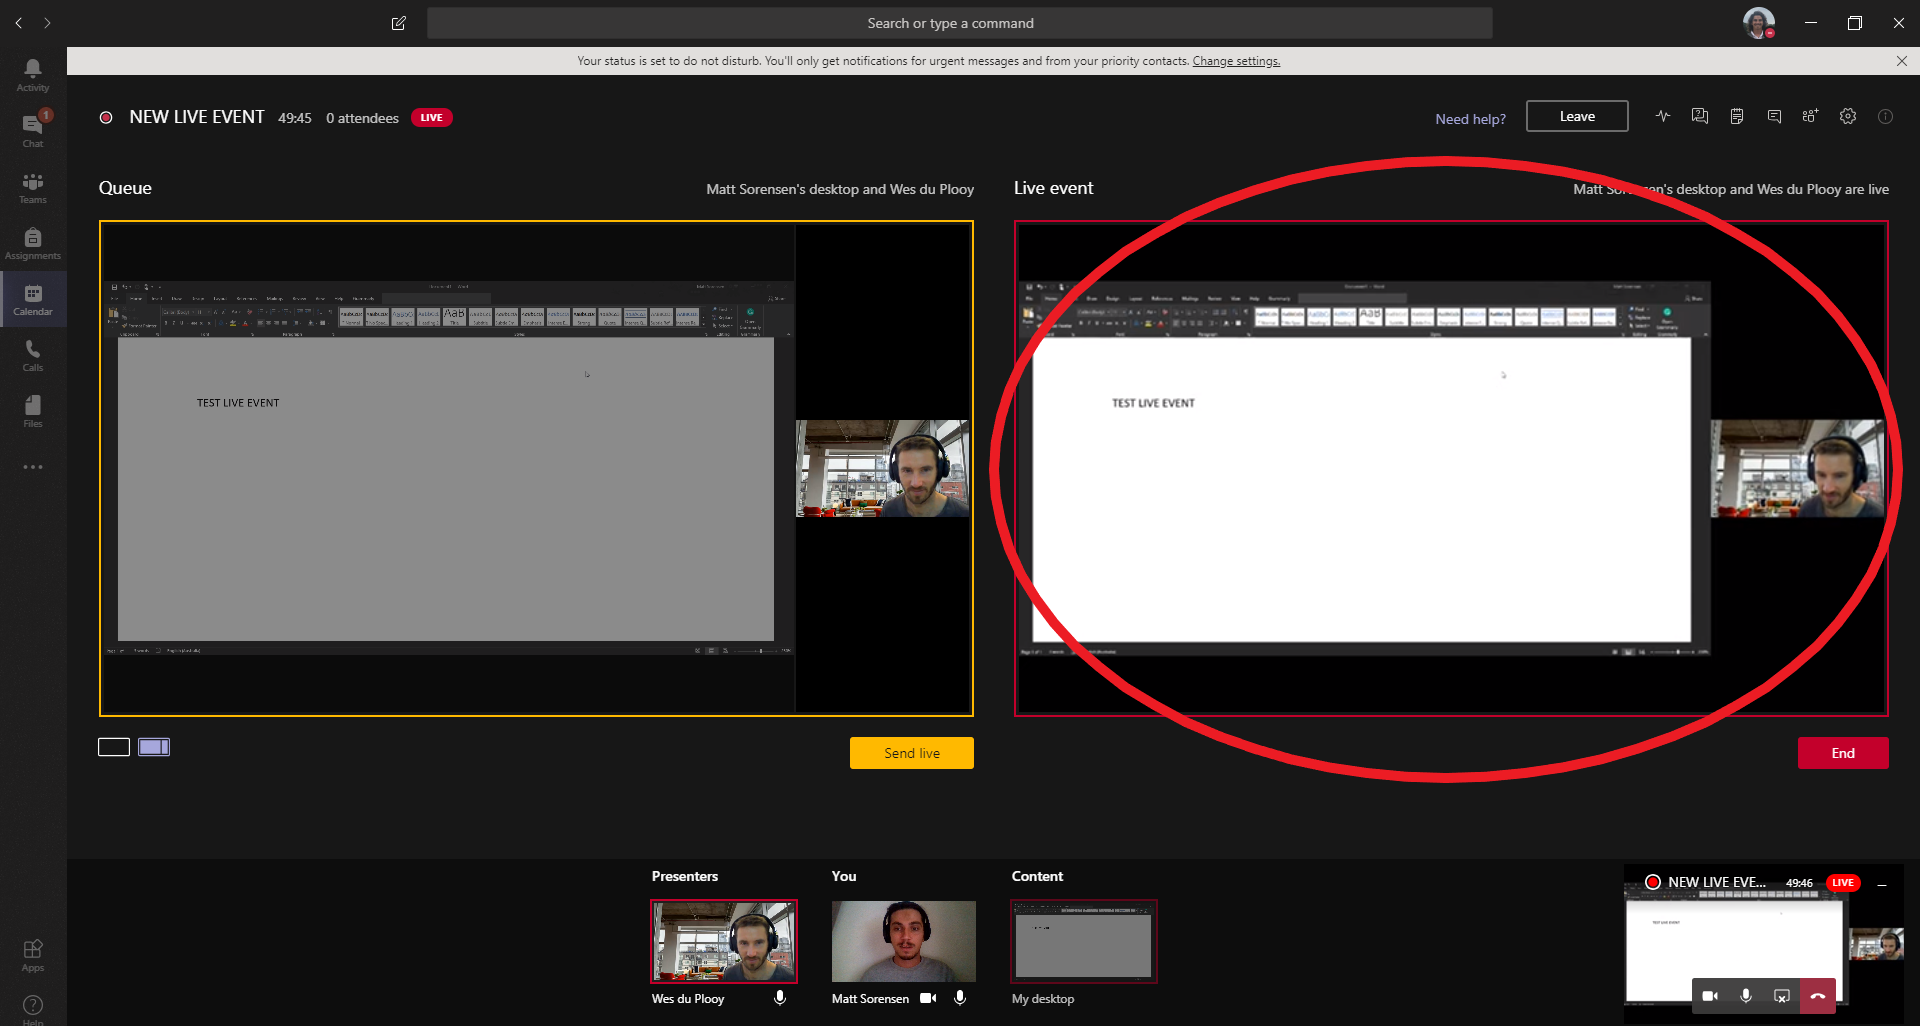
You will now have a red border around your Live event window indicating that it is now live
Important note
Once the producer has enabled content sharing, if either of the presenters clicks to share content it will automatically go live
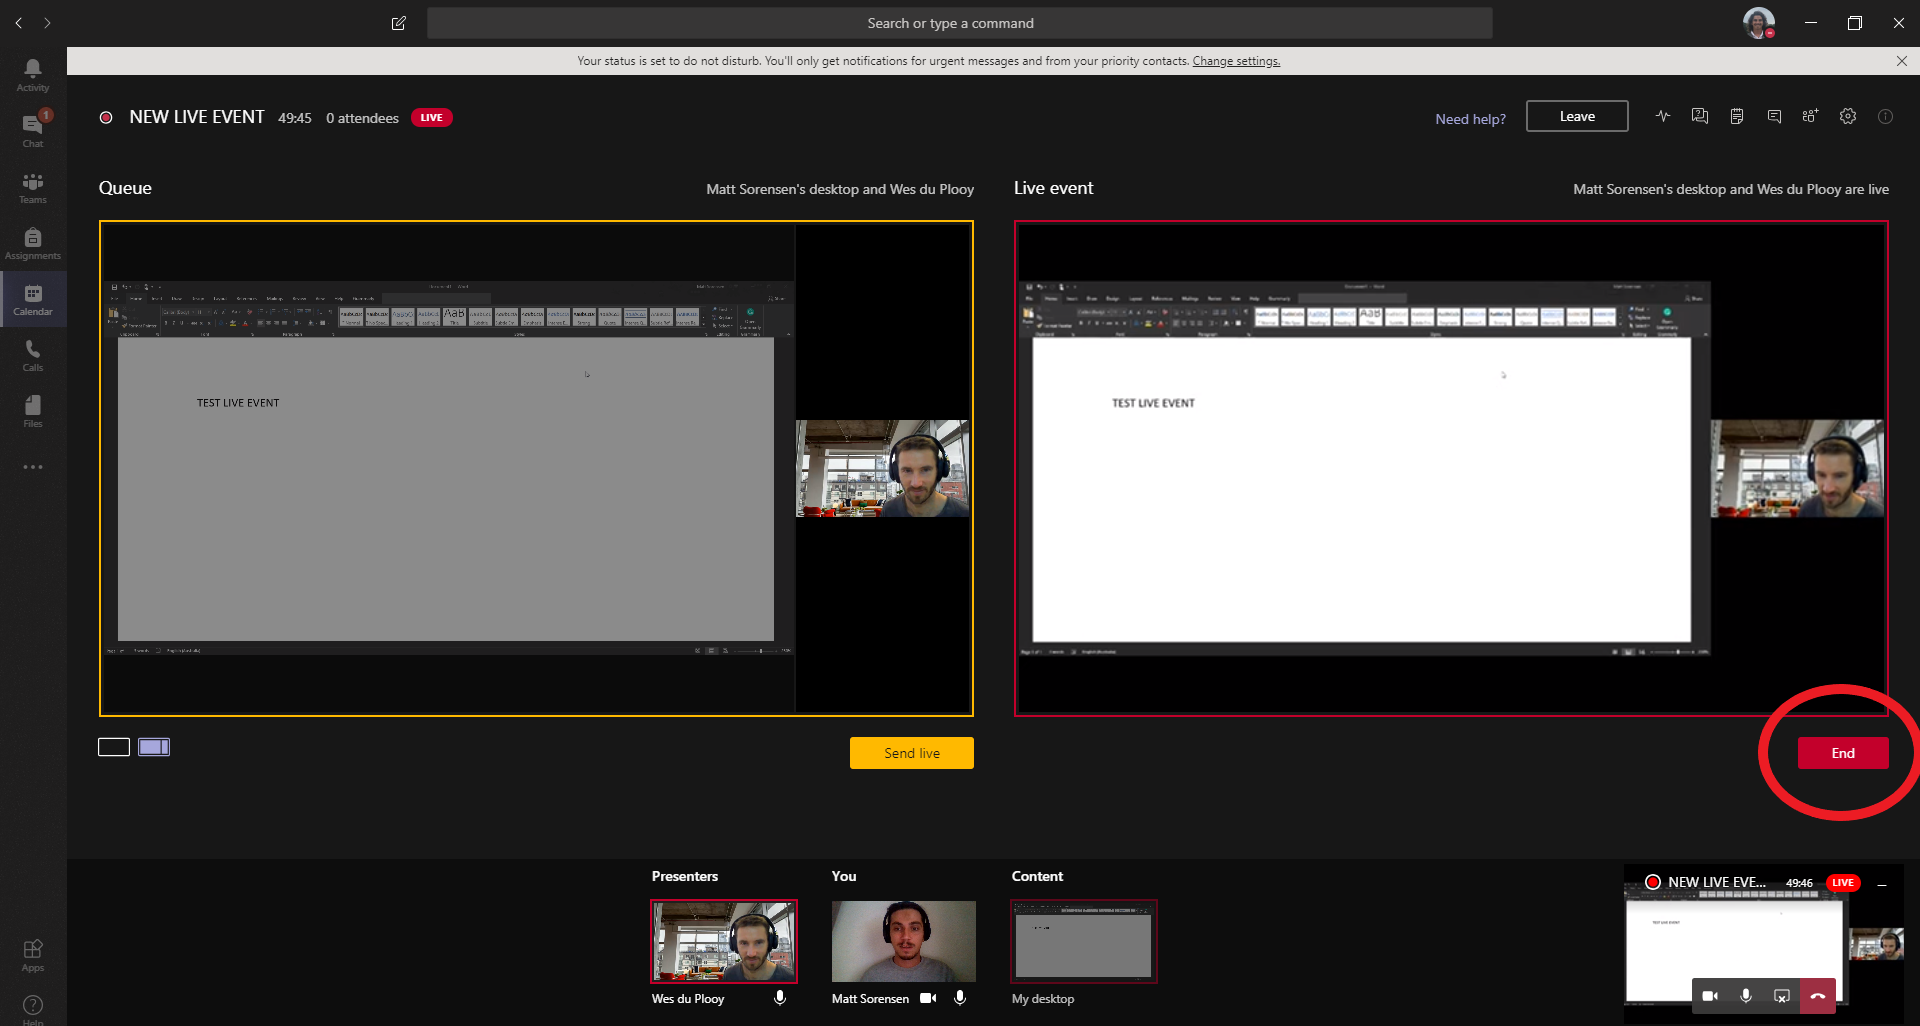
Step 13
Once your event is finished you can end the event simply by clicking the red End button
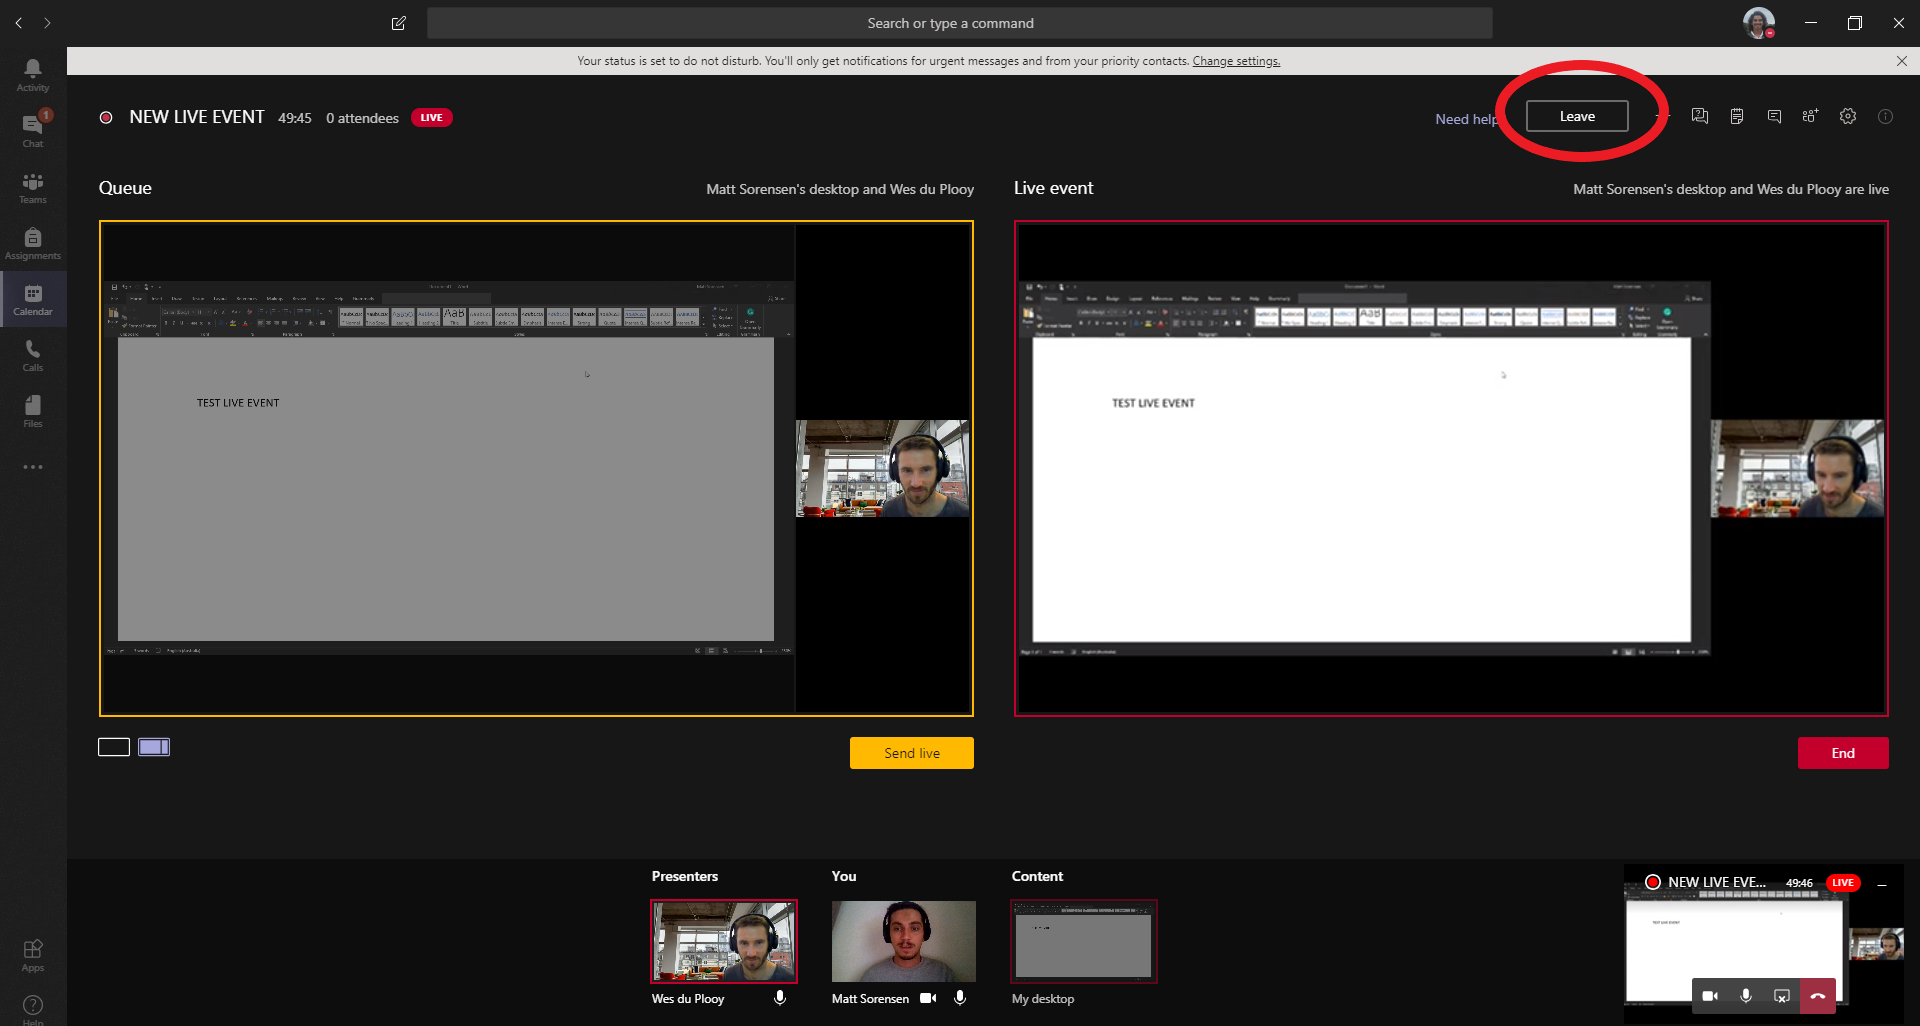
Alternatively you can leave at any time simply by clicking the Leave button at the top right of the screen - the event will continue running
Producer capabilities
Producer capabilities can vary depending on the production method you use:
Producers can... | Producing in Teams | Producing with an external app or device |
|---|---|---|
Select video feeds from other presenters and send them to the event | Yes | No |
Chat with other producers and presenters | Yes | Yes |
Start and end the live event Warning: Once you stop the live event, you can't restart it! | Yes | Yes |
View the live attendee count | Yes | Yes |
Share their screens (desktop or a window) into the event | Yes | No |
Mute all other producers and presenters | Yes | No |
Join the audio from a PSTN phone (dial-in or self dial-out) | Yes | No |
Moderate the Q&A, if configured for the event | Yes | Yes |
Have a Yammer conversation, if configured for the event | Yes | Yes |
Automatically archive recording in Microsoft Stream | No | Yes |
Download recording | Yes | Yes, via Microsoft Stream |
Download attendee report | Yes | No |