H5P Reports
The following article discusses H5P reports which track student progress and H5P activity responses.
H5P reports
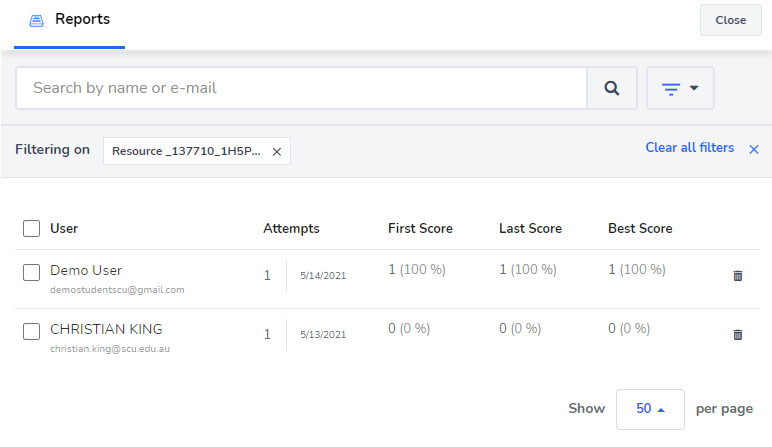
A H5P reports include information on the student details, number of attempts, first, last and best score. H5P reports are a good way to track how students are engaging and progressing through a H5P activity. Each report is limited to a single H5P, there is unfortunately no way to cross examine or compare different H5P reports.
Enabling H5P reports
Ensure that under the Publish settings, you have enabled Protected mode. Only protected content can generate reports because this requires user authentication.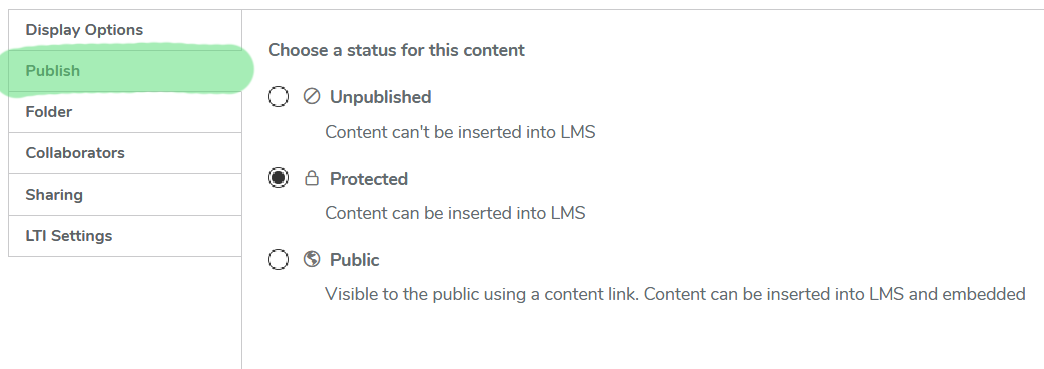
Public publishing options that are typically used to embed H5Ps are not able to track results.
H5P types that support reports
A report is generated after an authenticated student completes a H5P activity that requires a student response. However, only the following H5P types can generate reports.
|
|
|
|---|
Accessing H5P reports
There are two different ways to access H5P reports, through the Blackboard unit site (using the Blackboard content editor +Plus button), or through the H5P library.
Accessing reports through Blackboard
H5P content added using the +Plus button in the Bb content editor includes the H5P reports interface when available. The benefit of this method is that the report is easy to access in the context of the module, and will filter responses to the location the H5P was inserted.
- Locate the H5P activity in a unit module. If a report is available the option will be shown to lecturer Bb accounts (but not to students or in student view).
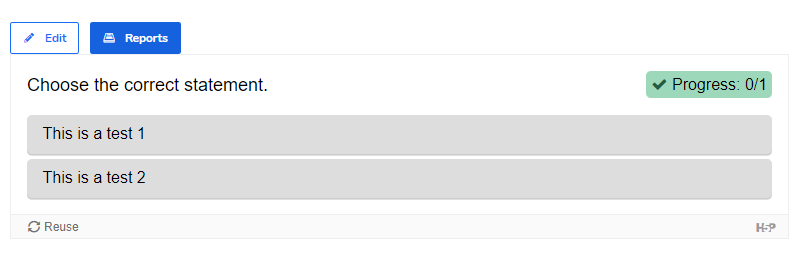
- Click on Reports at the top of the H5P item. This will access the report for this H5P.
- By default the report will filter only responses that access the H5P from this location. Click "Clear all filters" to show all student's attempts no matter where the H5P may have been inserted (e.g. previous terms or other units).

Accessing reports through the H5P library
Reports can also be accessed from the H5P library. The benefit of this approach is that you can quickly access all the reports for many H5Ps, with more screen real estate available to view the reports. Reports will include ALL responses, regardless of where the H5P has been inserted in whichever units.
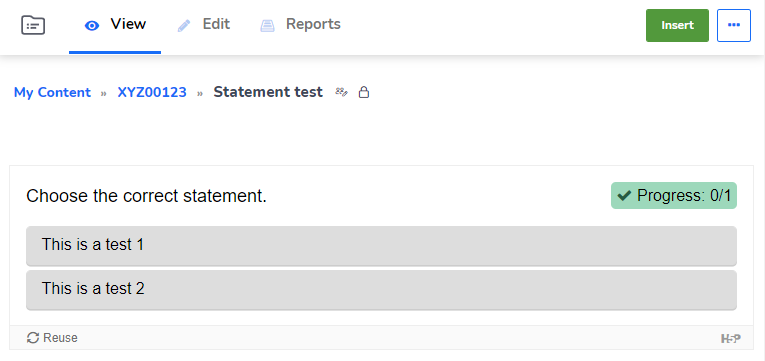
- Open https://scu.h5p.com/ in a browser and login using your SCU credentials. Alternatively, you can insert a H5P as a link from the Bb Build Content menu, which opens the H5P library for you.
- Find the relevant H5P to view the report. Browse "My Content" or type the name of the H5P into the Search bar.
- Click on the H5P Title and then click Reports.
Where the Reports option is missing
If there is no Reports option present, this indicates that this H5P either has public publishing turned on or the H5P content type does not support report tracking. You can use Bb statistics tracking to monitor student interactions instead.
Viewing an individual H5P student report
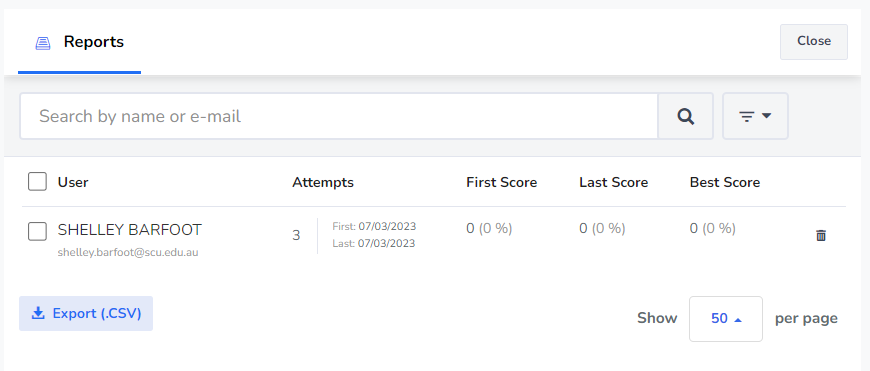
Once you have opened a report, you can view each individual student's performance.
- To access an individual student's report, click on their Name, or Search for a particular student. Students who have made multiple attempts are listed.
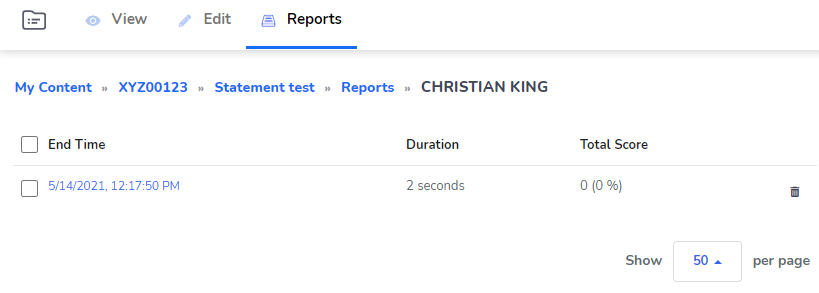
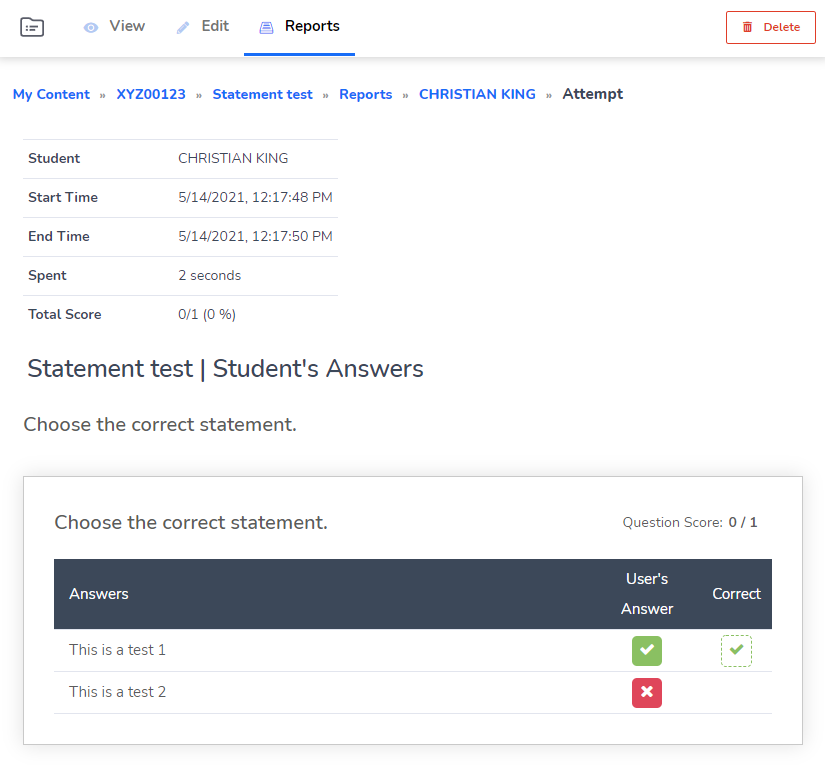
- Click on an attempt date to view a student's results for that attempt, including the answers they selected.
Deleting H5P attempts
At the end of a term, it is possible to delete student attempts. This allows you to refresh the H5P data ready for the next term, and remove old data. If you wish to retain student data it is advised to either make a fresh copy of the H5P for the next term, or use the + Plus button method to access reports, which allows results filtering.
- Select students using the individual checkboxes, or select the checkbox next to User at the top to select all students.
- Click on the trash can icon
 Delete on the top right.
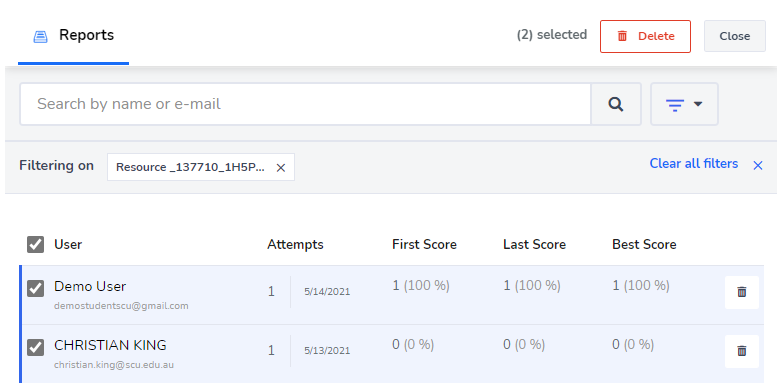
- After clicking the trash can confirm the action by clicking Delete.
