Managing a Zoom Webinar - Host
Host
The Host has the main controls of the Webinar. To successful manage a Zoom Webinar the host will need to use a variety of these controls.
In the webinar, the host has a control bar on the bottom of the window:

The main controls are discussed below...
Microphone
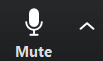
Clicking the microphone icon will mute and unmute your microphone.
Clicking the up arrow beside the microphone icon will open a pop up where you can choose the source of your microphone audio (e.g. built-in or connected microphone) to your device.
Video
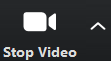
Clicking the video icon will start and stop your video feed. Clicking the up arrow beside the video icon will open a pop up where you can choose the source of your video from built-in or connected camera to your device.
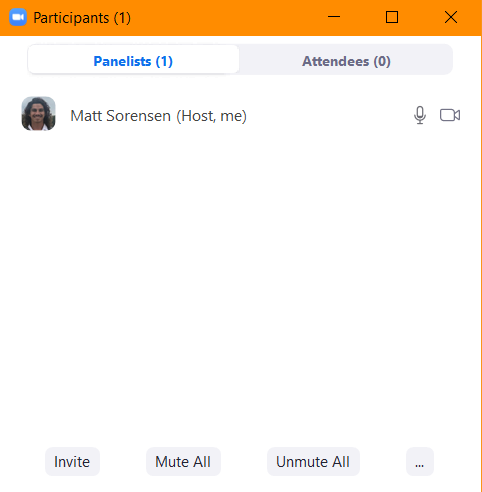
Participants:
Clicking the participants icon will open the participants control pop up.

There are two parts to this:
Panellists - Able to collaborate with the host of the webinar
Attendees - Watching the webinar
Master controls are:
Invite
Mute All
Unmute All
You can also click on the microphone or camera icons next to a user. This will mute/unmute or start/stop the video to the corresponding user.
In the Attendees section, you can also remove attendees.
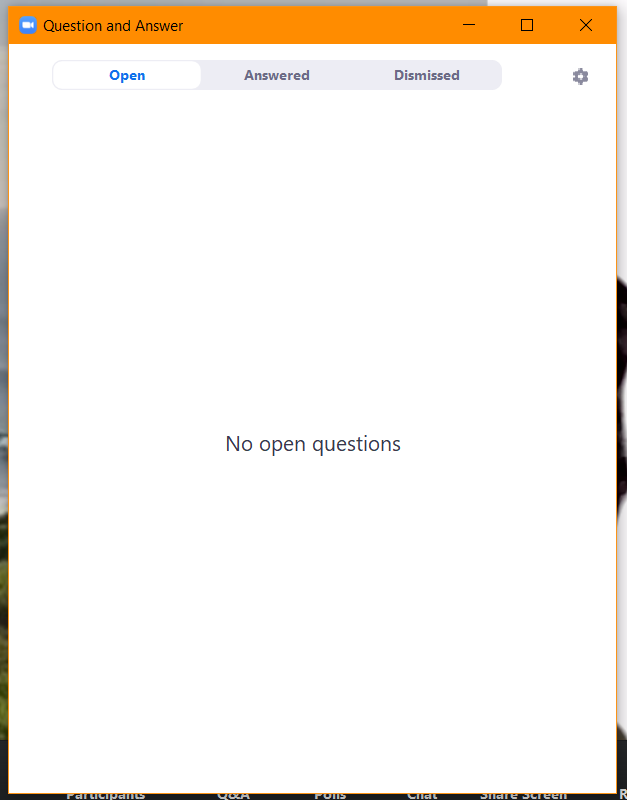
Question & Answer

Clicking the Q&A icon will open the Question and Answer control pop up.
There are three parts to this:
Open - Questions that have not been answered.
Answered - Questions that have been answered.
Dismissed - Question that a host or panellist have removed the question.
Switching between the three sections you can montior and manage questions from all participants.
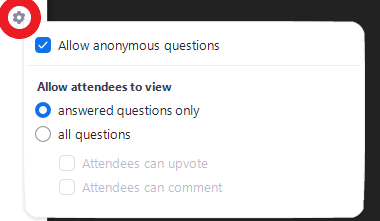
Clicking the gear will open up the Q&A setting and allow you to change what questions are visible to the attendees:
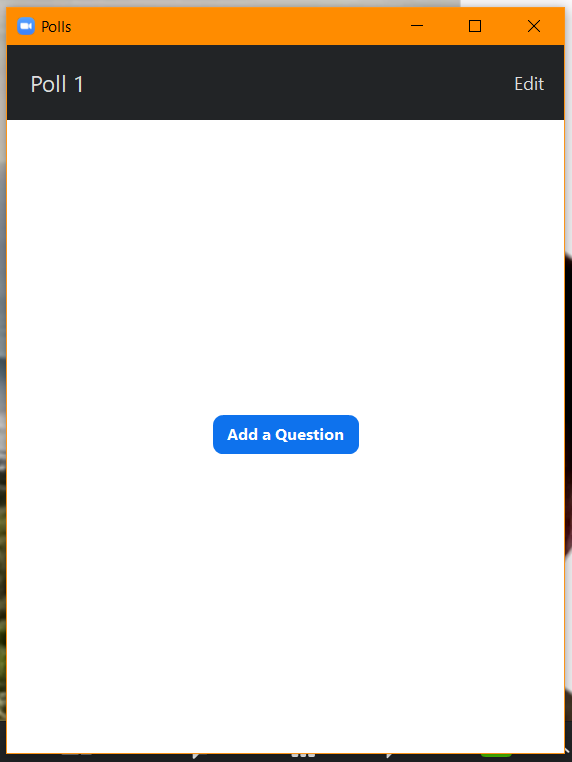
Polls

Clicking the Polls icon will open the Polls control pop up.
In the polls control pop up you can:
Add a new question by clicking the Add a Question button
Monitor the poll, live during the webinar
Manage the poll by clicking the Edit button in the top right of the pop up
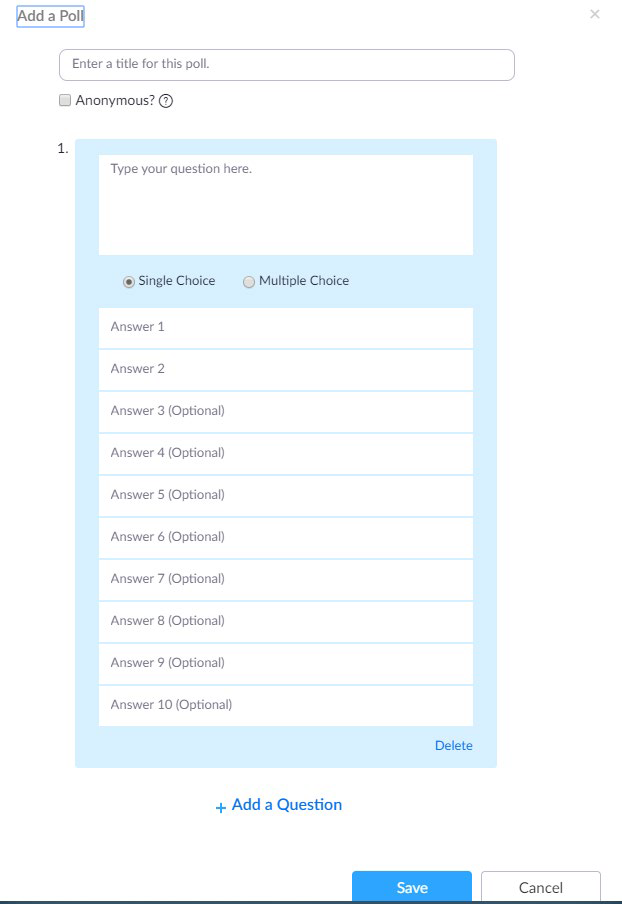
Creating a Poll question
- If there are no current polls it will have a single button saying Add a Question
Click the Add a Question button and a Zoom web page will open a pop-up. This is where you can create a question and an array of answers you would like attendees to select from

- Once done, hit Save and it will appear in the Zoom meeting as below
Chat

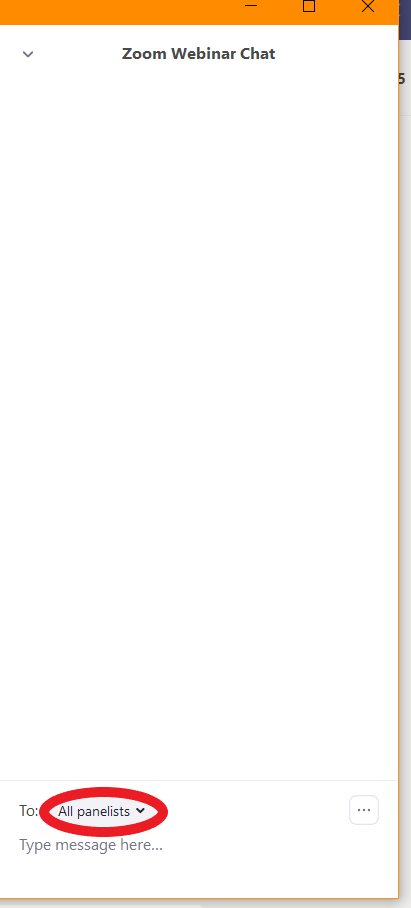
Clicking the Chat icon will open/expand the window, showing the Zoom Webinar Chat on the right side of the window.
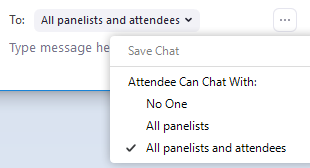
This is a live chat room where you can communicate during the webinar. You can also change/choose who you wish to chat to by clicking the drop down arrow next to "To" and selecting the desired role group/person, located above the type a message text box.
If you click the menu option (3 horizontal dots) it will open the menu for the attendees chat. This allows you to restrict their chat to suit your Webinar.
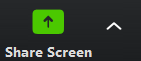
Share Screen
Clicking the Share Screen icon will open a popup which will allow you to select from:
Desktop
Window
Application
If you wish to share a video and want the sound to be included, ensure you click the check boxes at the bottom of the pop-up:

Once sharing you can re-click the Share Screen icon to choose another option or stop sharing.
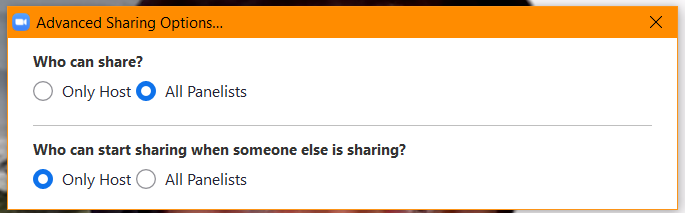
Clicking the up arrow beside the Share Screen icon will open a pop up where you can choose who can share and can start sharing when someone else is sharing. The two options for both are:
Only host
All Panelists
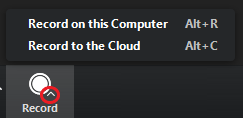
Record

Clicking the Record icon will start a recording of the webinar.
Once the recording has started, the recording status will appear in the top left of the screen. The recording status will say "Recording..." and next to it you will have pause and stop icons which will pause or stop the recording if you click on them.
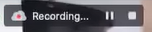
You will also notice that the original Record icon on the main control bar at the bottom of the window will have changed. It will a now have the pause and stop icons which will pause or stop the recording if you click on them.
Clicking the arrow up will prompt you to either record to your PC or to the Cloud.
NB
Only the Host can record a Webinar
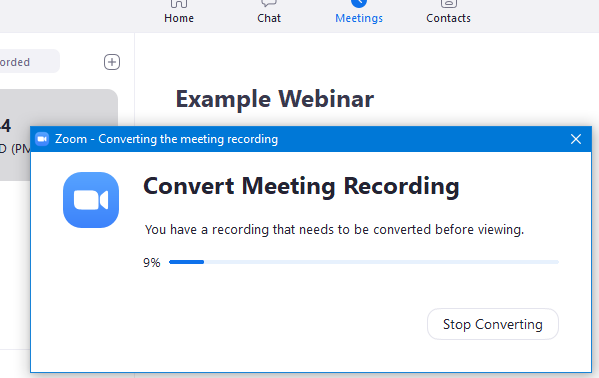
Once you have finished the Webinar, a dialogue box will open as it prepares the recorded meeting:
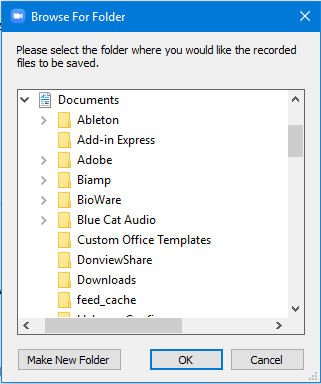
Once finished preparing the file after the Webinar, you be prompted to choose a place to save the recording:
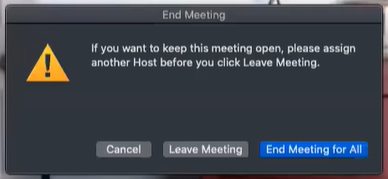
End Meeting
Clicking the End Meeting icon will stop the recording of the webinar.
A pop-up will appear and will prompt you to make a one of three choices:
Cancel - This acts as a safety net in case you did not wish to end/leave the meeting and accidentally clicked the icon
Leave Meeting - Enables you to leave the meeting whilst allowing remaining participants in the meeting
End Meeting for All - This will stop the meeting for all participants and stop the recording