How to compress a video with Handbrake
This guide offers information on how to compress and standardise the video content from your device.
Having trouble with video size?
Video formats straight from cameras or mobile devices can be large in size. Check the settings on your device and reduce the video resolution before recording.
Compressing video will reduce file sizes and, as a result, significantly reduce time uploading files to the web. Using the recommended standard codec and container (H.264, MP4) will also ensure compatibility across platforms.
Uploading video to Blackboard
When submitting your video file to Blackboard for assessment, please note that large file sizes can take a while to upload. Uploading, especially on home Internet connections is generally much slower than downloading. Check your internet upload speed from this link: www.speedtest.net
If you have trouble uploading your file from home, we advise you to use the University facilities as this will be much faster.
If possible, aim to keep video file sizes under 300MB for submission through Blackboard.
Read the download and installing documentation before beginning.
Check the System Requirements page before downloading.
Windows - HandBrake 1.5.0+ requires .NET Desktop Runtime 6.0.x. Please be careful when selecting the correct .NET version to download. See the links under the “Run Desktop Apps” section in the middle of the page.
If your computer is incompatible, previous version are available.
Step 1. Click here to download and install Handbrake for Windows and MacOS.
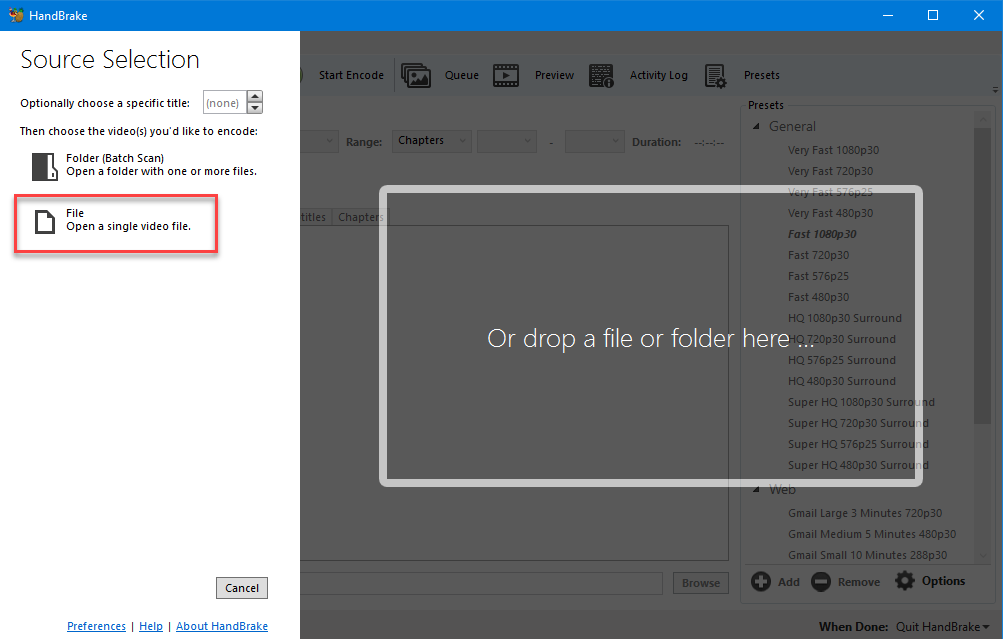
Step 2. When you first open Handbrake, you will be prompted to select your video source.
You can choose either to open a single file or specify multiple in a folder.
For this example, we will use a single file
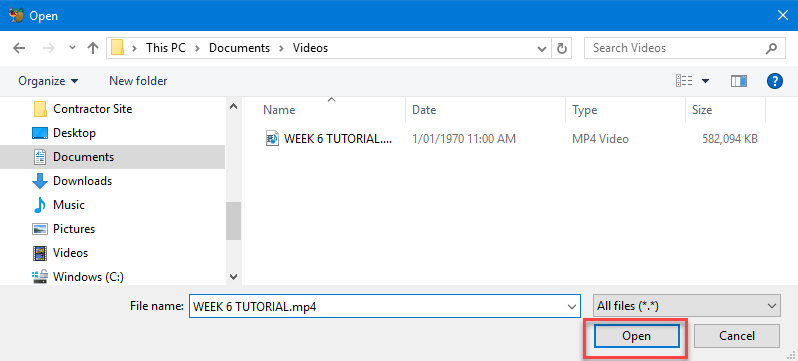
Step 2: From your computer, choose the file you want to convert and click Open
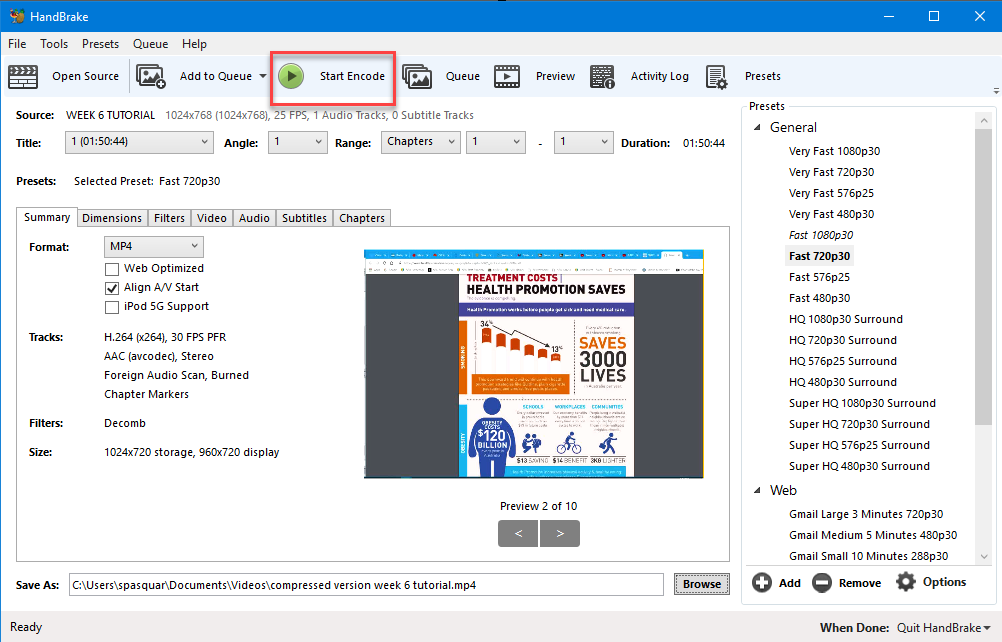
Step 3. Once your source file has been opened, click on the Presets from the top menu.
From the drop down list, select one of the preset option. We recommend either:
- General > Fast 720p30
- General > Fast 480p30
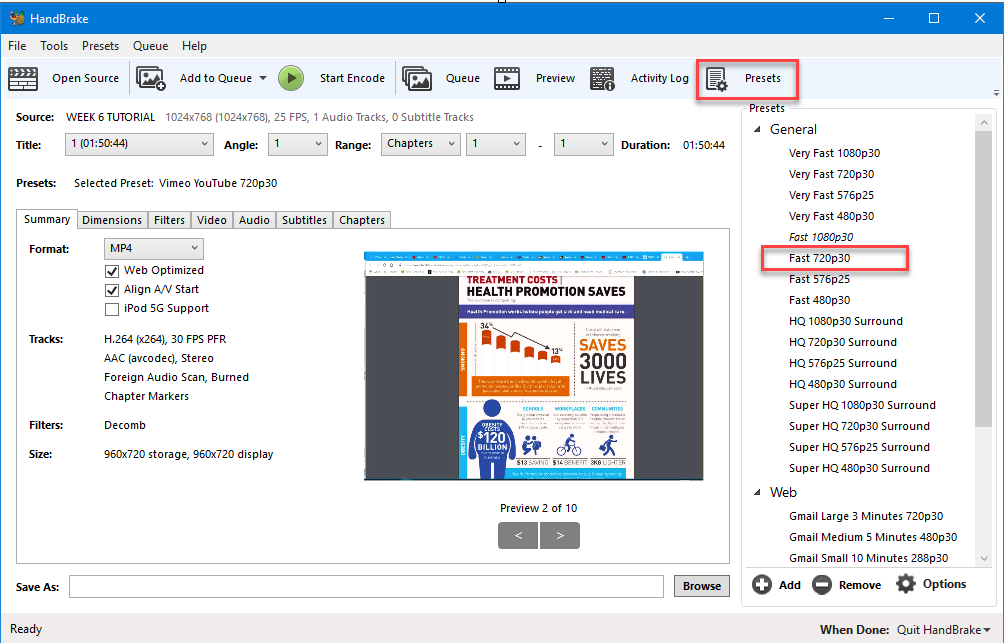
As a general guideline, 720p30 (higher quality) will result in file sizes of around 10MB per minute of content, and 480p30 (lower quality) around 5MB per minute of content. You will need to use your best judgement in deciding which one to use based on the length of your video. For more detailed instructions on selecting a preset click here.
If you need to reduce the size of the output file further, you can also make adjustments to the encoding quality, click here for more information.
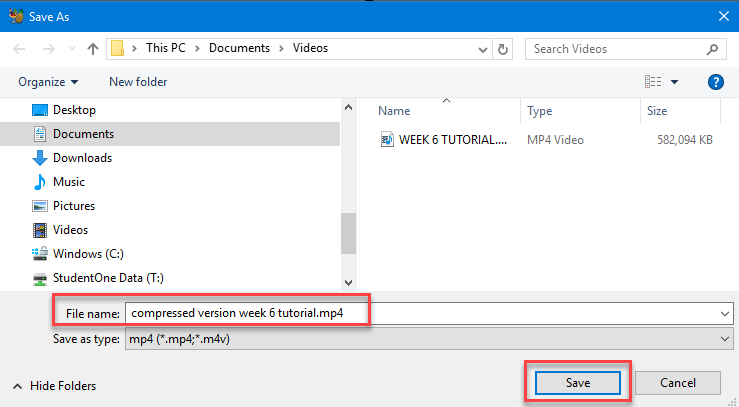
Step 4. Select the destination to save the new file by clicking Browse button at the bottom-right of the application.
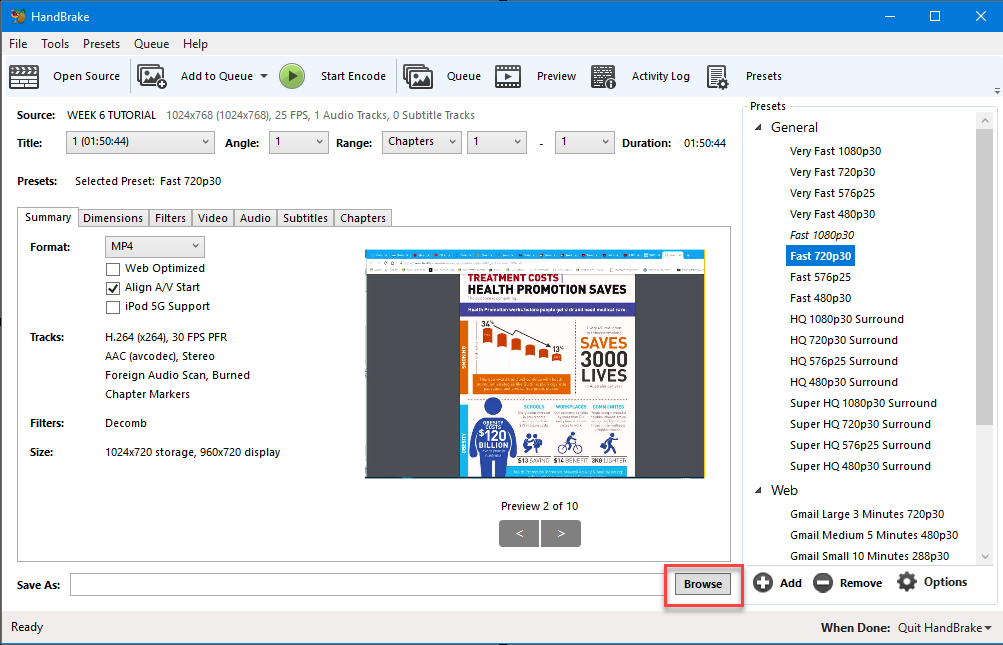
Step 5 Choose the location where you want the video to be saved.
Type in a new name for your video, including file extension
Click the Save button.
Step 5. From the top menu, click the green Start Encode button to begin processing your video file.
Step 6: Handbrake will display the progress of the video encoding at the bottom of the application. Depending on the capabilities of your computer and the size of the file, this may take some time.
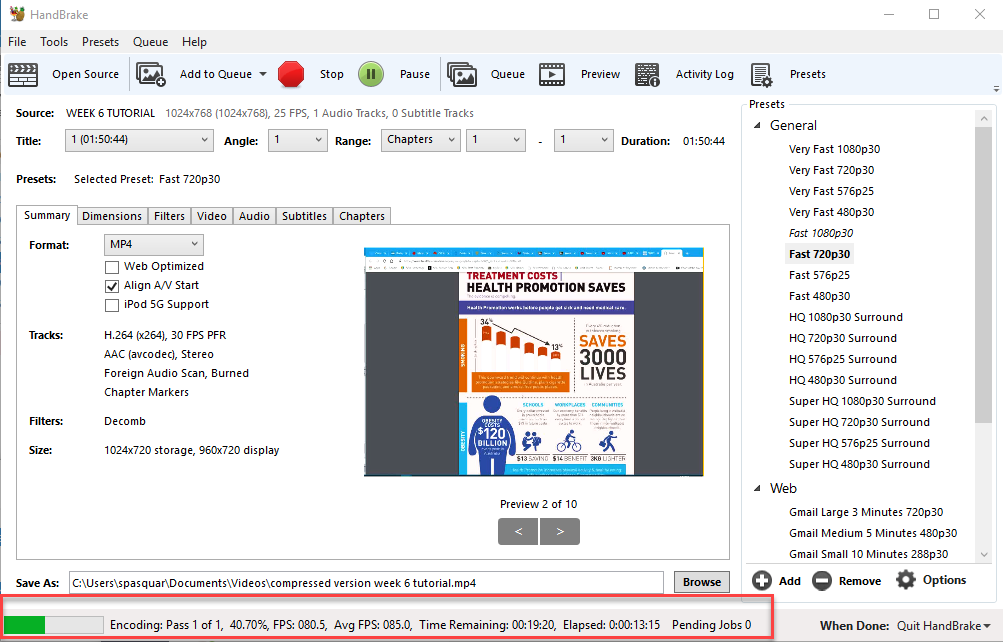
Step 7: Once the video has finished compressing, you will see a significant change in file size.
eg,
Original file size: 582,094 KB
Compressed file size: 170,921 KB
