Setting up a Blackboard test (quiz) for summative assessment
Quizzes developed in the Blackboard (MySCU) environment are called tests. This article covers the process of creating a Blackboard test for the purpose of unit assessment.
To learn more about how Blackboard tests can be used for summative assessment, see the following articles: Blackboard tests (quizzes) for summative assessment and Using quizzes to evaluate student learning.
Before you begin
Consider the following points before you start building a Blackboard test (quiz).
- What learning outcomes are the quiz connected to?
- Is this quiz an appropriate assessment type for assessing these learning outcomes?
- What do students need to know prior to the quiz? Has this been covered in class?
- What constructive feedback will support students after they complete the quiz?
It is a good idea to write your quiz questions into a Word document or Excel spreadsheet ahead of time to reduce the impact of internet connection issues.
Writing good quiz questions
Creating a Blackboard test
The process of developing a test can be broken down into 6 discrete stages: create, deploy, submit, grade, post, view (see Figure 1). A key feature of the process is you can create a test in isolation, with an additional step required to deploy the test to students.

Figure 1: Process of developing a Blackboard Test (source: https://help.blackboard.com/Learn/Instructor/Original/Tests_Pools_Surveys/Create_Tests_and_Surveys)
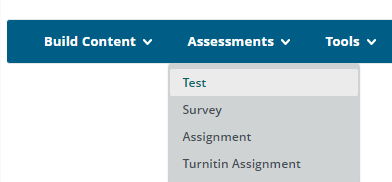
Create: Navigate to the "Assessment Tasks and Submission" content area in the Blackboard unit site. Under the Assessments menu, click Test and then Create.
Enter the test details and click Submit to build the test. After you create the test, add the required questions using the Test Canvas screen.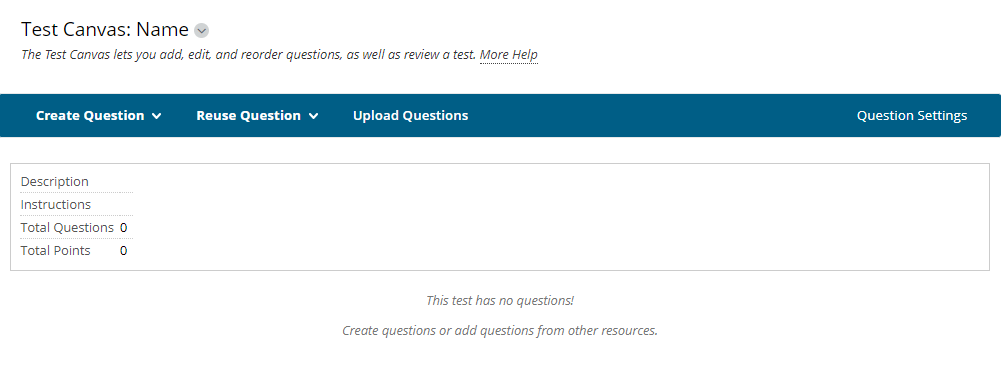
Click OK to save the test and questions.More about Blackboard test question types
To learn more about the different question types available on the Test Canvas screen and how these can be configured, see the article: Creating questions for a Blackboard test (quiz).
- Deploy: Tests are deployed by selecting a test listed under the "Add an Existing Test" option. Click on Submit to proceed.

Customise the Test options and then click Submit to deploy the test to students. - Submit: Students will now be able to attempt the test using the test options you have specified (date, time, conditions etc.)
- Grade: After the test has been submitted it can be graded in the Grade Centre: Needs Grading page (questions with set answers such as multiple-choice can be automatically graded).
- Post: Unit Assessor releases the grades to students when they are complete (depending on the test options specified).
- View: Students can view their grades and read feedback on their responses in the Grades and Feedback content area.
The video below covers the process of creating a Blackboard test in more detail.
You can also create or import an existing Blackboard test using the Tests, Surveys and Pools site tool, which is under the Site Management > Site Tools menu located at the bottom left of the unit learning site. Any tests created here will also appear in step 2: Deploy Add an Existing Test list above. Where you wish to import a Blackboard test from a previous unit site, see the following article: Reusing a Blackboard test (quiz)
Selecting Test Options when deploying a Blackboard test
The Test Options for a Blackboard test are the specific settings that control the format and delivery of the test to students. This could include when the test is made available to students, how much time is allowed, or adding a password to restrict access.
Before selecting test option settings to use, consider the following:
- Is this a summative or formative test?
- How many attempts of the test are students allowed?
- How long will students need to complete the test? (check the unit outline for details if the assessment is summative)
- When will students attempt the test? (check the unit outline for details if the assessment is summative)
- What exceptions will be required for individual students? (special considerations, etc.)
Watch the video below to learn more about how to set or change the various test options for a Blackboard test, including recommended settings.
Using a practice test
It can be a good idea to set up a practice test that mirrors the format and settings of a summative quiz assessment. This enables students to manage their expectations and plan accordingly, especially where they have not used Blackboard tests before. This also helps you to experiment with the test options where it is not mission-critical.
Recommended Test Options
The table below provides detailed recommendations for modifying all the Test Options in a Blackboard test. Note it's always important to carefully evaluate each setting, based on the purpose of the specific test, as these may vary between units and contexts. It is also possible to edit the Test Options after the test has been created, but note that changes can't be made AFTER students have started the test.
Section | Option | Recommendation |
Test Information | Name (Required) | ✔️ Consider what will make sense to students from a navigational perspective, i.e. “Task 1 Quiz – Introduction to Anatomy”. |
Description | ✔️ Add any important details about the test (i.e. what content the quiz will cover, whether or not work will auto-submit, if students can backtrack etc.) | |
Open test in new window | ❌ Popup blockers may prevent students from opening the test when this option is ticked. | |
Test Availability | Make available to students | ✔️ Select “Yes” to make the test available to students, modify the dates to “Display after” and “Display until” (see below) to control when the test is visible to students. (Avoid forgetting to make the test available) |
Add a new announcement for this test | 💭 Notifies students the test has been deployed in the “Announcements” section of the learning site. Students will usually be aware of the quiz through workshops/tutorials or manual posts. | |
Multiple Attempts | ❌ Only tick this option where the quiz is formative in nature - such as a practice quiz. | |
Force Completion | ❌ This option prevents students from restarting the test when their internet connection drops out. Instead, set a timer and select auto-submit (see below). | |
Set Timer | ✔️ The amount of time given for completion of the test will depend on the number of questions and the weighting of the assessment. | |
Auto-Submit | ✔️ Auto-submit saves the student's progress once the timer expires. Useful when the student hasn't finished the test or their internet has dropped out. | |
Display After | ✔️ Enter the date and time where the test will be visible to students. | |
Display Until | ✔️ Enter the date and time when the test will be made unavailable to students. You will need to make an availability exception (see below) or create a new test to manage absent students. | |
Password | 💭 Passwords are useful for restricting student access to a test, such as when a test is being delivered in a face-to-face class environment. | |
Test Availability Exceptions | Test Availability Exceptions | 💭 Students with special considerations can be granted extra time or an extension. If there are no students with these requirements, this can be left blank. |
Due Date | Due Date | 💭 If a due date is set, any tests submitted after the due date will be marked “late”. |
Do not allow students to start the Test if the due date has passed | ❌ Prevents students from accessing the quiz after the due date. Use “Display until” instead (above) unless there is a valid reason to do so. | |
Self-Assessment Options | Include this Test in Grade Centre score calculations | ✔️ Ensure this is always ticked for summative assessment. Untick for formative assessment such as a practice quiz. |
Hide results for this test completely from the instructor and the Grade Centre | ❌ Hides the test results from the instructor so that only the students can see them. | |
Show Test Results and Feedback to Students | Show Test Results and Feedback to Students | 💭 Provides answers and feedback to students. Ensure that WHEN is set to “On Specific Date” after the test is due (so that all students have completed the quiz), then you may wish to select all the answer and feedback options for full transparency. Test questions should be modified in future after the answers have been published to students. |
Test Presentation | All at Once | 💭 Students’ progress will not be saved if their internet drops out. |
One at a Time | 💭 This option saves students’ progress between questions, and can help reduce cognitive load. | |
Prohibit Backtracking | 💭 Where one at a time has been selected, prohibit backtracking prevents students from changing their answers to questions. Students should be notified ahead of time when this option is in effect. | |
Randomize Questions | ✔️ Randomising questions supports Academic Integrity. However, this option may challenge students where there is a significant difficulty variation among the questions, especially when prohibit backtracking has been enabled. (Answers can instead be randomised when the questions are created.) |
Icon legend: ✔️ Recommended ❌ Not recommended 💭 Depends on the situation