Setting up your Grade Centre
This article explains how to set up the Full Grade Centre in a Blackboard unit learning site. The Grade Centre is used to manage student assessment and grading.
How do i access the Full Grade Center?
If you are unsure about how to access the Grade Centre and its features, please read The Grade Centre article. This article covers how to access the Full Grade Centre and how it functions.
The Full Grade Centre page offers a complete view of the assessment records for all students in your learning site, listing every assessable task for every student, and the status of that task. You can show and hide grades from students and change the way that grades are displayed.
The Grade Information Bar
Hovering your mouse over the column heading for an assessment updates the Grade Information Bar at the top of the grade centre table. This provides information about the Possible points for the assessment event, along with the type of assessment, student submissions and any assessment attempts that need grading. In the example below, hovering over the FINAL GRADE column has displayed relevant information in the grade information bar about that column.
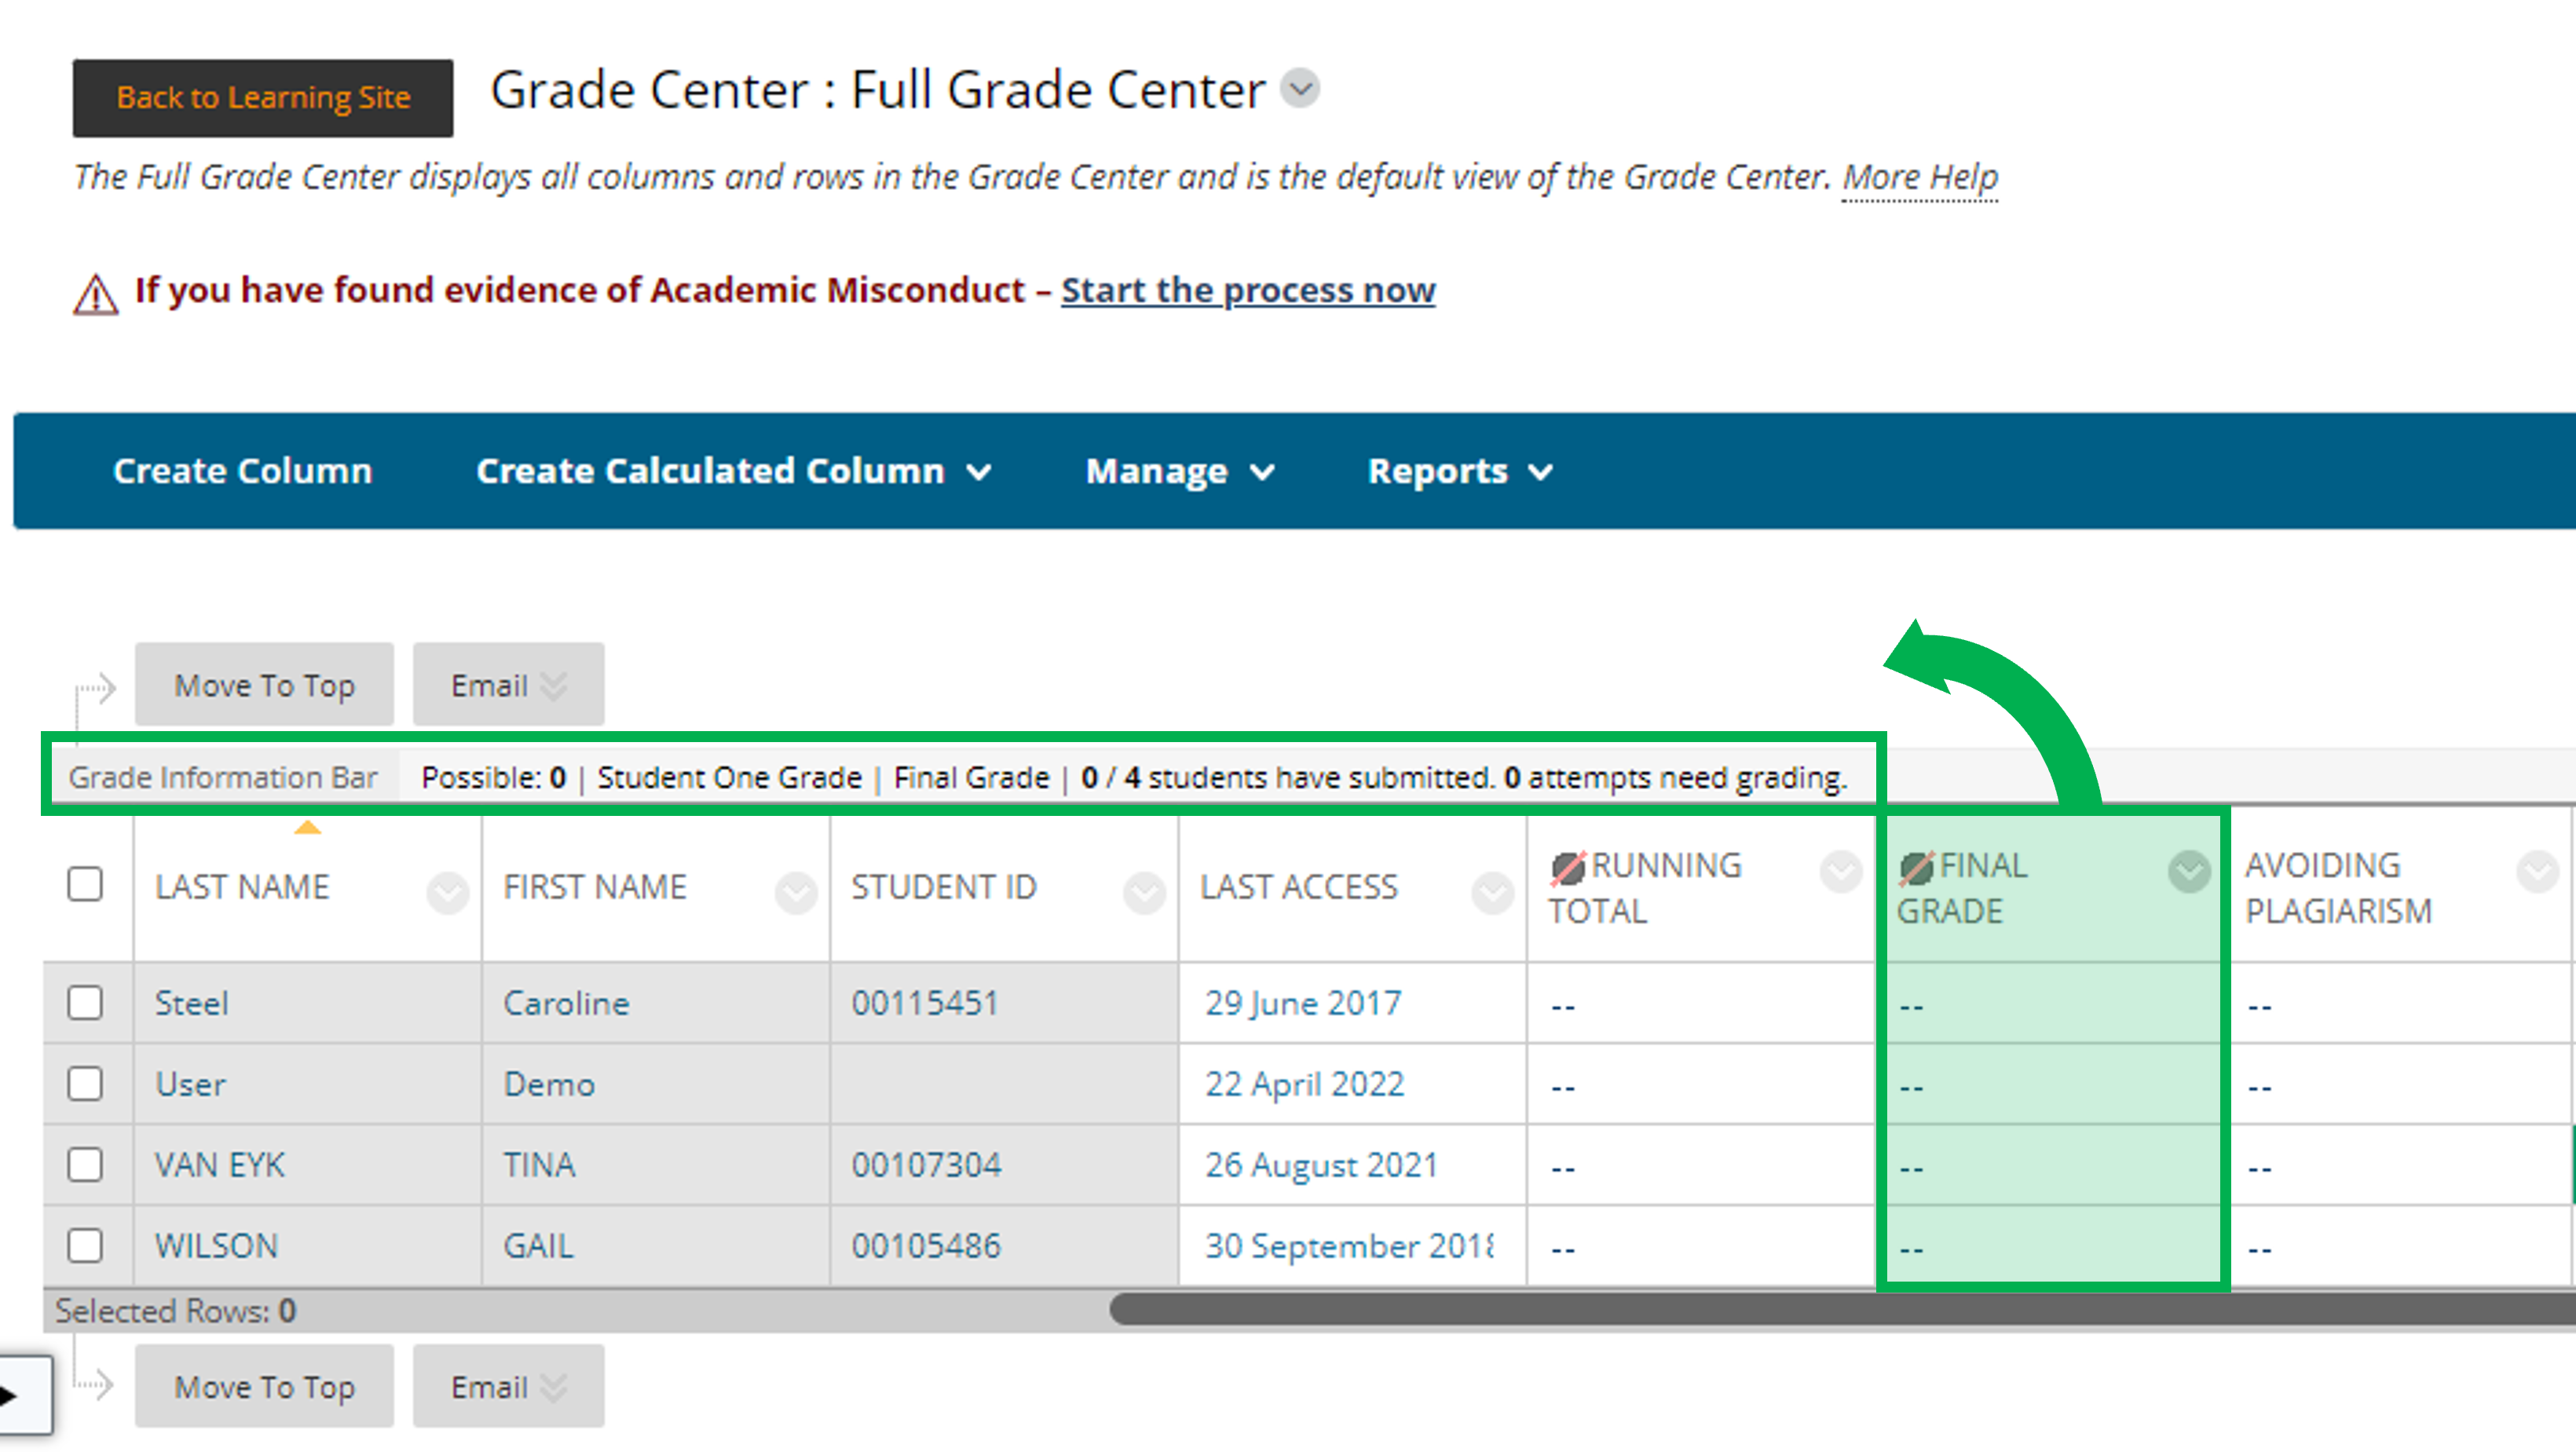
The Final Grade column
The final grades column is used to capture the unit results for students at the completion of the unit. It is critical that the Unit Assessor ensures that ALL grades are entered into the Final Grades column for the grades process to function correctly.
Do not edit or delete the Final Grades column
Final Grades deadline
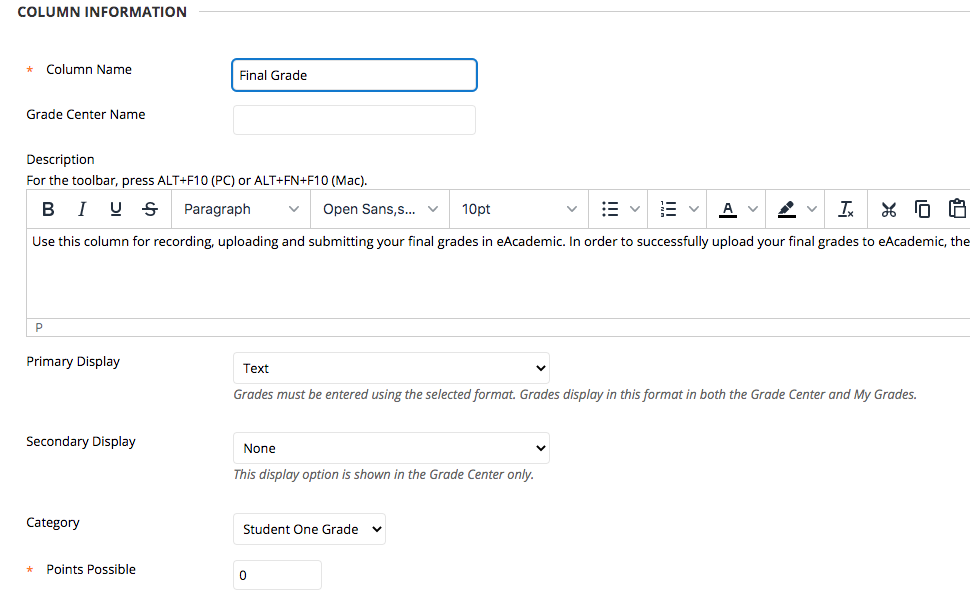
The Final Grade column for all unit learning sites is generated when the site is first created. The Final Grade column has a setting of 'Text' for Primary Display. This supports the entry of a text attribute for the final grade that is not calculated.
Do not change these settings. Ensure that your Final Grade column is set up correctly by checking as follows:
- Click on 'Edit Column Information' in the Final Grade column heading menu

Make sure the following settings match:
Primary Display: Text
Secondary Display: None
Category: Student One Grade
Points Possible: 0
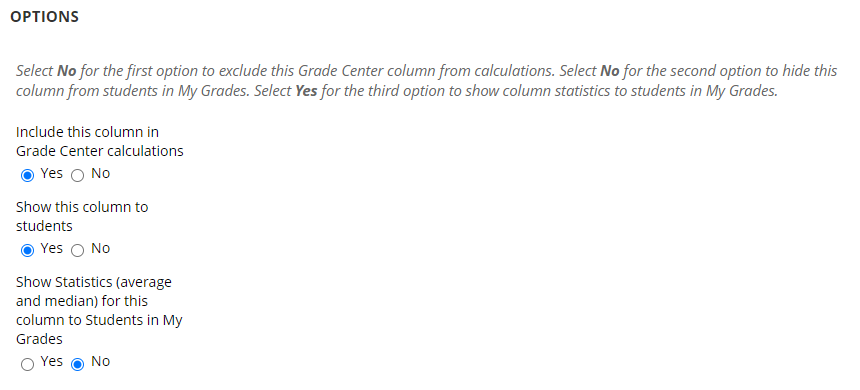
Include this column in Grade Center calculations: No
Show this column to students: No
Show Statistics (average and median) for this column to Students in My Grades: No
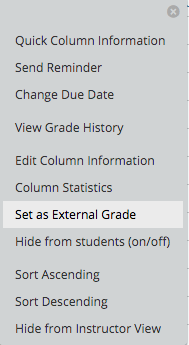
- The Final Grade column should also be set as the External Grade using 'Set as External Grade' if that option is available in the dropdown menu on the column heading. If you don't see that option in the list, then the column is already set as 'External Grade' and nothing else needs to be done.
How to create an assessment Running Total
Setting up a graded piece of assessment in Blackboard (e.g. Bb or Turnitin assignment) will automatically create a corresponding column in the Grade Centre. Within the Full Grade Centre page, you can select whether that assessment piece is formative (not included in Grade Centre calculations) or summative (included in Grade Centre calculations).
Using a RUNNING TOTAL column is an effective way to let students know how they are progressing with the assessment in a course, and supports the Unit Assessor to make final judgements about a student's grade. All summative assessments should be included in calculating the RUNNING TOTAL column (with the exception of 'meets requirements' accreditation specific assessment).
Calculating Running totals
The default setup for the RUNNING TOTAL column is an unweighted sum of all summative assessments for a user. This means it includes all columns involved in Grade Centre calculations. You can edit each column to check whether that column is included in calculations or not.
The following video goes through the process of making sure your RUNNING TOTAL column is an accurate reflection of a student's overall grade.
Quick ways to check your Grade Centre is set up correctly
When hovering over the column title for RUNNING TOTAL (or your new weighted column for the RUNNING TOTAL) ensure that it reads Possible: up to 100 (may vary by student). If you see a different value you will need to recheck all the columns in the grade centre to ensure they are correctly set up.
- Open the Full Grade Centre and next to each column click and choose 'edit column'.
- For every summative assessment, locate the section that says 'Points Possible' under Primary/Secondary Display, and ensure this matches the weighting for that assessment task (e.g. 10 points = 10%).
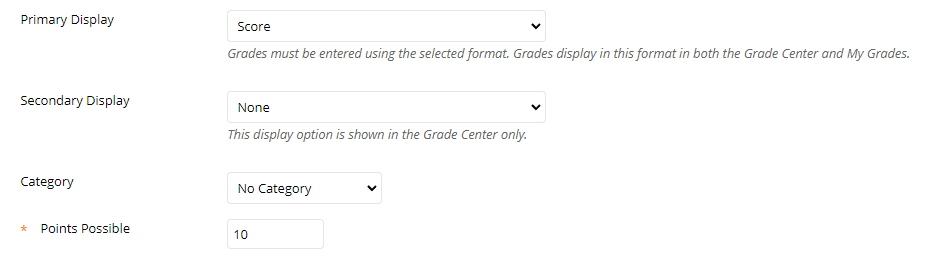
- Scroll down to where it says Options and check 'include this column in Grade Centre Calculations' is set correctly. Only summative assessment should be included in Grade Centre calculations.
- Click Submit to save changes.
You can also check that the grades centre is set up correctly using Column Organization. This gives you a simple overview of your assessment breakdown, as described in the following video.
Smart views
A Smart View is a customised view of the Grade Centre which can be used to display only selected assessment events and/or selected students, rather than showing the entire Grade Centre. For example, if you use Blackboard groups for an assessment task, you could create a Smart View that displays only students who are group members. Smart Views can be saved for ongoing use, and shortcuts can be added to the Grade Centre entry in your site menu’s Control Panel for easy access.
Using Smart Views is smart!
Spending the time to set up Smart Views will save you time navigating the grade centre, help organise your marking and stay on top of student progress.
Creating a Smart view
- Open the Full Grade Centre.
- To create a Smart View, click on the Manage button and then select Smart Views.
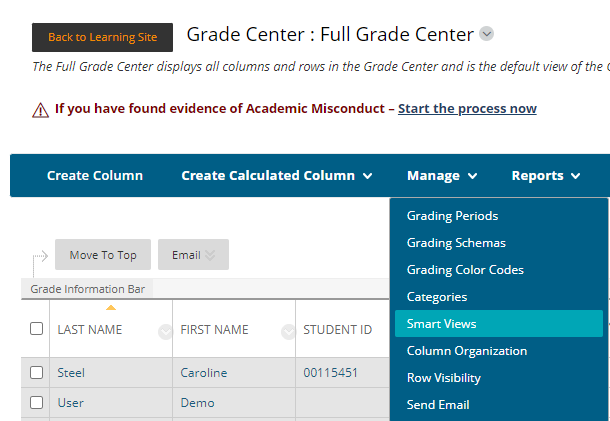
- The Smart Views page opens which will show a list of the default Smart Views.
- Click on Create Smart View to create a new smart view. Under Smart View Information, enter a name for the Smart View and an optional description.
- Choose the type of Smart View you would like to create under the Selection Criteria heading, and select from the related criteria how you want the Smart View to select Grade Centre records and which columns to display.
- Click on Submit, which will create the Smart View and add it to the list on the Smart View page.
The video below walks through this process in more detail.