Create interactive videos
What is an interactive video?
In a traditional video (or linear video) you click “play” to start to the video, with options to pause, rewind, fast forward and restart during the experience. With an interactive video, you are also able to click, drag, scroll, hover, gesture and complete other digital actions to interact with the video’s content.
There are several different functions you can build into an interactive video, but the most commonly used options include:
- Hotspots: clickable areas within a video; these buttons can take a viewer to a separate web page or provide further information
- 360 views: the ability for a user to drag the screen within a video frame to see in all directions
- Branches: different paths a student can take to control and customise what they see
- Quizzes: deliver an assessment and reveal a personalised result at the end of the video
How does an interactive video assist in learning?
Videos are well known for their ability to increase viewer’s participation, reduce cognitive overload, maximize retention and provide practical learning experiences. Interactive videos are engaging for students because they grab their attention and stimulate cognitive thinking processes. Researchers Delen, Liew, and Willson found that using interactive video increased the time students spend reviewing the material and greatly increased the retention of information (Delen et al., 2014). "Interactive videos facilitate differentiated and personalized learning since they allow learners to act independently, follow their path and maintain their pace. They increase learners’ satisfaction over the educational process and transform passive watchers into active learners" (Palaigeorgiou et al., 2019).
Preparation
Before you start building your interactive video you will require your own video recording in mp4 format, or alternatively a YouTube video. You could create a PowerPoint recording and save it as an mp4 video, use Camtasia Studio to create a video, or download an existing MediaSite recording. You will also need a list of questions, statements or definitions that will form the basis of the interactivity.
Converting videos
If your video is not in the MP4 video format you can use Handbrake to convert it.
Design Considerations
The following design guidelines will assist you to design an effective interactive video. Before you start building your interactive video, spend some time considering how you might develop each of these elements. Jot down some questions or explanatory text that will target the key learning objectives of the interactive video.
| Design Element | Include | Avoid |
|---|---|---|
| Annotations | Use fixed annotation positions that don't interfere with viewing the video. | Heavy or extraneous annotations may be interesting but don't contribute to the learning. |
| Pre-test | Pre-adjunct questions stimulate the learner’s attention and motivate them to focus more on specific aspects of the video. | Pre-adjunct questions that are unrelated to the video, overtly technical or poorly worded are likely to confuse students. |
| Predictive Questioning | Ask students to predict what is going to happen next in the video. Expose student misconceptions and evaluate understanding. | Questions unrelated to what happens next in the video or where there is not enough information provided to make a common-sense guess. |
| Reflective questions | Use reflective questions where students pause and think about their choices, reflect and deepen their understanding. | Questions unrelated to the temporal location in the video, or where the pause stops the video mid-sentence. |
| Navigation | Provide second-layer navigation so that viewers can jump to specific scenes, especially when the video is too long. Use branching to offer multipath videos where multiple subtopics are covered in the original video. Include enough triggers to make students want to watch the video again. | Long videos with poorly structured or labelled navigation will frustrate students. Instead, break up sections every few minutes with interactivity or other navigation ques. |
| Summary | Reinforce the presented knowledge and encourage learners to build explanations and expectations that go beyond the learning material. Use either memorization (recognition or recall) questions or application questions. | No summary, or a summary that introduces new concepts not covered in the video. |
| Feedback | Give feedback to students’ answers. Feedback is essential for providing the necessary scaffolding to students. Provide meaningful feedback that guides students focus and navigational choices. | No feedback, or unhelpful feedback. Students should be able to reattempt interactions and understand where and why they went wrong. |
| Analytics | Track Interactions using H5P reports and identify students who are struggling with specific interactions. H5P reports help you to understand how students are interacting and optimize the design of the interactive video. | Failing to review the H5P reports or review your design decisions using H5P Reports. |
Process
The video below demonstrates the basic process of creating an interactive video.
Tutorial
There are several steps to creating a H5P interactive video. In the following example, we will be using a YouTube video on the Port Stephens reef to create an interactive video.
- Open the H5P content library. Within MySCU, you can do this by clicking Build Content > H5P content.
- Click on Add Content.

- Find Interactive Video from the list or use the search bar to find it.

- Enter a Title for the interactive video.
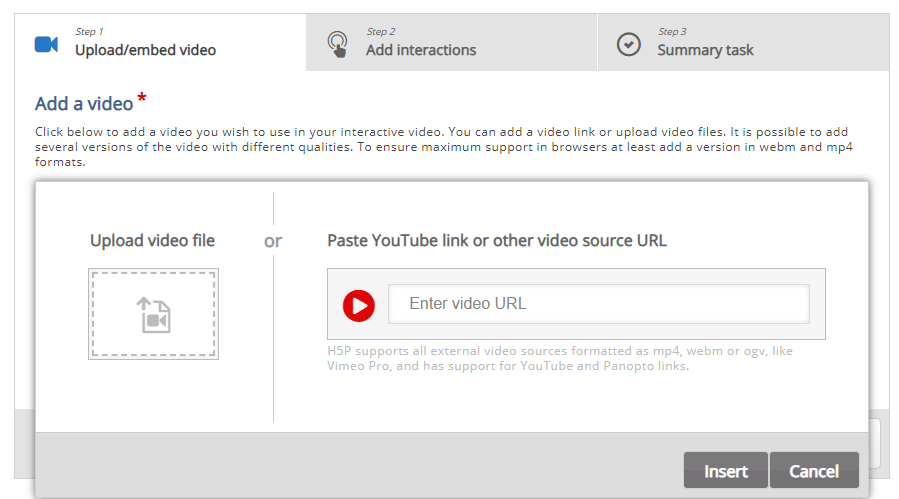
- Under Step 1 Upload/embed video either upload your video file or paste the weblink to a YouTube video. In this example, we will be using a YouTube video on the Port Stephens reef. Copy and paste the youtube link: www.youtube.com/watch?v=FLLWl-BgGU8 and click Insert.
- Click Step 2 Add interactions, where you are able to add text, tables, links, images questions and branching.

- In this example, we will be adding some a multiple-choice question, some reflective text and a summary slide. To start with we will add a multiple-choice question.
Scroll the slider at the bottom of the video or hit the play button to navigate to a location where you wish to add interactivity.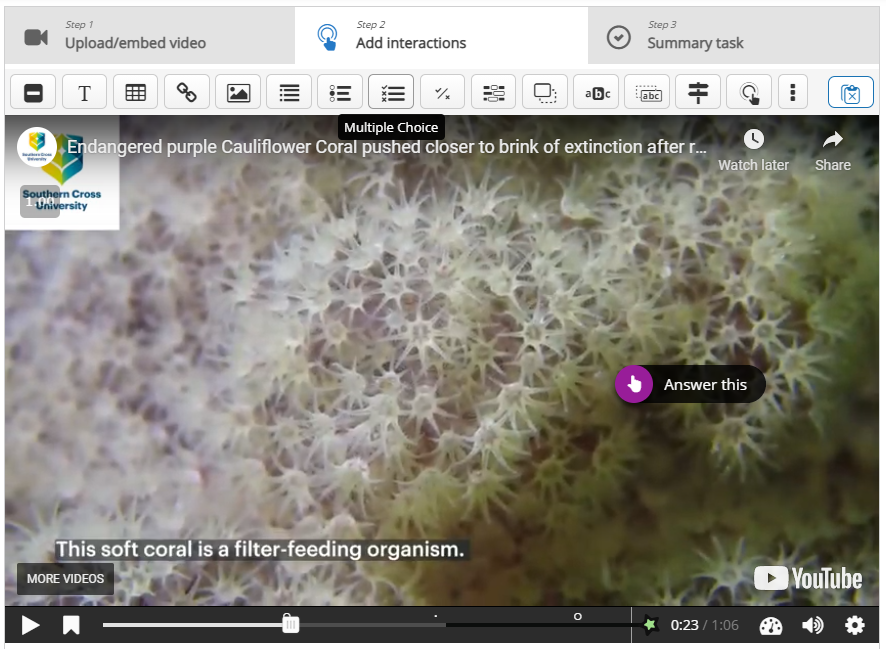
- Click on the
 Multiple Choice icon to add a quiz question.
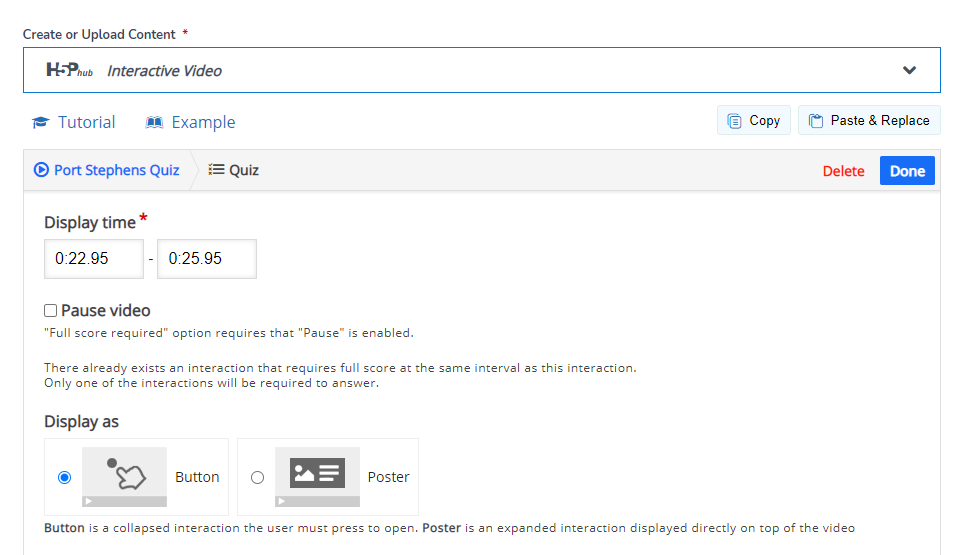
- Change the Display Time to modify the length of time to display the question will display on the screen.
Change the Display as option to Poster. This allows the question to be presented on screen rather than as a button that students click on.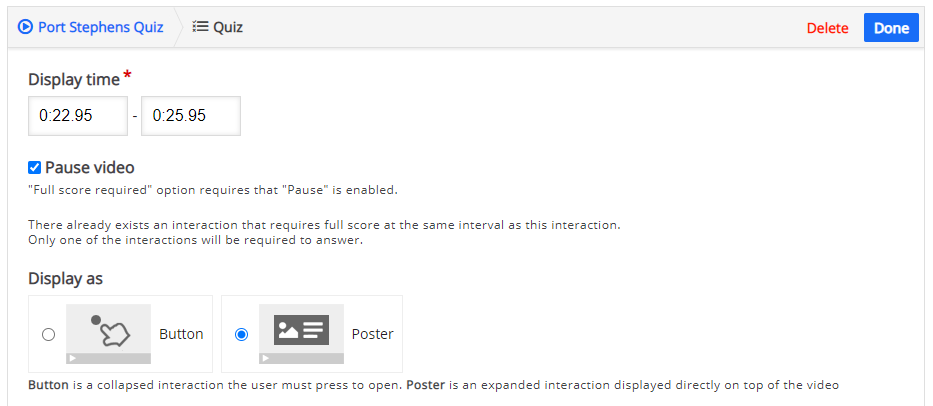
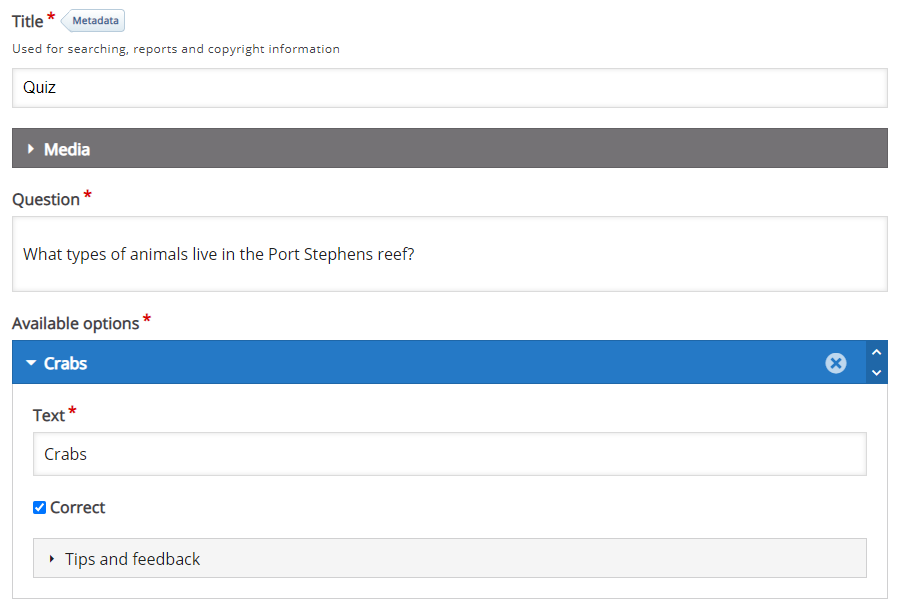
- Add a title for the quiz question and then edit the Question and response Text options. An example question for the Port Stephen reef video is shown below.
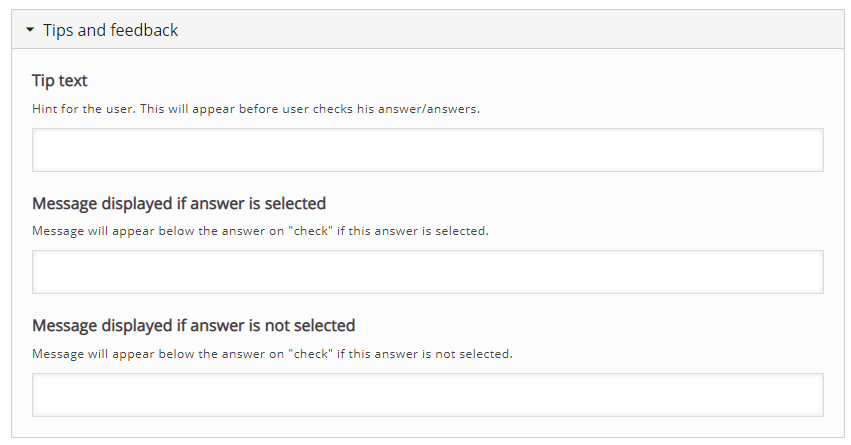
- Under the Tips and feedback accordion menu, you can provide specific feedback for students about each choice they select.
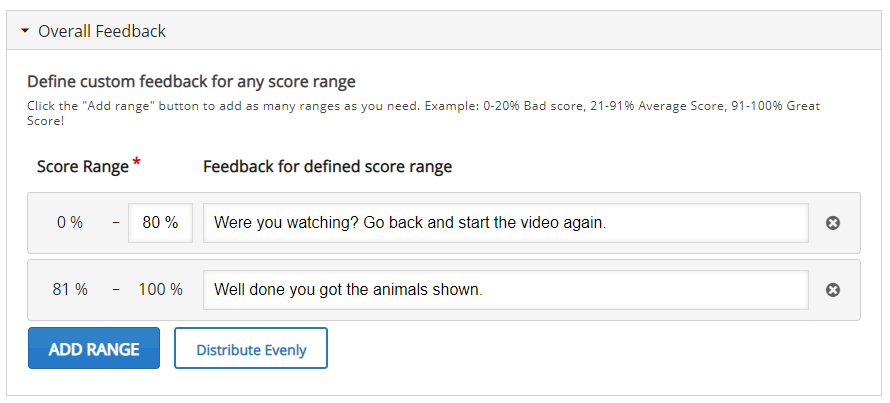
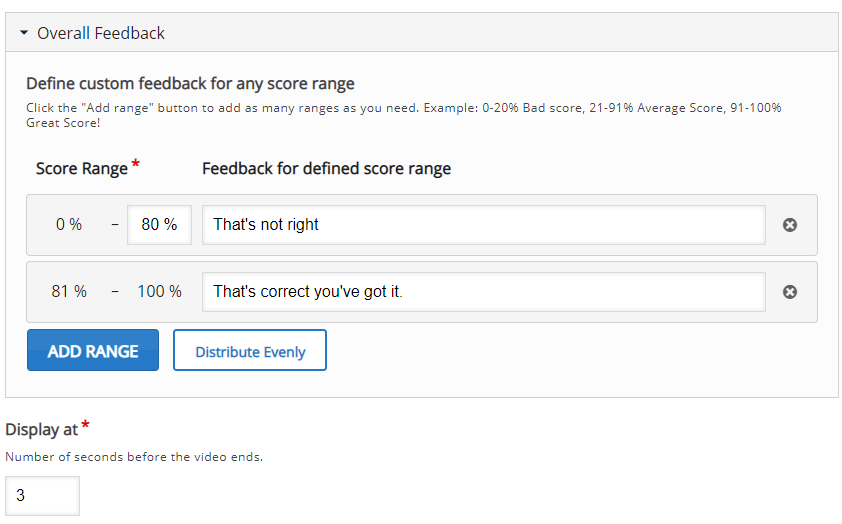
- Provide Overall Feedback based on the score students receive. In this case, we are encouraging students to rewatch the video as the correct answer should have been obvious to them.
- Click on Done to save the quiz question and add it to the video.

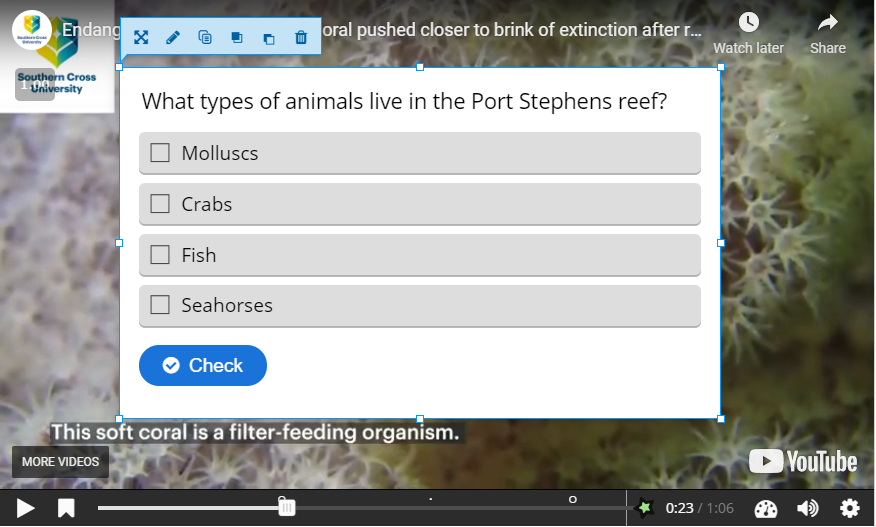
- Manipulate the drag handles around the question box, so that the question fits neatly on the screen. Where the question does not fit cleanly you may prefer to use the Button Display as type (step 9).
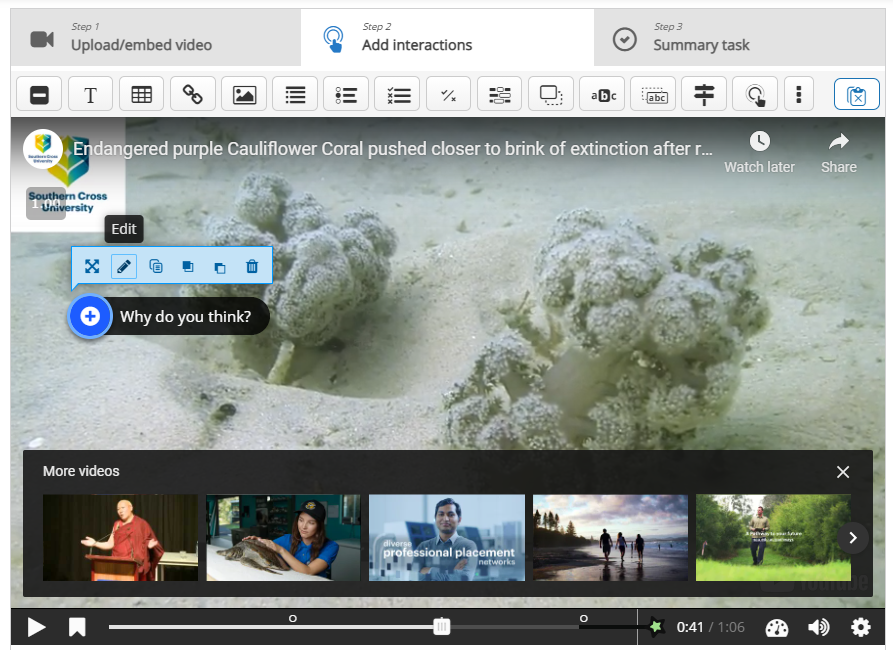
- Now we will add a text annotation interactive so students can reflect on a question about the reef decline. In this case we will make the display times the same, pause the video and use a button with a name for the label.
Add the following text and then click Done to add the text annotation.
- The last step is to edit the summary slide. Click on Step 3: Summary Task to access the Submit Screen.
Enter a Title for the summary task and add a Set of statements, with the first statement being correct.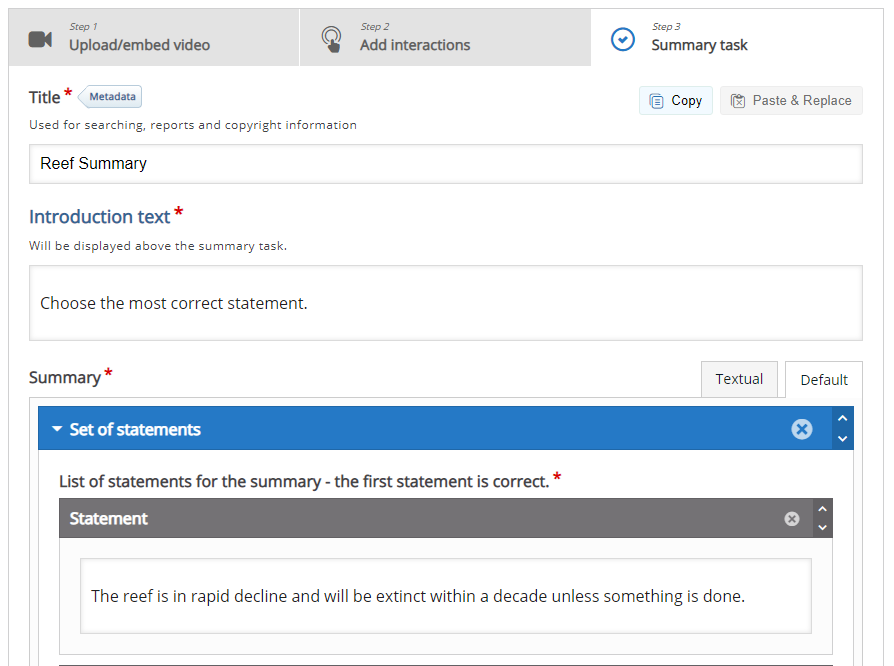
- Set the options for feedback and how many seconds before the end of the video the summary will appear.
- Click Save and test out your interactive video.
- Click Edit to make further changes. You can quickly navigate to each interactive element by clicking on Step 2, the dot on the timeline location, and then click on the Edit icon in the popup menu above the interactive element. You can also move, copy or delete interactions using this popup menu.
- Once you have completed your interactive video, you can publish it the same way as any H5P.
This is what the finished product could look like.
References
Delen, E., Liew, J., & Willson, V. (2014). Effects of interactivity and instructional scaffolding on learning: Self-regulation in online video-based environments. Computers & Education, 78, 312-320.H5P. (n.d.) https://www.researchgate.net/publication/263774564_Effects_of_interactivity_and_instructional_scaffolding_on_learning_Self-regulation_in_online_video-based_environments
Palaigeorgiou, G. & Papadopoulou, A. & Kazanidis, I. (2019). Interactive Video for Learning: A Review of Interaction Types, Commercial Platforms, and Design Guidelines. 10.1007/978-3-030-20954-4_38. https://www.researchgate.net/publication/333425485_Interactive_Video_for_Learning_A_Review_of_Interaction_Types_Commercial_Platforms_and_Design_Guidelines