Software Conferencing & Collaboration Tools In Lecture Theatre Spaces
Some teaching spaces are enabled for self service use of software based digital conferencing, collaboration and video streaming applications
using the presenter/teaching PC. (Zoom, MS Teams, Collaborate).
These rooms are equipped with Cameras and Microphones that are connected to the presenter/teaching PC for use with common software collaboration applications.
This allows familiar desktop workflow with collaboration platforms in the teaching space.
Recording in Software Applications (Zoom / Teams / Collaborate)
Please move all locally stored recordings to personal removable storage (USB Drives) or organisational cloud storage.
These computers maybe re-imaged (formatted) at any time. Local storage of content is not guaranteed.
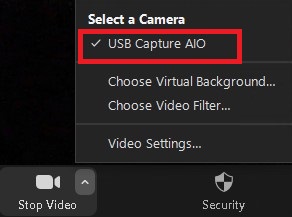
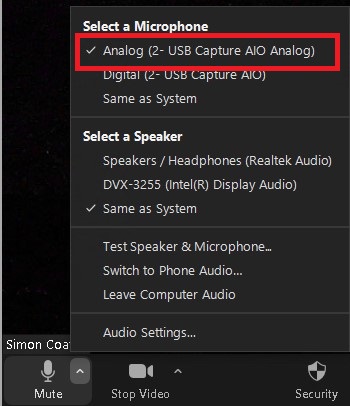
Ensure Correct Video Camera & Microphone Device are selected within the software application being utilised.
- Microphone device to use: "Analog (USB Capture AIO Analog)"
- Camera Device to use: "USB Capture AIO"
Example - Zoom
Microphone Device : "Analog USB Capture AIO Analog"
Camera Device : "USB Capture AIO"