Breakout Groups in Collaborate Ultra
This article will discuss the use of breakout groups in Blackboard Collaborate Ultra. Breakout groups allow you to divide classes into smaller groups and assign group activities to students to complete.
Collaborate Breakout Groups and recordings
When a Breakout Group is started the session recording is automatically stopped. There is no way to record breakout groups in Collaborate Ultra. You will need to manually restart the recording once the breakout groups are closed, which will create a new recording file for the session. It is a good idea to rename the recordings later so that it is clear which tutorial or workshop they belong to.
Watch the video overview below covers how breakout groups work.
Before you start
Click to access the Collaborate Ultra Session within the unit learning site.
- Have a plan as to how you will use the breakout groups with your students.
Setting up breakout groups in Collaborate Ultra
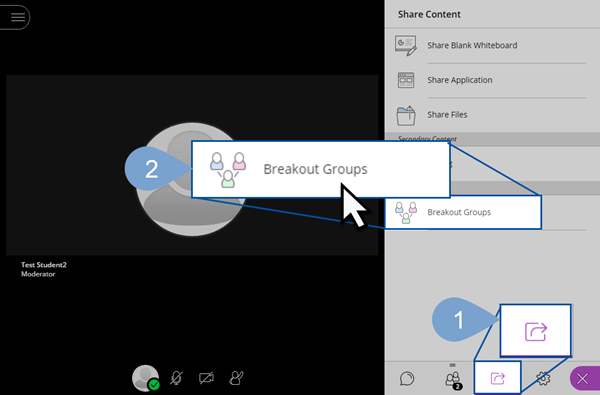
1. Access the Share Content panel (1) and Click on Breakout Groups (2).
2. Use Custom assignment to organise the groups with a drag-and-drop interface (3). This will allow you to manually assign students to breakout groups. You can also choose randomly assigned groups.
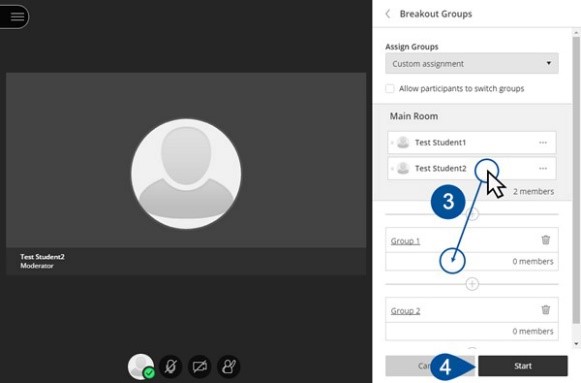
4. Click Start (4).
5. Click the down chevron (7) for each group to view group members.
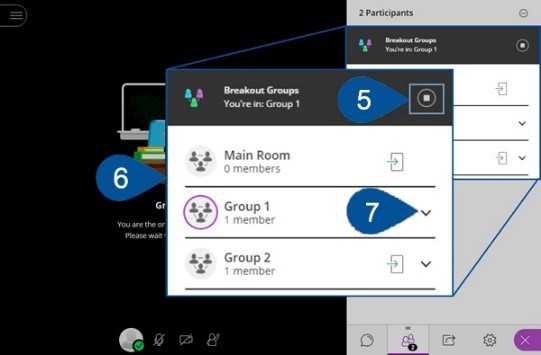
6. Click the Stop icon (5) to bring everyone back to the main room. This deletes the breakout groups. Remember any work done in those rooms will be lost.
Breakout groups with large classes
In large classes, randomly assigned breakout groups are the preferred option as this is not time-intensive. The steps are the same as above except you choose Random assignment instead of Custom assignment.
Adding files into a breakout group
Prior to starting the breakout group, it's a good idea to provide direction to students on how to use files and the other features – whiteboard and share applications – but make these available prior to the students working in their groups. Then when students start the group you can ensure that these files are available to them. to share files in a breakout group:
- Upload all of the files that you want to share with the groups into the main share file area.
- Go to the file that you want to share, click on the 3 dots in the circle and click Share with groups. (This option may not show up immediately as it takes a bit of time for Blackboard to register the groups.)
- When students enter their groups the slide will be on screen.
Saving work done in a breakout group
As the moderator, it is a good idea to visit each of the breakout rooms and grab a screenshot of student work to share in the main classroom.
Saving the whiteboard
Because you cannot record the Collaborate Ultra breakout rooms, students will need to manually take a screenshot (using Print Screen) or use the Windows snipping tool to capture their work.