Zoom Student Engagement & Interaction
The following article covers how to engage and interact with students online using the features of Zoom meetings. Zoom is an online meeting tool used for class workshops and tutorials at Southern Cross University. This article covers the following Zoom features:
Using Zoom reactions and non-verbal student feedback
Zoom features a range of non-verbal icons or 'emojis' that allow students to provide feedback during the Zoom meeting called Reactions. It is a good idea to inform students how to use these tools so that they can engage and interact in the online class. When students respond to your input using reactions it can boost their engagement and interactivity.
Zoom reactions must be turned on
To ensure the Reactions & Non-verbal Feedback buttons are enabled, you'll need to go to https://scuonline.zoom.us/and log in using your SCU credentials. Click on Settings and enter 'reactions' in the search table to find the settings for Reactions. Ensure that Meeting reactions and Non-verbal feedback are switched on. You can also choose limit the emojis that students can select from.
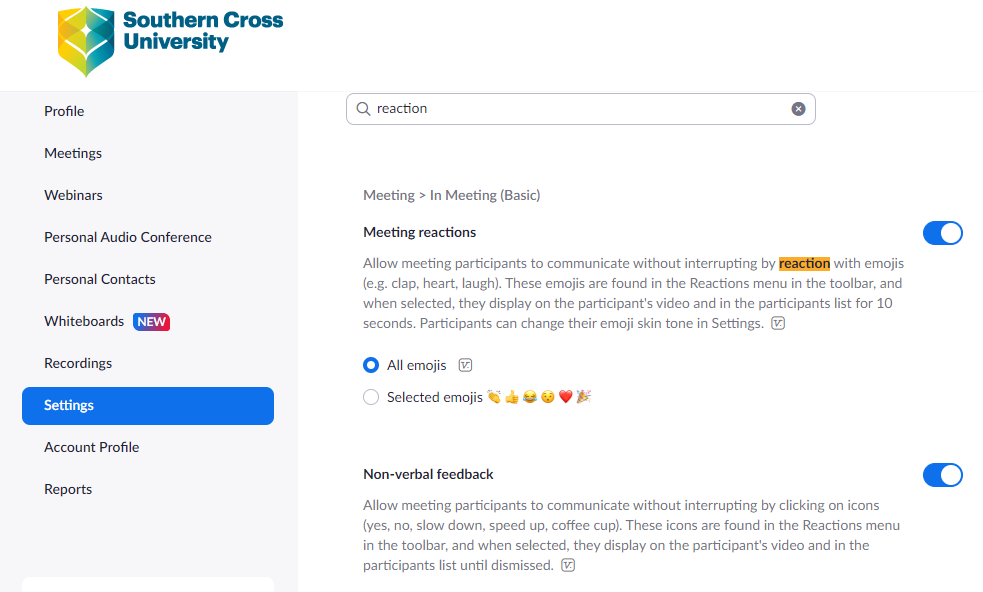
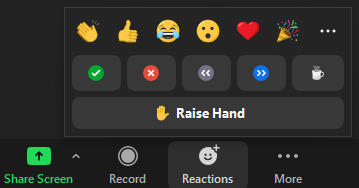
The following Reactions are available in Zoom when enabled:
- Emoji Reactions - Clap, Thumbs-up, Joy/Laugh, Open Mouth/Wow, Heart, and Tada/Party.
- Non-verbal feedback - Yes, No, Slow down, Speed up, and I'm Away.
- Raise Hand - used for asking questions.
When should students use which type of reaction?
Emojis, such as "Thumbs up & Clap", only stay on screen for 10 seconds and are useful for immediate feedback.
The "Yes, No" buttons stay on screen until removed, which are useful for deeper concept checking before moving on to your next point.
"Raising Hands", should be reserved for questions that are directly related to the topic of conversation. Students can be encouraged to use the Zoom chat for questions or discussions that are better addressed later.
Emoji Reactions
Clap, Thumbs-up, Joy/Laugh, Open Mouth/Wow, Heart, Tada/Party etc.
Emojis are small digital images (icons) that are used to express an idea or emotion. These reactions can be used by participants at any time, but they will only show for 10 seconds, before disappearing. They are therefore useful in small groups for checking in and getting quick feedback. Encourage students to use them even when in Breakout Rooms to acknowledge and respond to their peers.
Non-verbal feedback
Yes, No, Slow down, Speed up, and I'm Away.
These reaction buttons stay on screen until removed by either the user or the Host. With larger groups, these are extremely useful, for example in the case of signposting a move to the next section of a presentation. Give guidance on how you would like participants to use them, for example:
- Ask students to use the Reactions "Yes" button when they are ready to proceed so you can visually check that everyone is following along. From the Gallery View of the participants, you will be able to clearly see who has the "Yes" Green Tick or the "No" Red Cross.
- Similarly, guide students to the "Slow down/Speed up" buttons, before explaining a concept, to encourage them to provide you with non-verbal feedback regarding pace. Monitor the Participants panel as you provide content, before moving on to the next section.
- Direct students to use the "I'm Away" Coffee Cup on screen when they step away from their devices. This is a visually useful guide if participants have their cameras off and you wish to elicit responses. If the coffee cup is on screen, you will know they are unlikely to respond.
When non-verbal reactions are overused
If students are excessively using the "Slow down/Speed up" buttons, thereby hindering the session, the full set of Non-verbal feedback tools can be disabled.
However, as they are quite useful, guidance towards best practice use would be a better place to start before disabling them completely.
Raising Hands
During a Zoom meeting, students ask questions using the "Raise Hand" tool which is located at the bottom of the Zoom window under Reactions. When a student raises their hand, their video profile will jump to the top of the participant's list and be highlighted. Don't forget to remind students to lower their hand after they've asked their question. You can also do this for them by hovering over the student's name in the Participant panel on the right.
Look for the hands!
Raising hands is extremely useful, but if your attention is not focused on the Participants panel or the Gallery view of attendees you may miss a raised hand. Remember to pause frequently to monitor any student interactions you may have missed. Nominating a Co-host during a session may be useful in helping to manage students who use the Raise Hand tool.
The following video demonstrates the use of the Zoom Reactions buttons.
Using Zoom Chat to facilitate discussion
Student participants can use the chat to engage with the host and one another using text comments, in a similar fashion to an SMS conversation. The chat feature of Zoom is an example of a backchannel: a conversation that takes place alongside an activity or event. The Chat panel can be opened by clicking "Chat", which is to the left of the green Share Screen button. The chat panel opens on the right of the Zoom interface unless Zoom is in fullscreen mode where it appears in a popup window.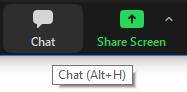
The chat can also be used by students in Breakout Rooms. . Only group members of each Breakout Room will have access to their Chat, and it can be saved after the session for review afterwards.
Using Files in the Chat
File share can also be used in the Chat, however, files are not retained in the recording and the files are not stored. When a file is uploaded to the Chat, users must click the file to download it or they will be unable to access the file later. Instead, it is recommended to upload files to the Blackboard learning site, which can be accessed by all at any time.
Teaching strategies for using the Chat
- A class Zoom meeting might begin with guidance for students to use the Chat for questions, which you could address between the segments of your session.
- You may decide to promote a nominated student assistant to Co-host, who help manage the Chat for you.
- You may wish to disable the Chat, advising students to note their questions and save them for a break between segments of your session, where you could temporarily enable the chat.
- Before setting a task and sending students off to a Breakout Room, remind them to engage and note their ideas in the Chat
Managing the Chat
Although student interaction using the chat is ideal, there may be occasions where chat becomes unruly or off-topic, or you have a large cohort where the chat conversation becomes a distraction. You can change the chat settings to manage how the chat can be used to manage these challenges.
The following chat options are available:
- No One - completely disabled for all, including you
- Host and co-hosts - allows participants to message only Host and co-hosts in the meeting
- Everyone - allows participants to message, but only publicly
- Everyone and anyone directly - allows participants to message in the main Chat, but this also allows for private chats between individuals, which you will not have access to
These Chat settings can be adjusted using the three-dot menu located on the top right of where you type chat messages.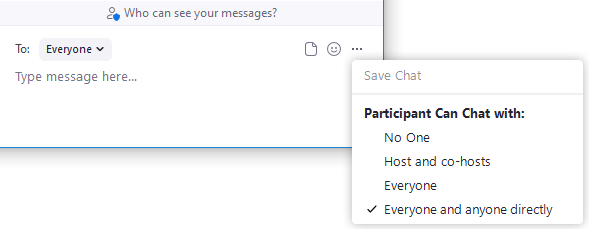
Setting the Chat to "Everyone" will prevent private chat conversations that you cannot moderate. This may be useful as a preventative measure against bullying or other inappropriate chat use.
On the other hand, such private chats (Everyone and anyone directly) may encourage collegial discussions beyond the scope of your session, yet nonetheless beneficial to fostering a community environment.
The following video guides you through the chat settings and how they can be adjusted.
More advanced student interactions
The following Zoom features offer greater interaction with students and support deeper learning approaches, but are best considered once you are familiar with the Zoom environment.
- Polls and Advanced Quizzes are advanced features of Zoom that allows students to individually answer questions created by the meeting Host. To learn more about creating Zoom Polls and Quizzes, see the following article: Active learning with Zoom polls & quizzes.
- Breakout Rooms allow students to interact in smaller groups, perfect for group based activities. To learn more about Breakout Rooms see the following article: Group work with Zoom breakout rooms
- Interactive Whiteboards allow students to interact with a digital collaboration space during and outside a Zoom class. To learn more about Zoom Whiteboards see the following article: Teaching online with Zoom interactive Whiteboards