Create a drag and drop
What is a drag and drop?
A drag and drop activity requires students to drag a piece of text or an image and drop it on one or more corresponding dropzones. Drag and drop activities are best utilised where students are engaged in sorting, grouping, matching, or placing information.
In the following example, students are asked to label the heart by dragging and dropping labels onto the boxes. Try it out for yourself.
How does a drag and drop assist learning?
A drag and drop activity generally involves matching or sorting. These types of activities help students to improve concentration, train visual memory, increase short term memory and attention to detail, improve the ability to find similarities and differences in objects, help students to classify objects that are grouped by similar traits and improve vocabulary.
Preparation
Before you start building your drag and drop, you will need to establish the draggable items and drop targets. If you are labelling an existing diagram, then you will need a graphic that is a suitable size (no larger than 1000px wide). If you are adding labels, then you may wish to use PowerPoint to create the background graphics and export this as a png or jpg file. As an example, the above drag and drop was created using a PowerPoint template and royalty-free graphics from the Servier Medical Art library. The diagram was exported from PowerPoint as a png file type.
Steps
There are several steps to creating a H5P drag and drop interactive. You can follow along with the tutorial below using this PowerPoint template. Download and open the PowerPoint, then export the image by saving the file as a png.
- Open the H5P content library. Within MySCU, you can do this by clicking Build Content > H5P content.
- Click on Add Content.

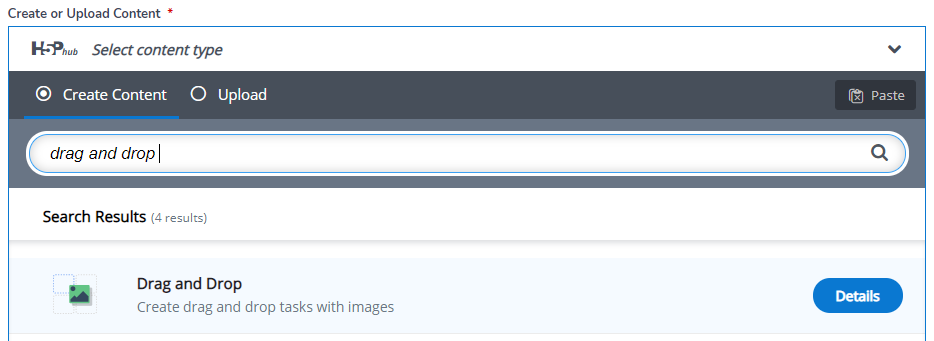
- Find Drag and Drop from the list or use the search bar to find it.
- Enter a title for the drag and drop.
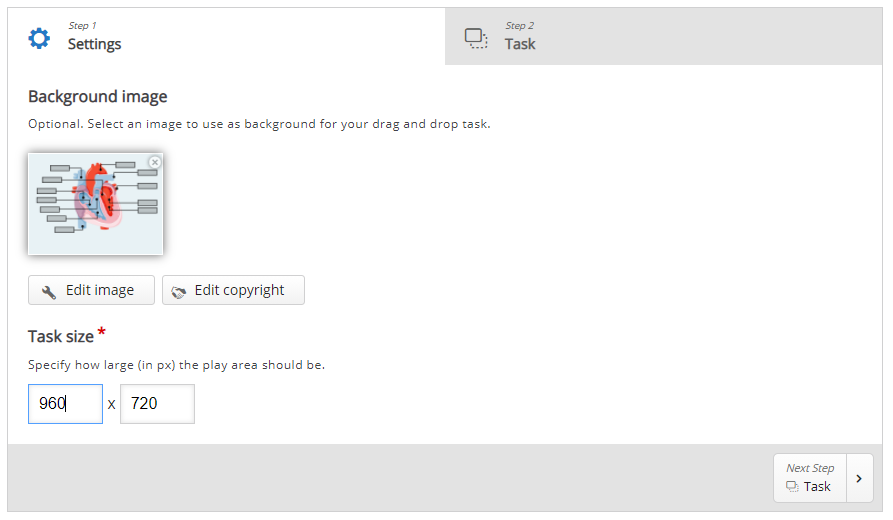
- Under Step 1 Settings add the background image for the drag and drop. The task size will ideally be the same size as the background image. In this case, the png file is 960px x 720px. Note: It should always be the same ratio height: width or the image will appear stretched. If you are not using a diagram, you may wish to select a relevant background image instead to provide context.
- Click Step 2 Task, where you add drop zones, text or image elements.
 Start by clicking on the drop zone icon. Drop zones are locations where text or an image will be dropped to (the drop target).
Provide a label for each drop zone to assist with matching. If you are using a diagram that already has box placeholders (like our example), change the Background Opacity to 0 to make the drop zone transparent. Move the drop zone to the correct location by click-dragging it. Repeat this process for all the drop zones that you need. Tick Enable Auto-Align to ensure that the elements snap to the drop zone.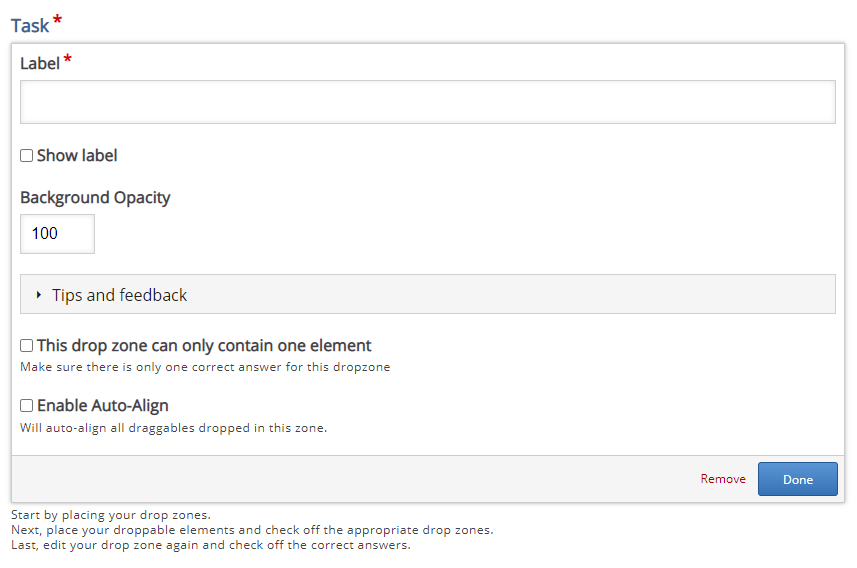
- Now you can add text or image elements that will be dragged to the drop zones.
 Click on the text icon and enter the text (if you are using images click on the image icon and add an image).
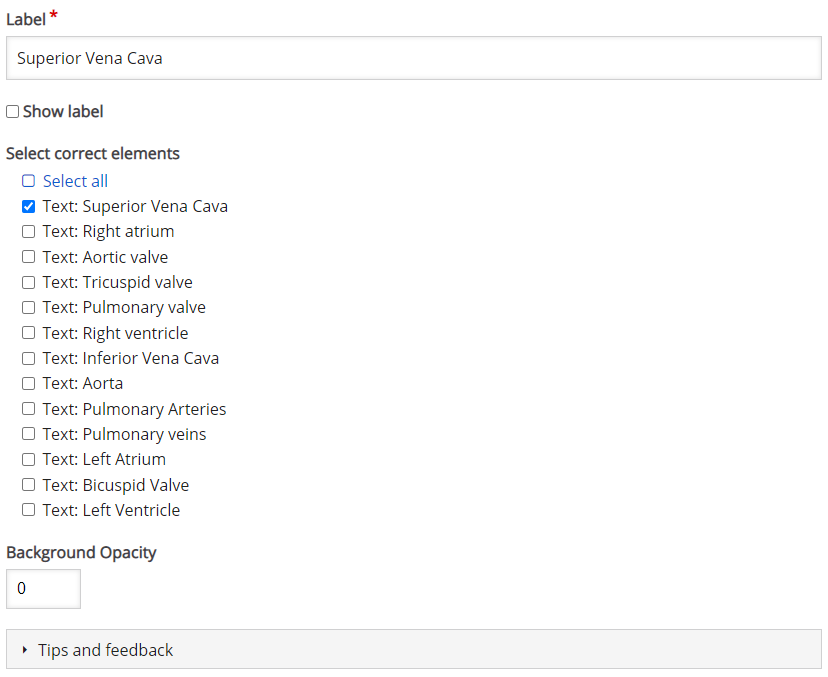
You will notice that the drop zones that you previously created can now be selected. In order for text or images to be dropped on a particular drop zone, the drop zones must be selected. You can do this quickly by ticking Select all. Move the element to a location at the bottom of the interactive where it can be dragged from. Repeat this process for all the text or images required.
- Use the drag handles to adjust the size of each drop zone and element. Your drag and drop should look similar to the image below when you are done.

- Click on each drop zone, then tick the correct text or image elements that match that drop zone. This will ensure that H5P matches the correct element to its drop zone.
- Save the drag and drop to test it out. You may need to do a few tests to get it working as expected. Double-check that each drop zone has the correct elements selected, and ensure that each element has all the drop zones selected to drop on. Note: if you allow an element to land on any drop zone then it will make the drag and drop very easy to complete.
- Once you have completed your drag and drop, you can publish it the same as any H5P.
The video below walks through the process of developing a H5P drag and Drop activity from conception to the finished product in a Blackboard learning site.
References
H5P. (n.d.). Drag and Drop Tutorial. https://h5p.org/tutorial-drag-and-drop-question
Laubheimer, P. (2020). Drag–and–Drop: How to Design for Ease of Use. Nielsen Norman Group. https://www.nngroup.com/articles/drag-drop/
Wilson, B. (2020). Drag/Drop Interactions in eLearning Design. https://www.bill-wilson.net/drag-drop-in-elearning-design